What's New in Easel
September 2024
Custom Project Defaults
Do you want your new projects to automatically use the material and bit of your choice, rather than the standard Easel settings? With our new Custom Project Defaults feature, you can now set your own preferences for new designs!
To get started, simply use the "Save as default" option from the Project menu. This will save your current workpiece material and bit settings as the default for all future projects, making your workflow even more efficient.
This feature is now fully released and available to all users – no sign-up required. Try it out today and enjoy the convenience of customized defaults for your next design!

August 2024
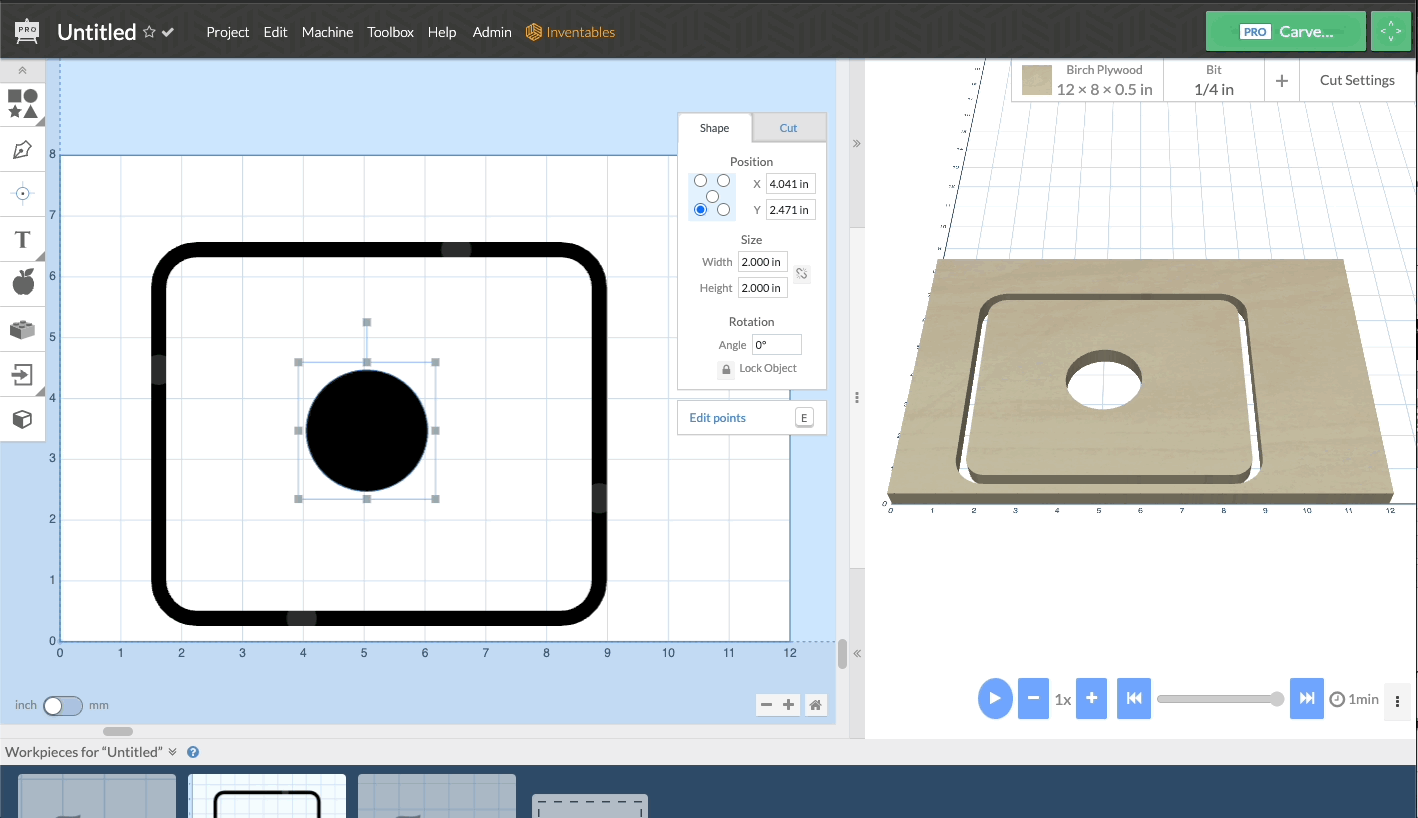
Measure Tool
We are excited to introduce the Easel Measuring Tool! Here’s an in-depth overview of this new feature:
Initiating the Measuring Tool
You can start using the measuring tool by selecting the measuring tool icon in the toolbar. Once selected, follow these steps to add a measurement:
- Click anywhere on the design canvas to set the first measurement point.
- After placing the first point, a line will appear connecting your cursor to the initial point.
- Place the second measurement point to complete the measurement line. This line will be added to your design canvas but will not be carved.
Editing and Managing Measurement Lines
Editing: Measurement lines are fully editable. Select a line and move its endpoints to adjust their positions. The measurement properties panel will appear when you add or select a measurement line.
Properties Displayed: The total length of the measurement line will be displayed centered over the line on the design canvas. The properties panel provides the angle, horizontal length, vertical length, and coordinates of each endpoint.
Additional Features: Measurement lines snap to vertices on shapes within your design. When your cursor is placed anywhere in the design canvas in Easel, you are able to see the coordinates of its position at the bottom of the screen next to the workpieces.
You can add as many measurement lines as needed for your design. Measurement lines can be locked, copied, or deleted as necessary, providing flexibility in your design process.
June 2024
Custom Fonts Released
We are pleased to announce an update to Easel Pro design capabilities: custom font uploads. This highly requested feature empowers you to seamlessly integrate your favorite fonts directly into Easel Pro for both design and carving.
Using Custom Fonts, you can now utilize the vast selection of fonts available online for a truly personalized touch. Make your next project pop with the perfect typeface – whether it’s a sign with your business’s logo, wall art for your online store, or a gift for a loved one.
To use this feature open the Font Library and select "Upload Font" in the list of options.

November 2023
X-Carve Pro Spindle Pause
New firmware for X-Carve Pro machines
Our newest firmware update for the X-Carve Pro improves the response from the machine when the user pauses a carve. This firmware is available to all X-Carve Pro users. For access to this firmware and functionality, click the prompt that appears in the carve walkthrough.
The new firmware will cause the X-Carve Pro spindle to stop moving upon pausing a carve, the spindle will then stop spinning, before raising to the user's safety height.
Upon resuming the carve, the spindle should lower to the appropriate height, start spinning, and then resume carving from the same location where the job was carved.
To properly utilize the new firmware, users should note the following:
- Users must home their X-Carve Pro when connecting or powering on the machine to enable spindle pausing.
- Pausing, resuming, and canceling a carve can be done from both the HMI and by pressing the pause/resume/cancel buttons in the Easel interface.
This firmware should not impact or change any other functionality or behavior with your machine or with Easel. Click the Carve button in Easel with a machine connected to open the carve walkthrough.
April 2023
Toolbox Refresh
We have released a new toolbox to all users. This improves the interface and experience when managing bits, materials, and cut settings. All of the functionality of the previous toolbox is still there - and more has been added. Read on to learn more!
You can also visit the toolbox support article. which has a video overview.
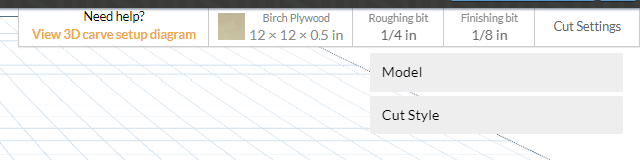
With a project open, access the Toolbox from the navigation bar in Easel.

You will notice that the toolbox has a new format, and some new functionality. In the Bits and Materials tabs, users can add, edit, delete, filter, and sort the bits and materials. The bits and materials displayed in the toolbox here will include “custom” and “Inventables” bits and materials. Users will still have access to the Easel-specific materials as well, but those are are not editable or deletable.

Saved cut settings can be viewed from the “Cut Settings” tab. Again, users are able to add, edit, delete, and sort their cut settings. We have included a link to our Cut Settings Guide on this page as well to make it easy to review your settings and calculate new settings.
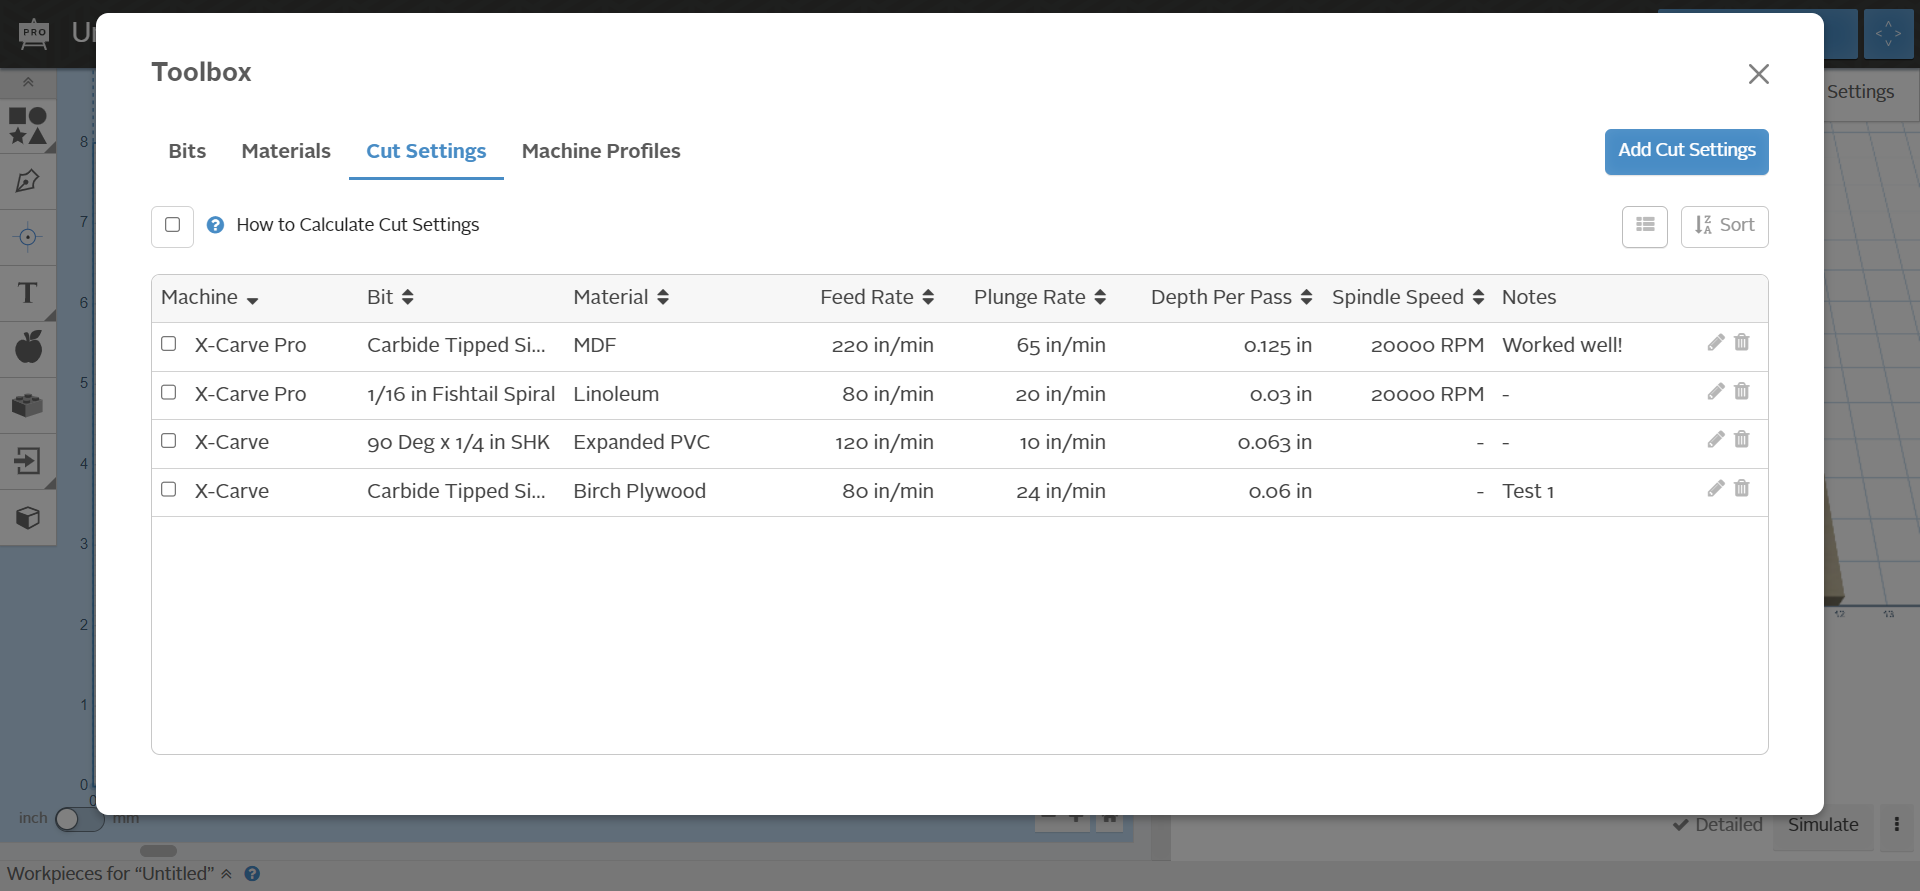
The toolbox can also be used to manage machine profiles. Here, users are able to add and delete machine profiles. Users can also sort the machine profiles to review when each profile was added and the number of cut settings associated with the profile.
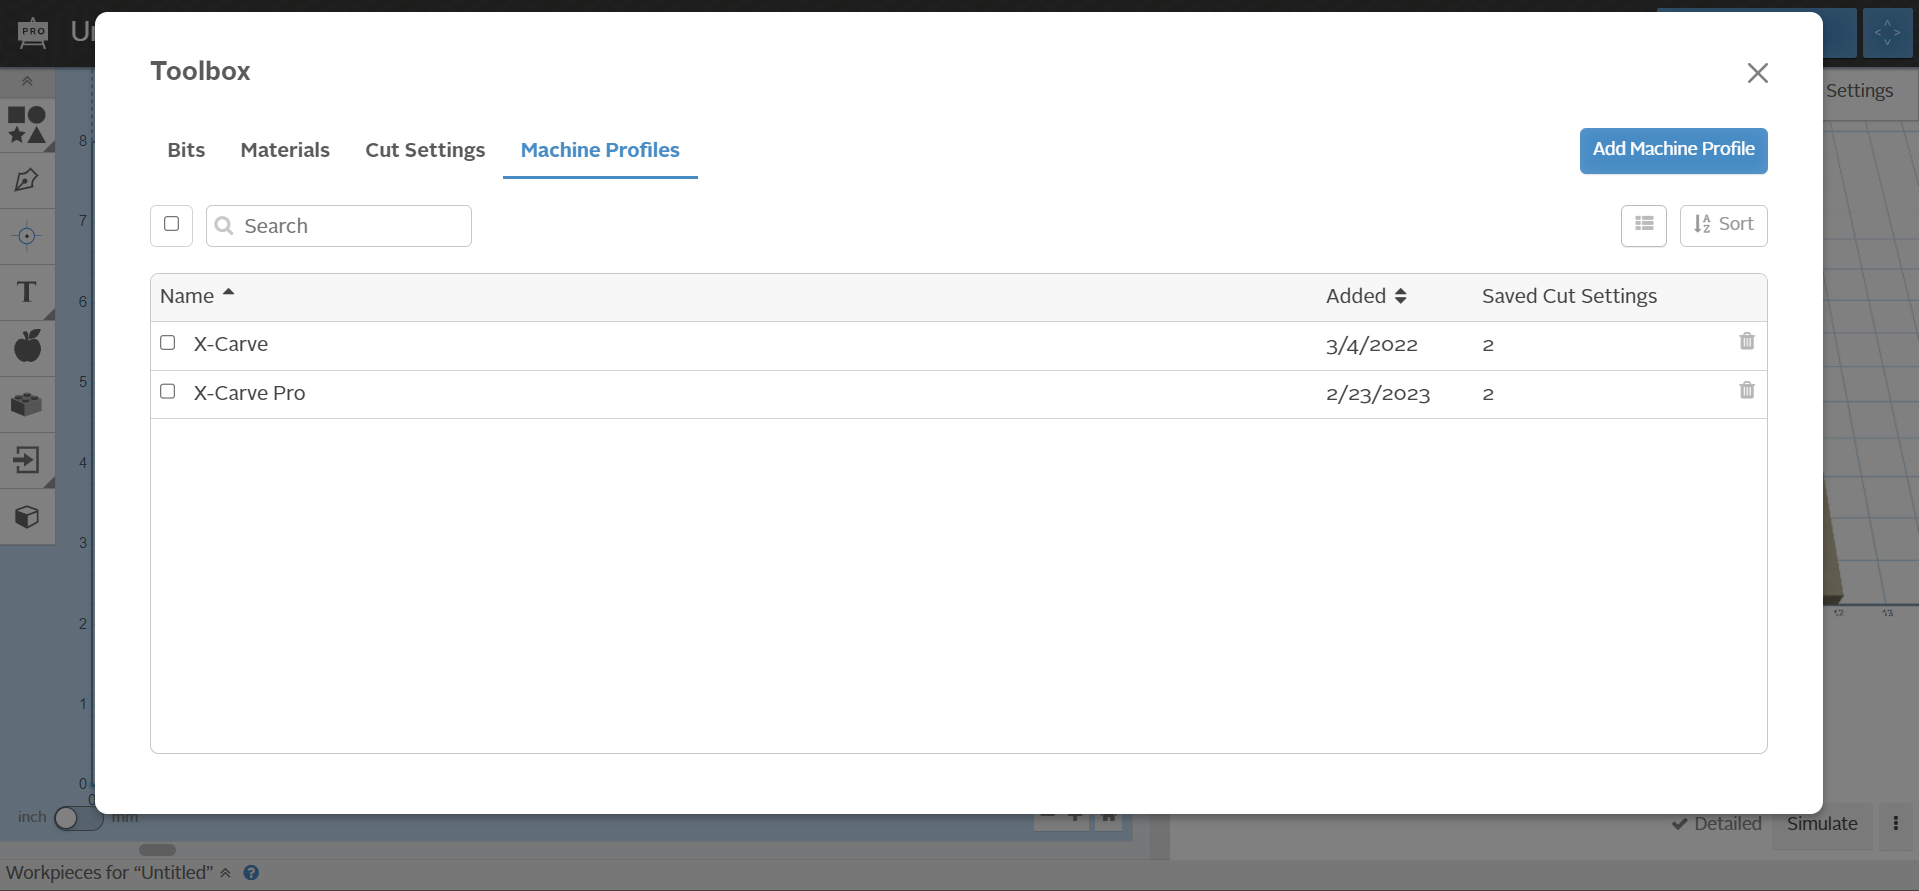
Please share your feedback so we can continue improving Easel!
February 2023
Toolbox Refresh - Beta Release
We have released a new toolbox to Beta Testers to improve the interface and experience when managing bits, materials, and cut settings. The new toolbox is only available to users enrolled in Beta testing at this time.
With a project open, access the Toolbox from the navigation bar in Easel.
You will notice that the toolbox has a new format, and some new functionality. In the Bits and Materials tabs, users can add, edit, delete, filter, and sort the bits and materials. The bits and materials displayed in the toolbox here will include “custom” and “Inventables” bits and materials. Users will still have access to the Easel-specific materials as well, but those are are not editable or deletable.
Saved cut settings can be viewed from the “Cut Settings” tab. Again, users are able to add, edit, delete, and sort their cut settings. We have included a link to our Cut Settings Guide on this page as well to make it easy to review your settings and calculate new settings.
The toolbox can also be used to manage machine profiles. Here, users are able to add and delete machine profiles. Users can also sort the machine profiles to review when each profile was added and the number of cut settings associated with the profile.
Beta testers, please share your feedback so we can continue improving Easel!
January 2023
Easy Volume Rotation
A quick rotate feature has been implemented for all Easel users. With a shape (or shapes) selected in the design view of Easel, the Shape window of the Cut/Shape modal now includes a button under “Rotation” that will rotate the selected shape(s) counter-clockwise with each press. No need to type in your degree measurements for simple 90-degree rotations!
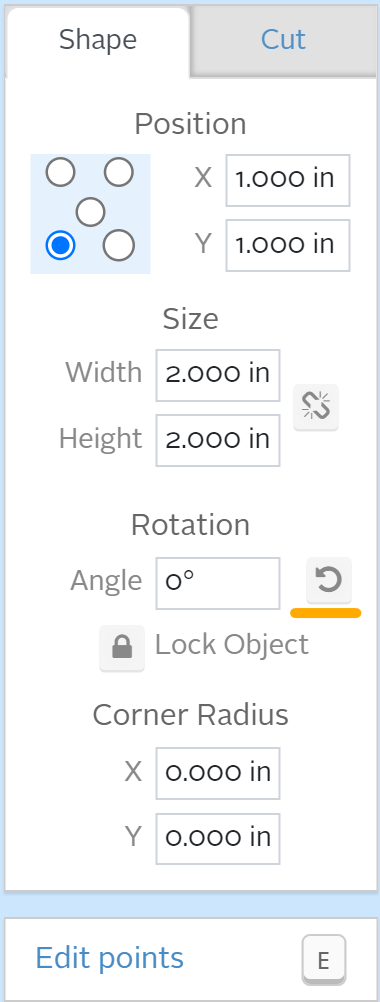
Here's a support article to help you learn more about shape position and size: Shape Position and Size
Please leave us feedback so we can continue simplifying workflows in Easel
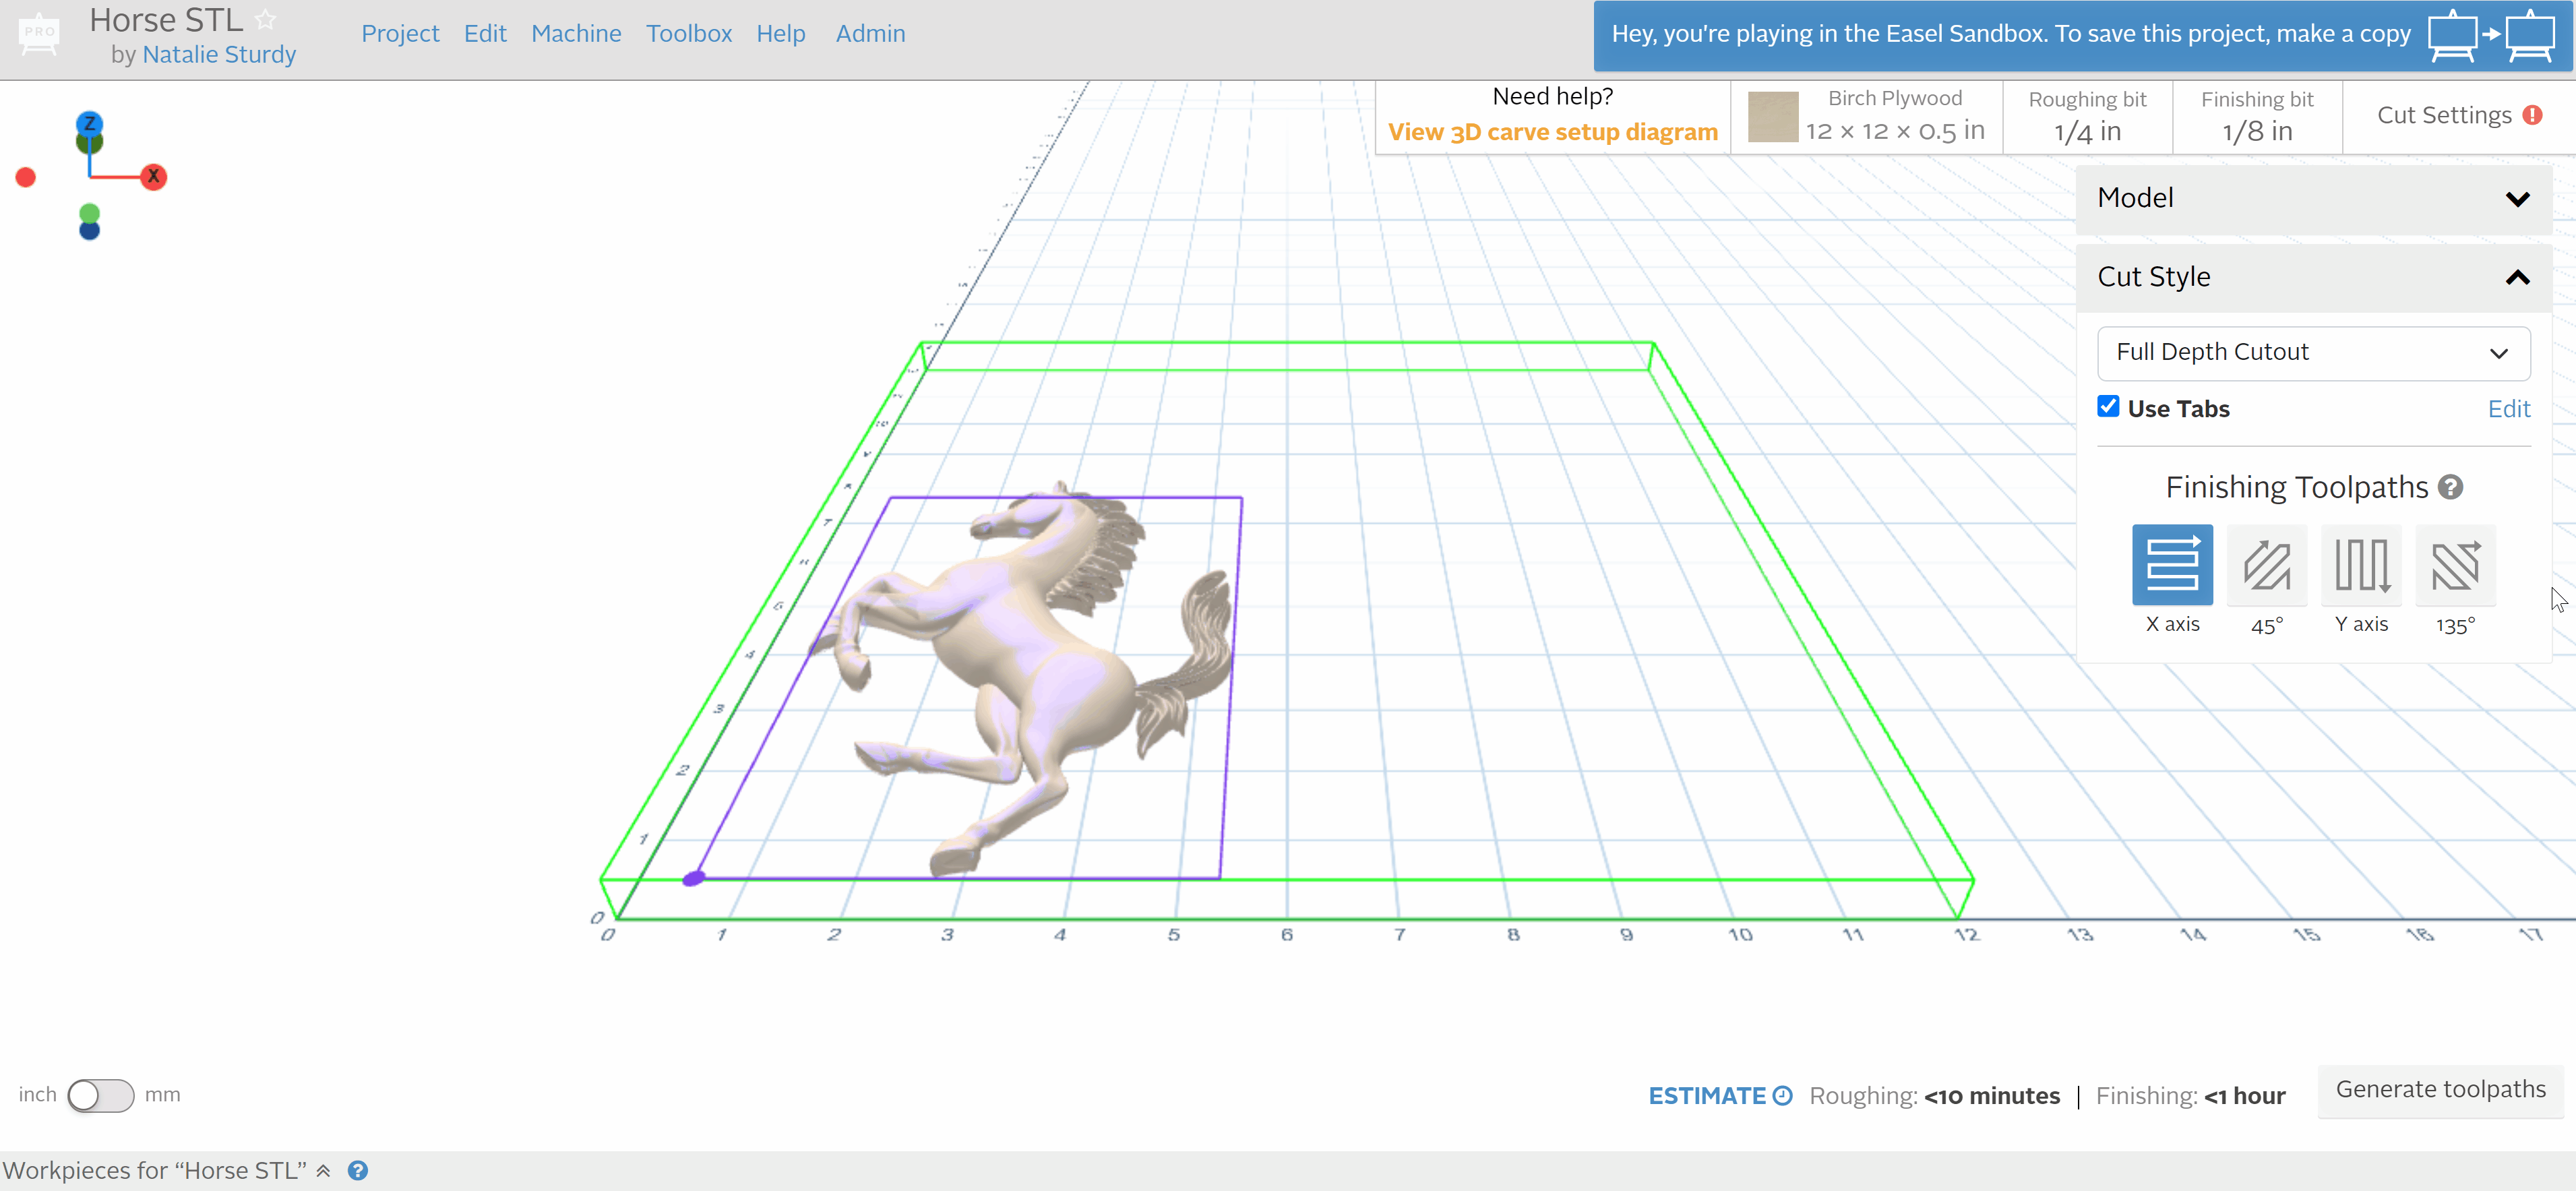
Editing Tabs in 3D Projects
Easel Pro users are now able to edit the tab placement for their 3D Carves! When utilizing a full-depth cutout as their cut style, users can select the edit button next to “Use Tabs” to adjust the positioning of their tabs. This allows users to keep tabs away from hard to reach areas like corners or delicate areas of the relief. The tab quantity and dimensions for 3D projects will continue to be calculated by Easel.

This animated GIF shows how to edit tabs for 3D projects
Here are some support articles to help you learn more about tabs:
Please leave us feedback about tabs so we can keep improving Easel!
October 2022
3D In Easel Pro
With 3D in Easel Pro you can easily carve beautifully detailed 3D relief carvings with a simple-to-use interface.
You can visit our 3D Support Section to Learn more about 3D in Easel Pro, or visit the Inventables Forum to see what others are carving.
First time ever using Easel? We recommend having a quick look at how Easel works before attempting your first 3D carve: Designing in Easel.
You could also try the Intro to Easel Project.
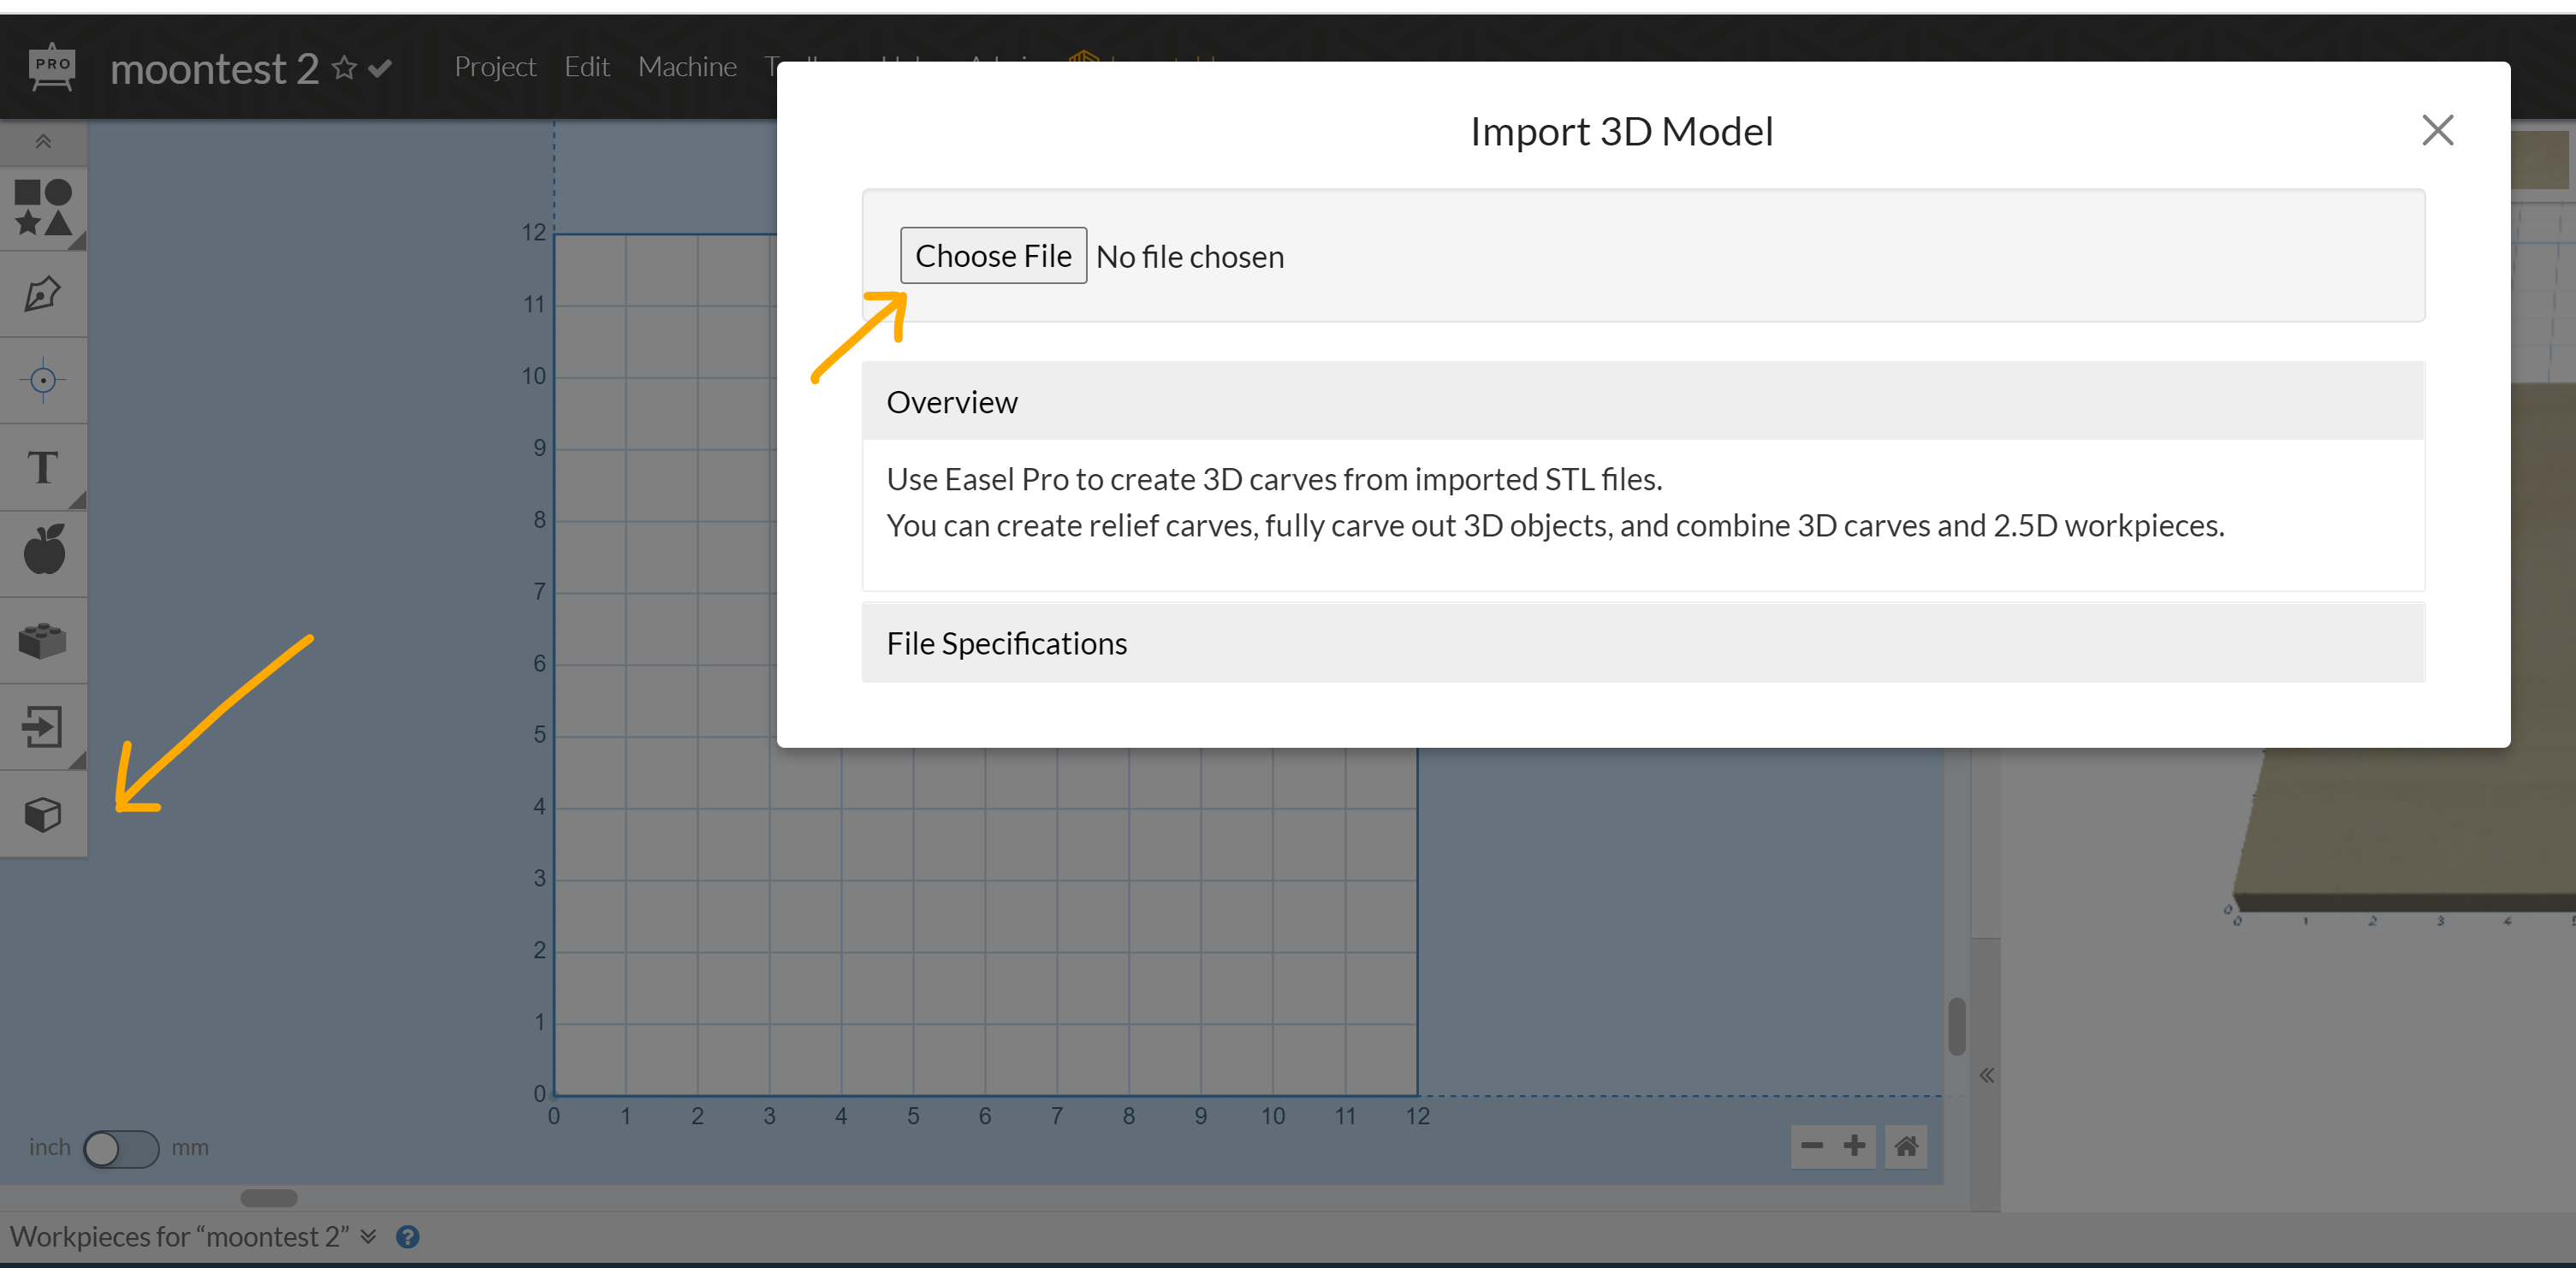
INSTRUCTIONS FOR 3D CARVING 3D in Easel Pro will only work with STL files. If you have a 3D file in another format, you will need to convert it to .STL. Here is a guide: https://all3dp.com/2/best-stl-converter-file-tool/
You may also find the GLOSSARY helpful.
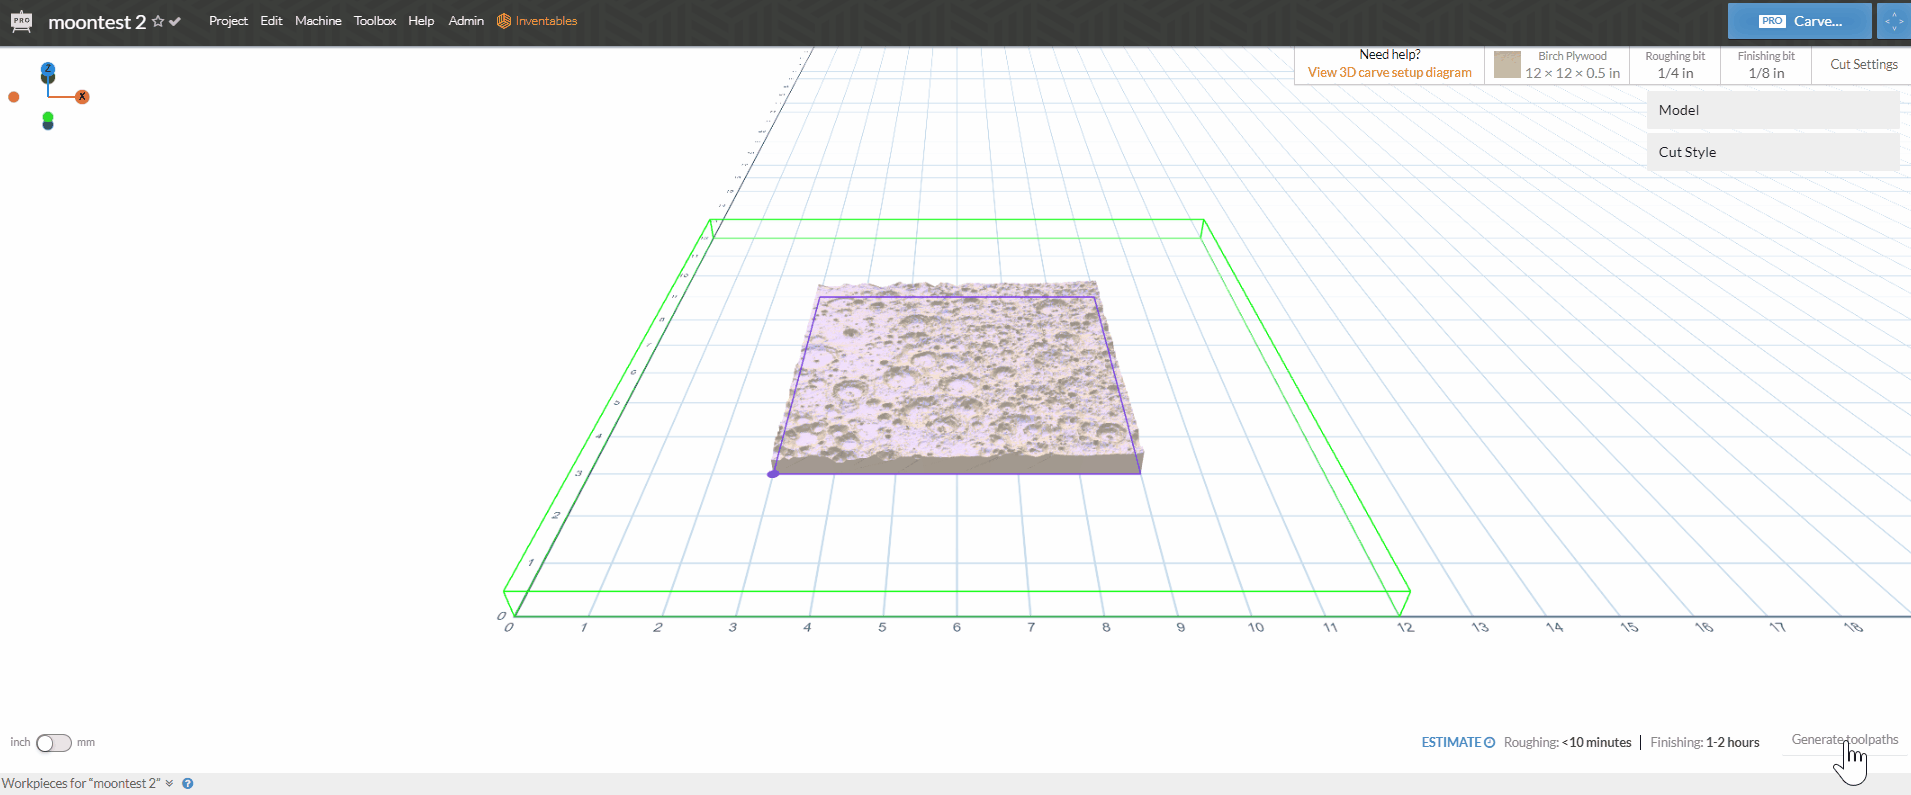
- Open up a new Easel Project and select "Import 3D STL File" to load your model.
- Once your model is loaded, enter the size of the stock material you will use for carving your 3D model. Make sure the stock size will be enough to completely carve the model (especially the height).
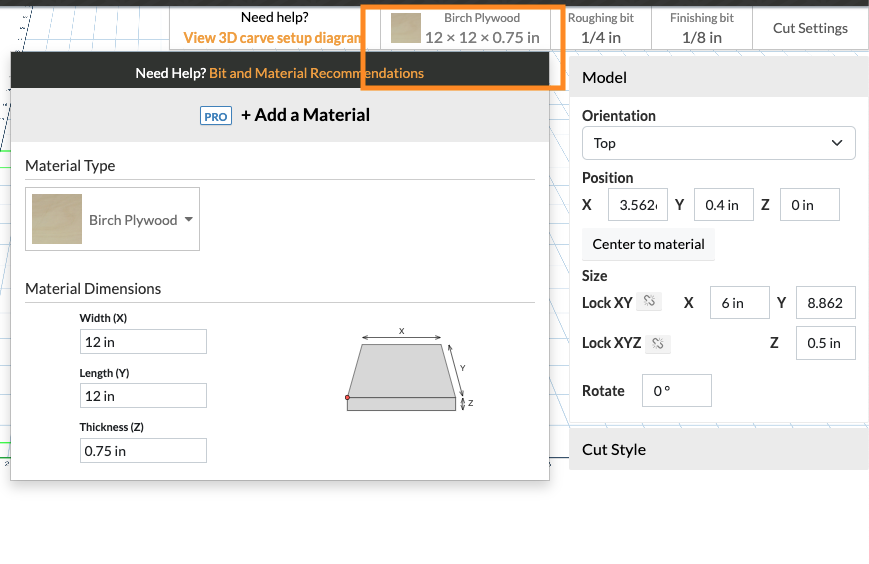
- Orient and position your model where you want it to be carved on the material, making sure that the model is within its boundaries. The green box represents the size of the material. The purple box represents the overall dimensions of your model.
You can use "Center to material" to quickly position the object to the middle of the material.
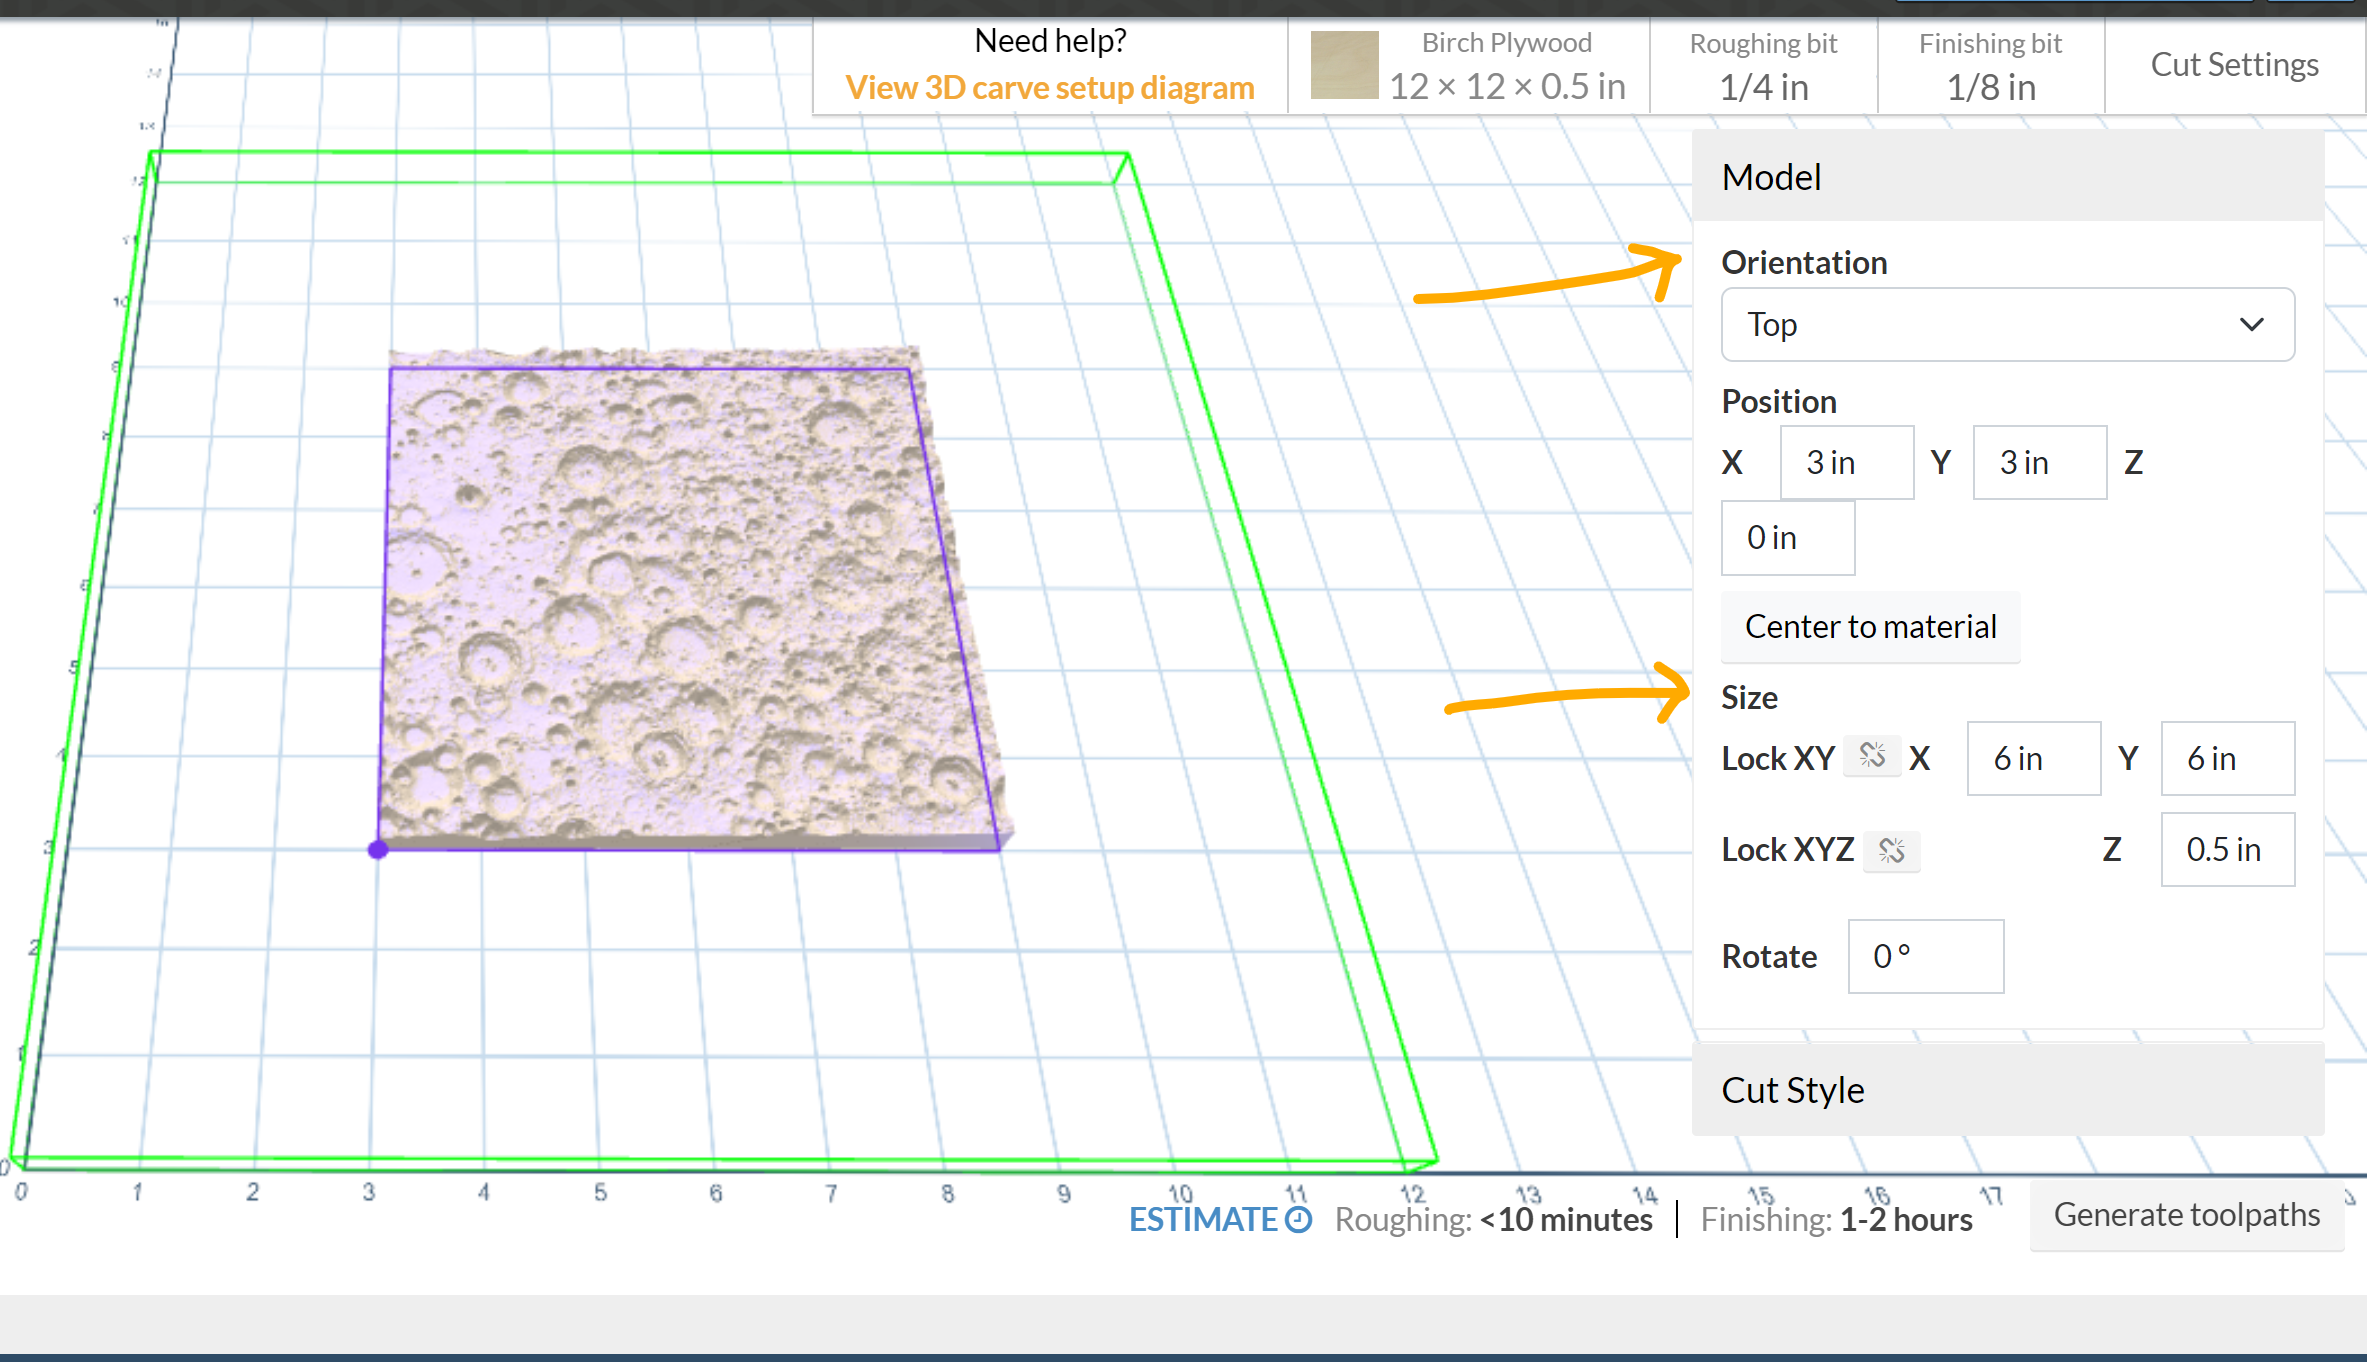
- Select the Cut Style you want for your model (see below for the Cut Style options). You can also select the direction of the finishing toolpath (e.g. to go with the grain of wood stock)
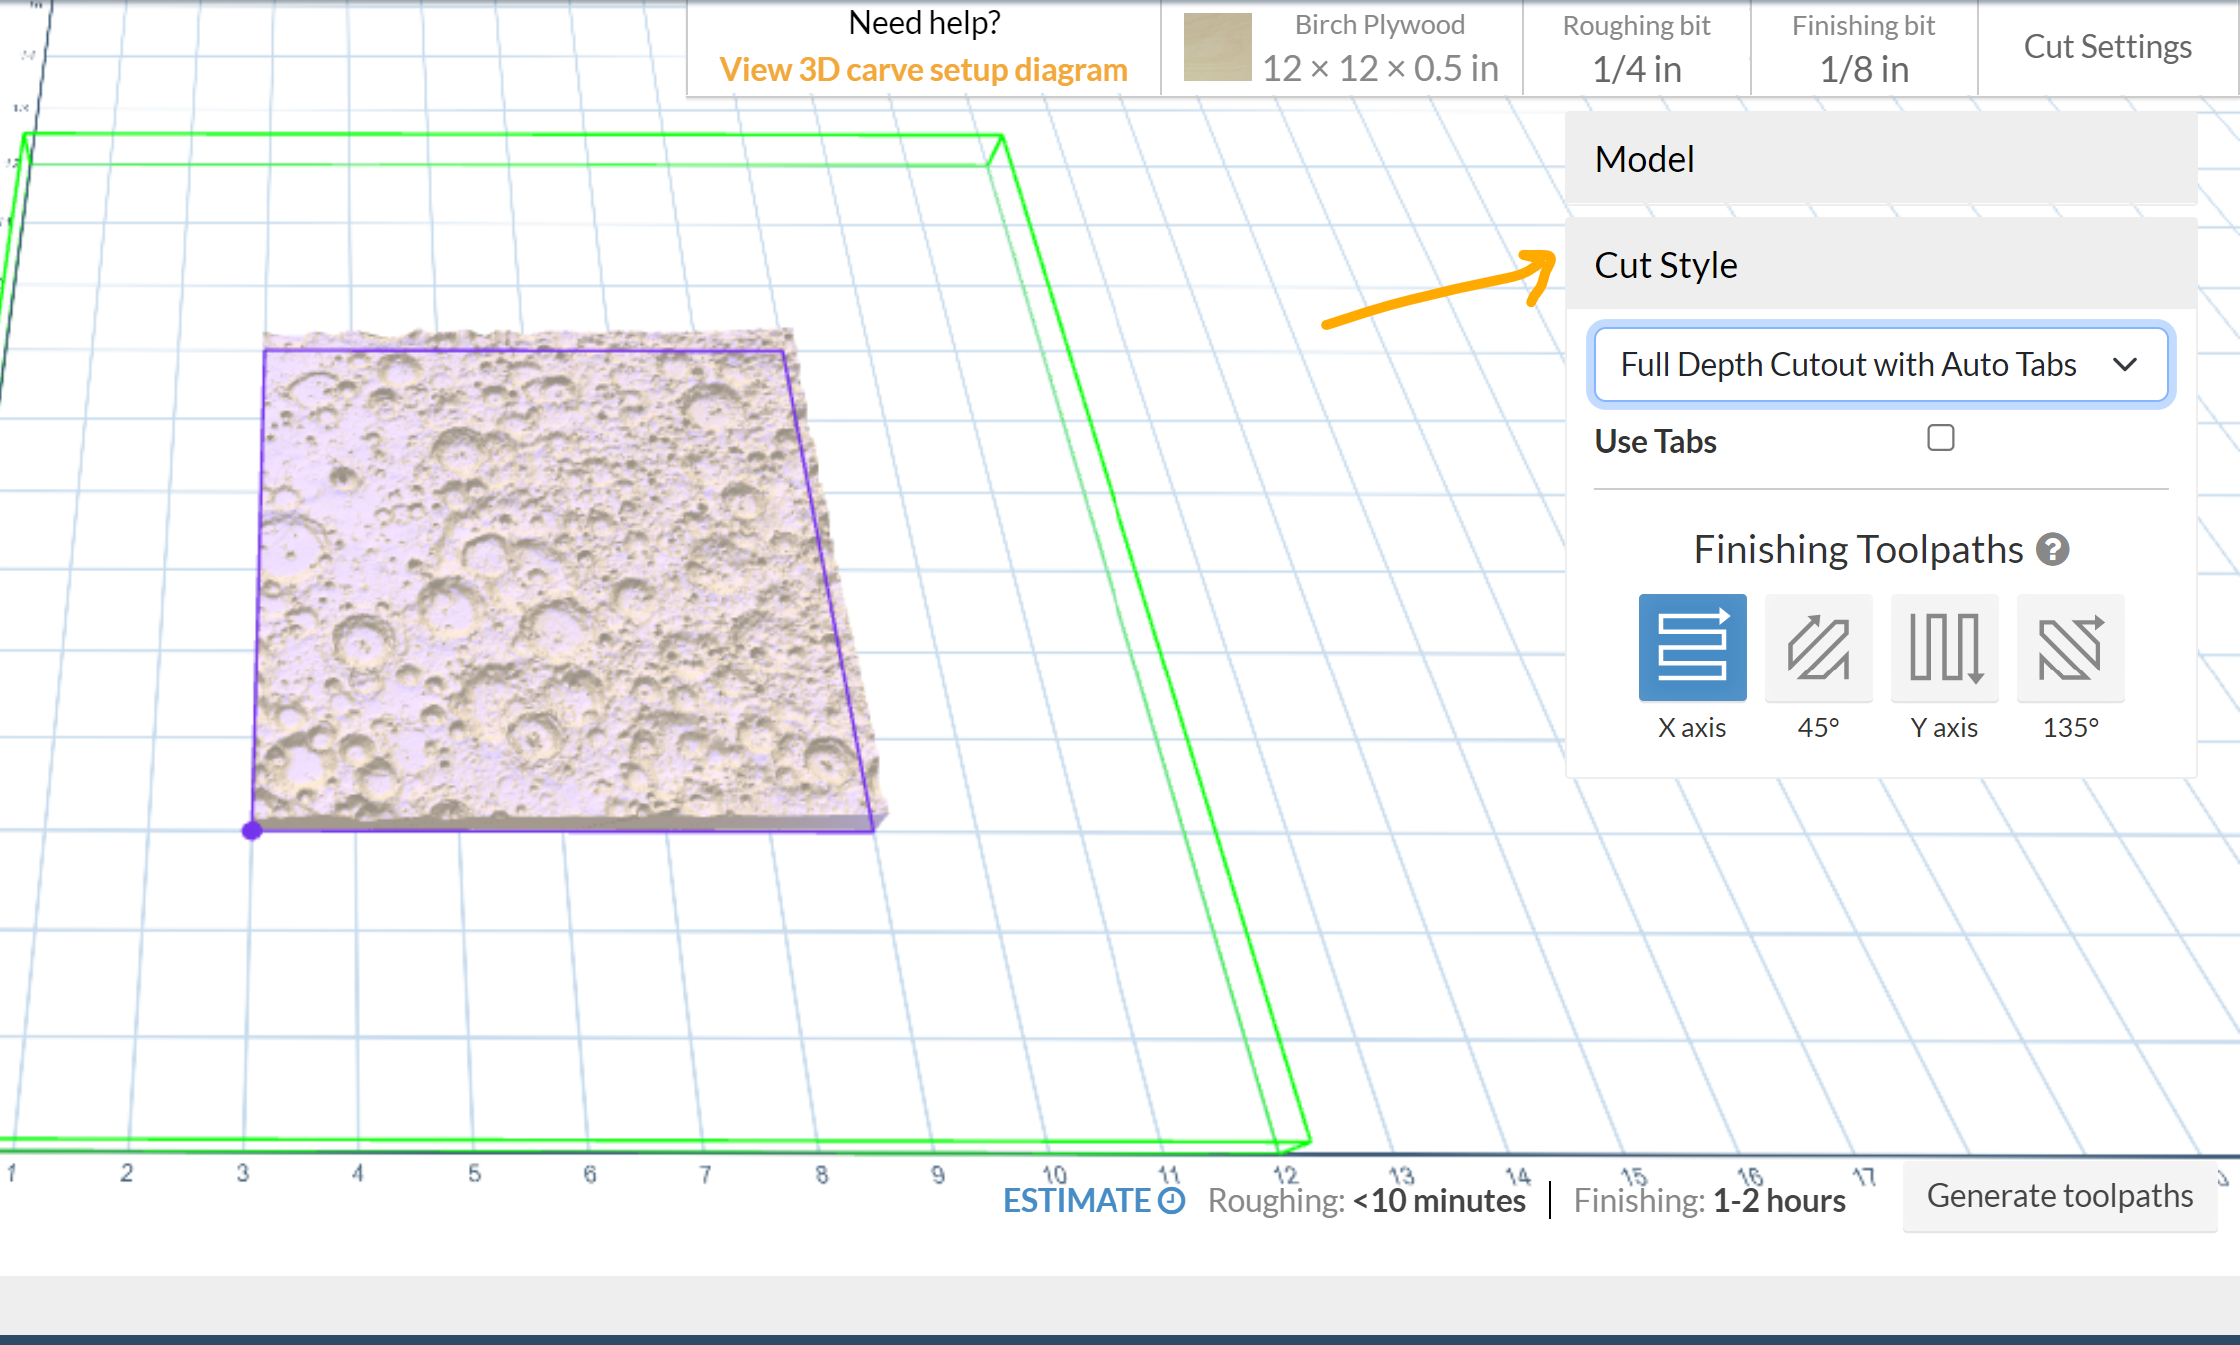
- Select the bits you will use for the roughing pass and finishing pass. In general, any end mill bit ¼” or ⅛” diameter will work well as a roughing bit; for the finishing pass, we strongly recommend using a ⅛” ballnose bit.
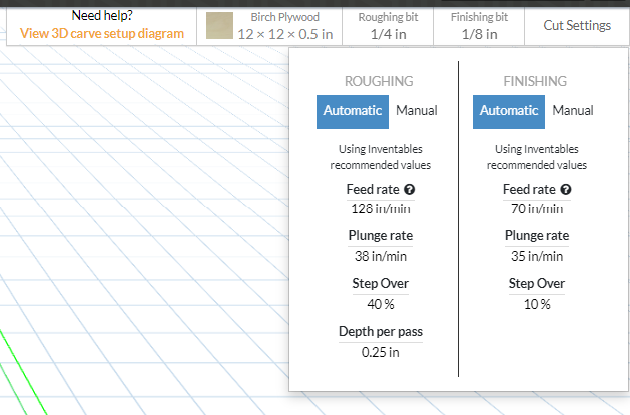
- Easel can recommend general, safe cut settings for both passes, but you might need a bit of experimentation to find what works best for your combination of bit and material.
Recommended Cut Settings for X-Carve Pro (shown below) Birch Plywood with 1/4" Downcut and 1/8" Ballnose:
Recommended Cut Settings for current X-Carve 1000mm (shown below) on Birch Plywood with 1/4" Downcut and 1/8" Ballnose:
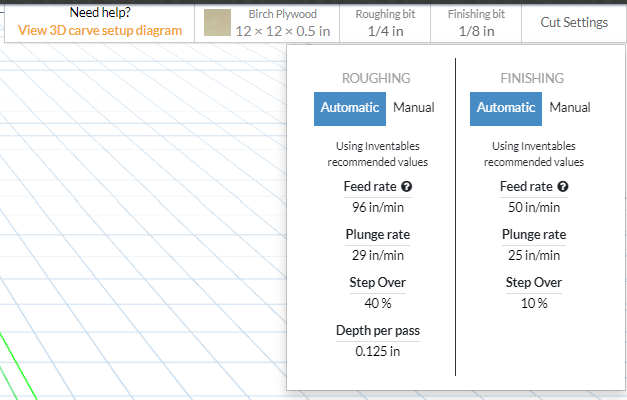
NOTE: If you are using a different type of material, your settings will be different or unlisted. We recommend using Easel's default settings as a starting point. For more information on calculating your cut settings, see this guide: Calculating Your Cut Settings: Basic Feeds and Speeds Information
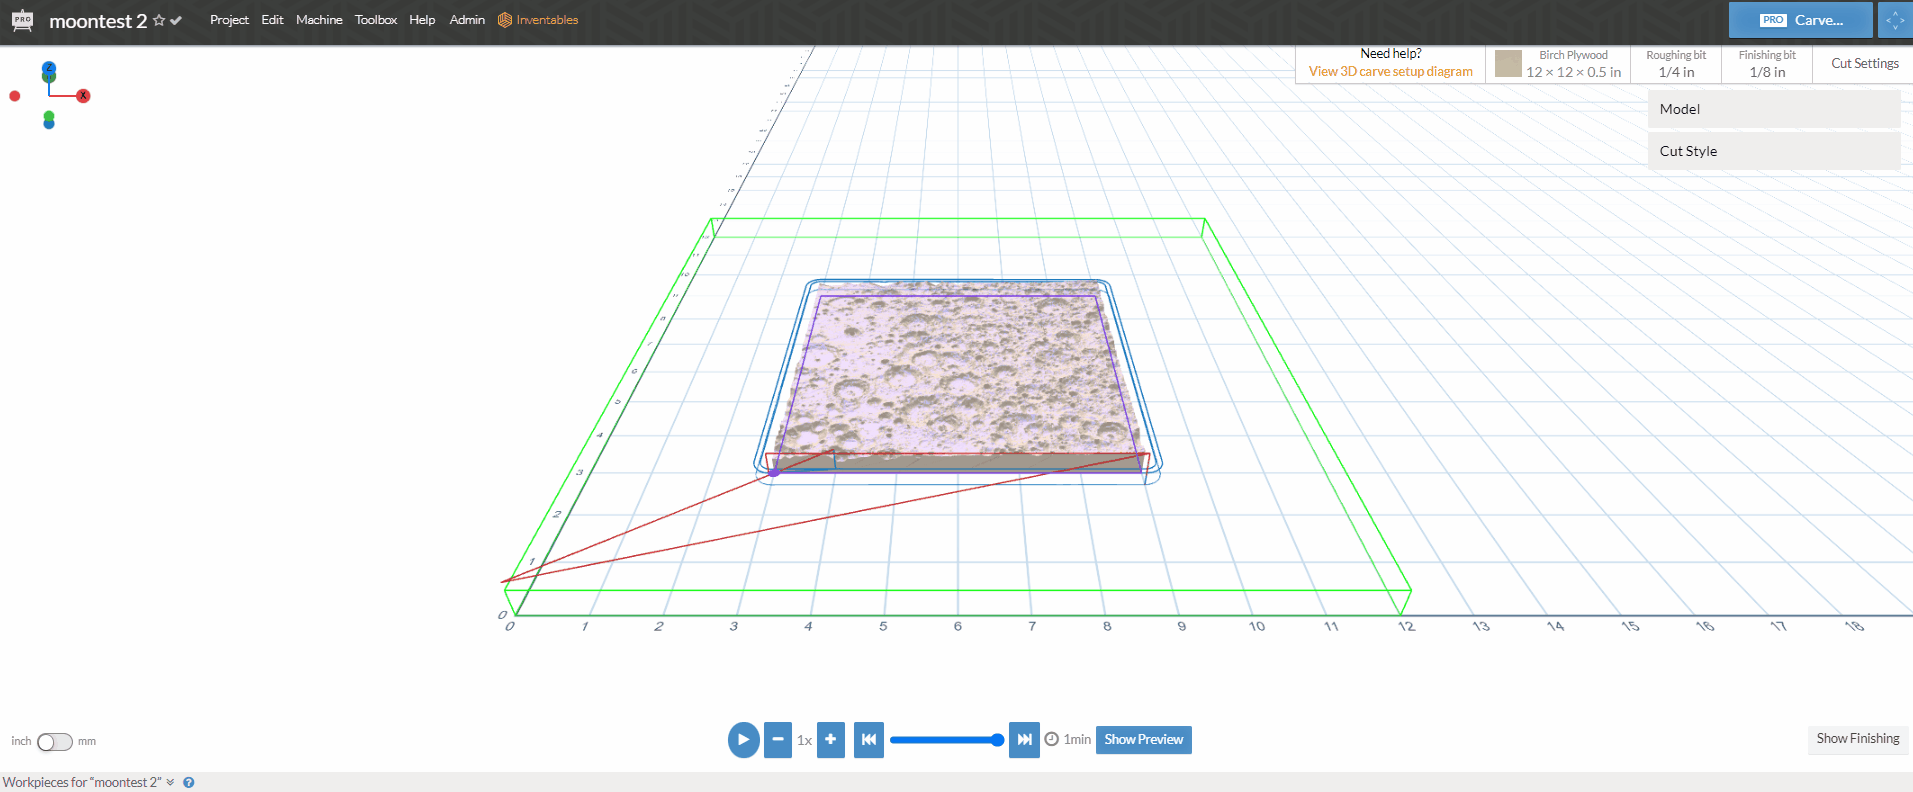
- Easel will display the Carve Time Estimator with approximate carving times. Generate toolpaths to see the carving path and the approximate time it will take (the image below is sped up for instructions.)
- After you have generated the toolpaths, you may see how the finished piece will look after clicking the "Show Preview" button.
Quick Repeat Carving
This is a workflow improvement that can have a major impact on repeated carvings. Now by enabling repeat carving under General Settings you can skip the zeroing and material positioning for any carve you plan to do multiple times in a row using the same position and bit.
How to use Repeat Carving:
- Go to Machine menu, and general settings.
- Click the checkbox to enable repeat carving
- Do your first carve with the normal walk through and setup
- When your first carve is finished, any subsequent carves will offer you the option to repeat carve
- You can re-probe your Z axis if needed, or just skip right to the carve.
Machine Parking combined with Repeat Carve makes for much improved production of multiples of the same product.
Overview Animation
Repeat Carve in the Walk Through