What's New in Easel
October 2025
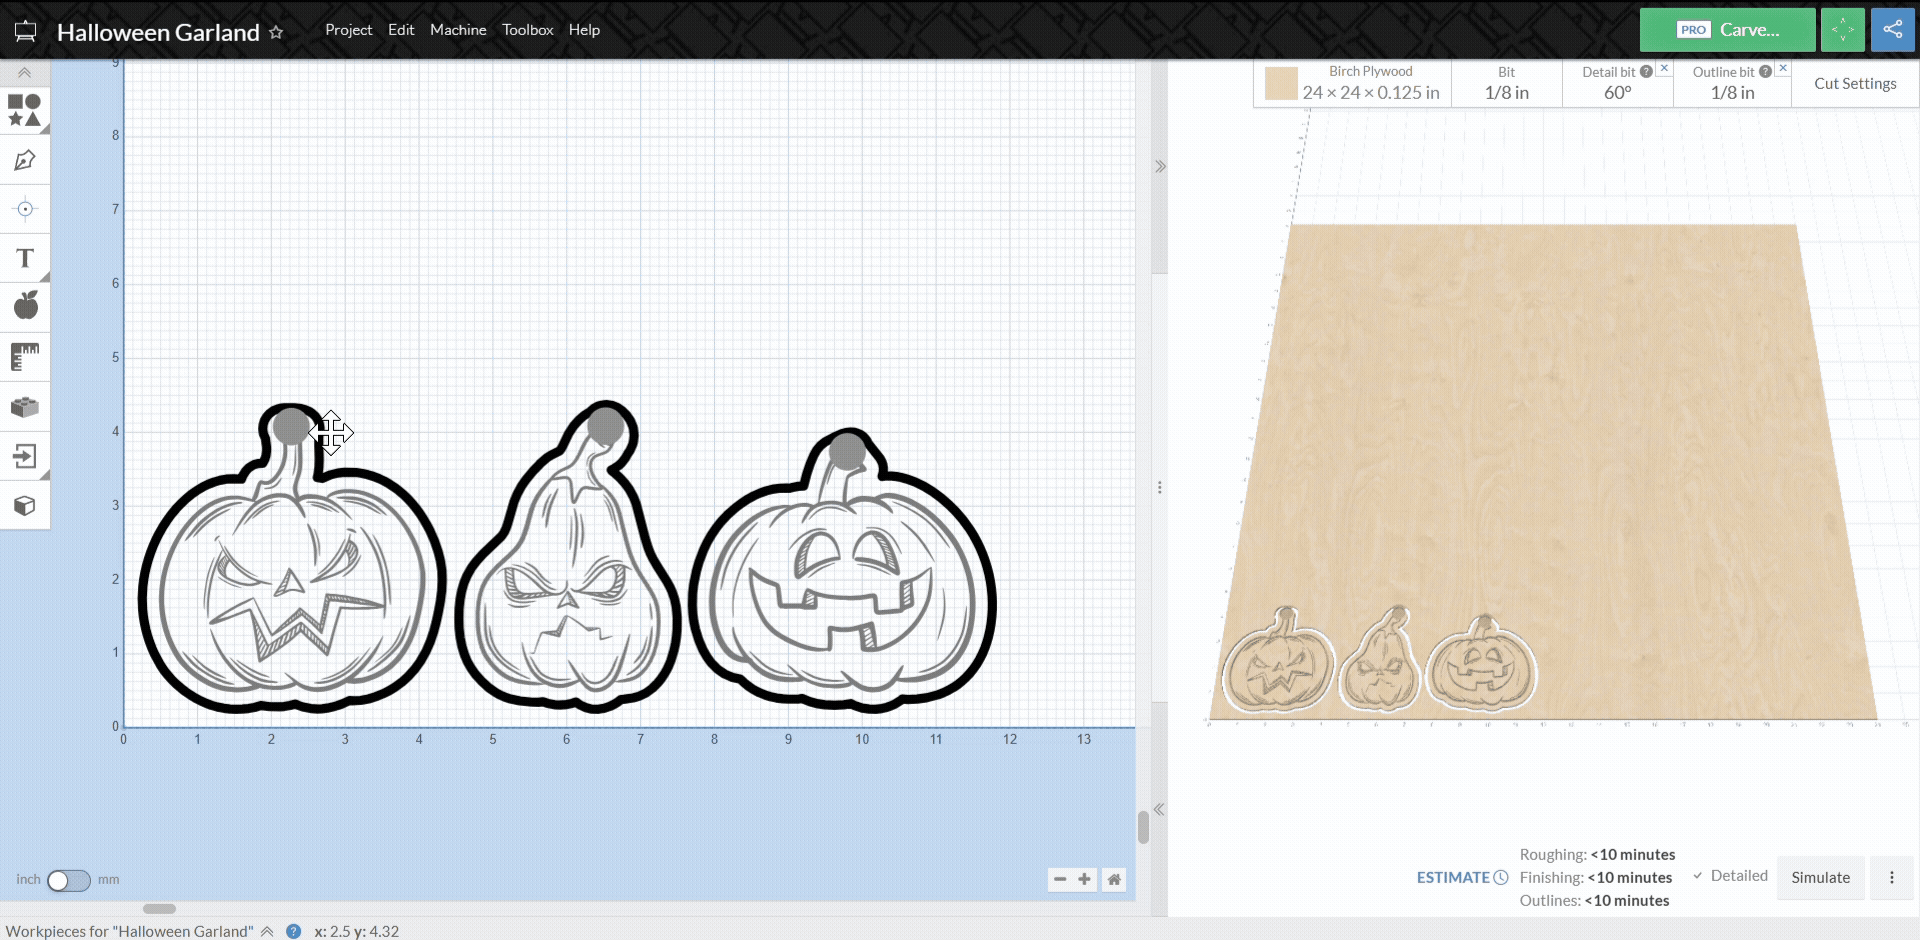
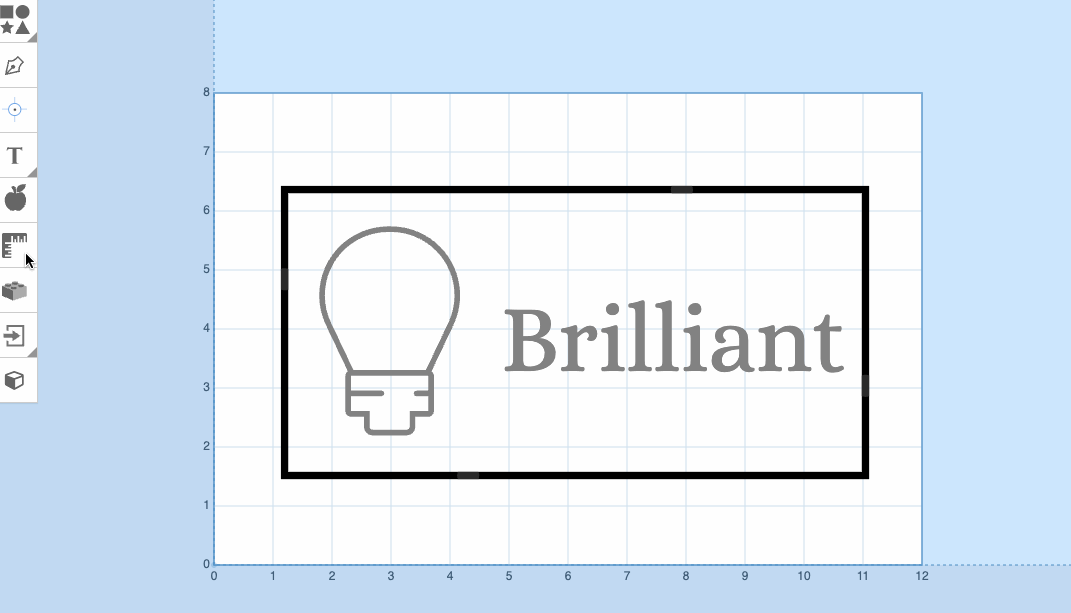
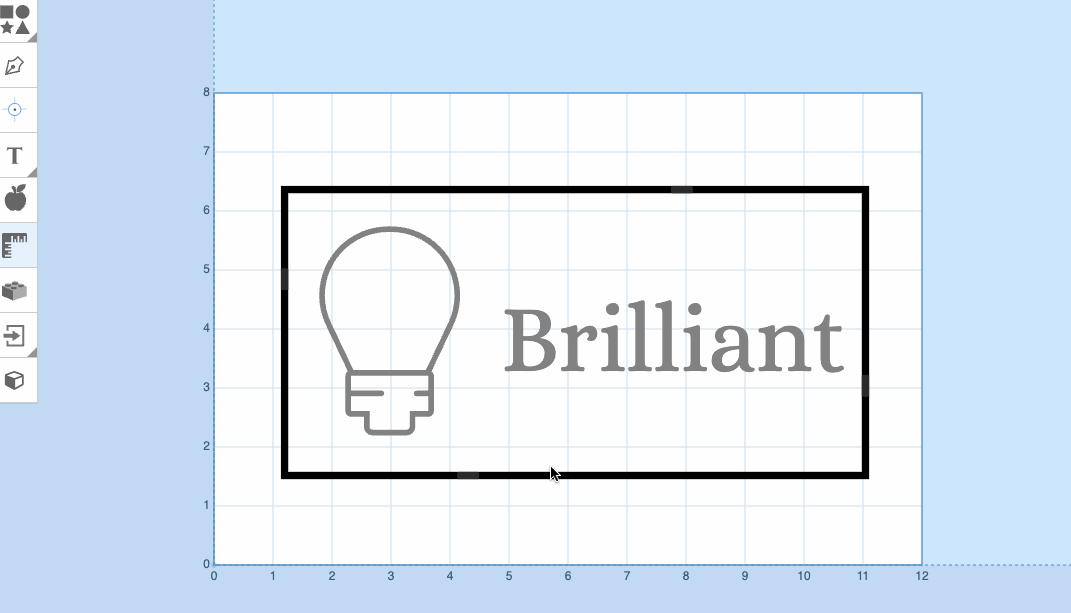
Choose pass type when adding a second bit
New in Easel -- Choose the desired pass type when adding a second bit to a workpiece!
.gif)
Previously, using an outline bit required adding a roughing and detail bit to your workpieces first. Some projects only require two bits: one to carve the fill cuts and other design details, and another for the outline cuts.
Now, you can chose between detail and outline when adding a second bit!
What if you still want to use a 3-bit workflow with a roughing, detail, and outline bit? You still can! After adding your detail bit as the second bit, simply click the + button to add the outline bit as your third bit.
September 2025
New "Edit" Options
We’ve made two of Easel’s most popular apps easier to access! The Convert Circles to Drill Holes app and the Replicator app are now built directly into Easel’s Edit menu.
No more digging through the App Library — you can now access these tools directly from the Easel design canvas. You'll find all of these options in the Edit menu at the top of the page, or by right-clicking on the shapes in your designs.
New Project Creation
We’re making it easier to kick off a new project in Easel! Check out the overview video on YouTube.
.gif)
When you start a new Easel project, you’ll see a window where you can give your new project a name, pick a category, and browse suggested projects from the Easel Gallery. If something catches your eye, you can copy it and jump right into customizing and carving!
Prefer to start from scratch? Everything in this new window is optional - you can always go straight into a brand-new blank project by closing the window or clicking the .
This update gives you the flexibility to hit the ground running with an existing design or to continue kicking things off with a clean slate!
August 2025
Outline Bit
More control over your cut paths — no workarounds needed. You can now assign a dedicated bit just for outline paths in multi-stage carves.
Previously, Easel always used your detail bit for outline cuts – including final cutouts – even if it was a V-bit or a small 1/32" bit. That often led to slow carves, broken bits, or extra workarounds.
Now, with Outline Bits, you can:
- Choose a separate, sturdier bit (like a 1/8" or 1/4" end mill) just for outline paths
- Skip duplicating workpieces or manually hiding shapes
- Keep everything in one carve with three distinct toolpaths: Roughing, Detail, and Outline

After you select an Outline Bit, Easel will assign it to shapes where the Cut Path is set to “on shape path”, “outside shape path”, or “inside shape path”:
 Pockets will be carved by the Roughing and Detail Bits
 Outlines will be carved by the new Outline Bit
How to use it:
- Load or create a project in Easel with a roughing and detail pass
- Click the “+” next to your Detail Bit and select an Outline Bit
- Simulate your carve — the outline pass will appear as a separate orange toolpath
- During carving or downloading G-code, you'll now see a new “Outline Pass” option when selecting toolpaths
This feature is available to all Easel users. Try it out and share your feedback!
Path drawing & editing improvements
We've recently made some improvements to the path drawing & editing tools in Easel!
First, when using the pen tool, you can drag while adding points to make curves:
Additionally, when editing points, you can drag to select all the points within an area:
Shape Names
Easel's Shape panel now lets you enter a name for the selected shape or group. Names are overlaid on their shapes in the design editor, making it easy to identify parts in assemblies or otherwise label or annotate particular design elements.
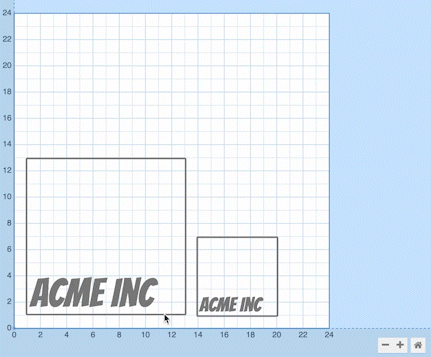
To add a name to a shape or group of shapes, select it in the 2D editor. At the bottom of the Shape editor, users will find a new input to name the selected shape or group. Shape names can be edited and deleted once added.
July 2025
Measurement tool updates
We've updated the measurement tool based on your feedback!
Easier Path Tracing
You can now trace along the path of a volume when placing measurement points more easily.
A circle indicator will appear when your point is close to the path.

Boundary Edge Detection
You can also trace along the boundary edges of volumes.
A dotted line will appear when you are on the edge of a volume's boundary.
Linked Measurement Lines
Lastly, we've added linked measurement lines.
For horizontal or vertical lines between two volume edges, you can set up one measurement line that updates dynamically.
To use: 1. Place the first measurement point along the boundary edge of one volume. 2. Hold Shift. 3. Place the second point on the boundary edge of another volume.
These measurements cannot be manually edited but will update dynamically as you reposition or update your design.
New bits in the toolbox
We’re making it easier than ever to add the bits you use to your Easel toolbox. Today, we’ve added nearly 600 new bits from 5 popular brands.
- Amana Tools
- Bits&Bits Company
- IDC Woodcraft
- SpeTool
- Whiteside Machine Company
Find them in your Toolbox under Add Bits:
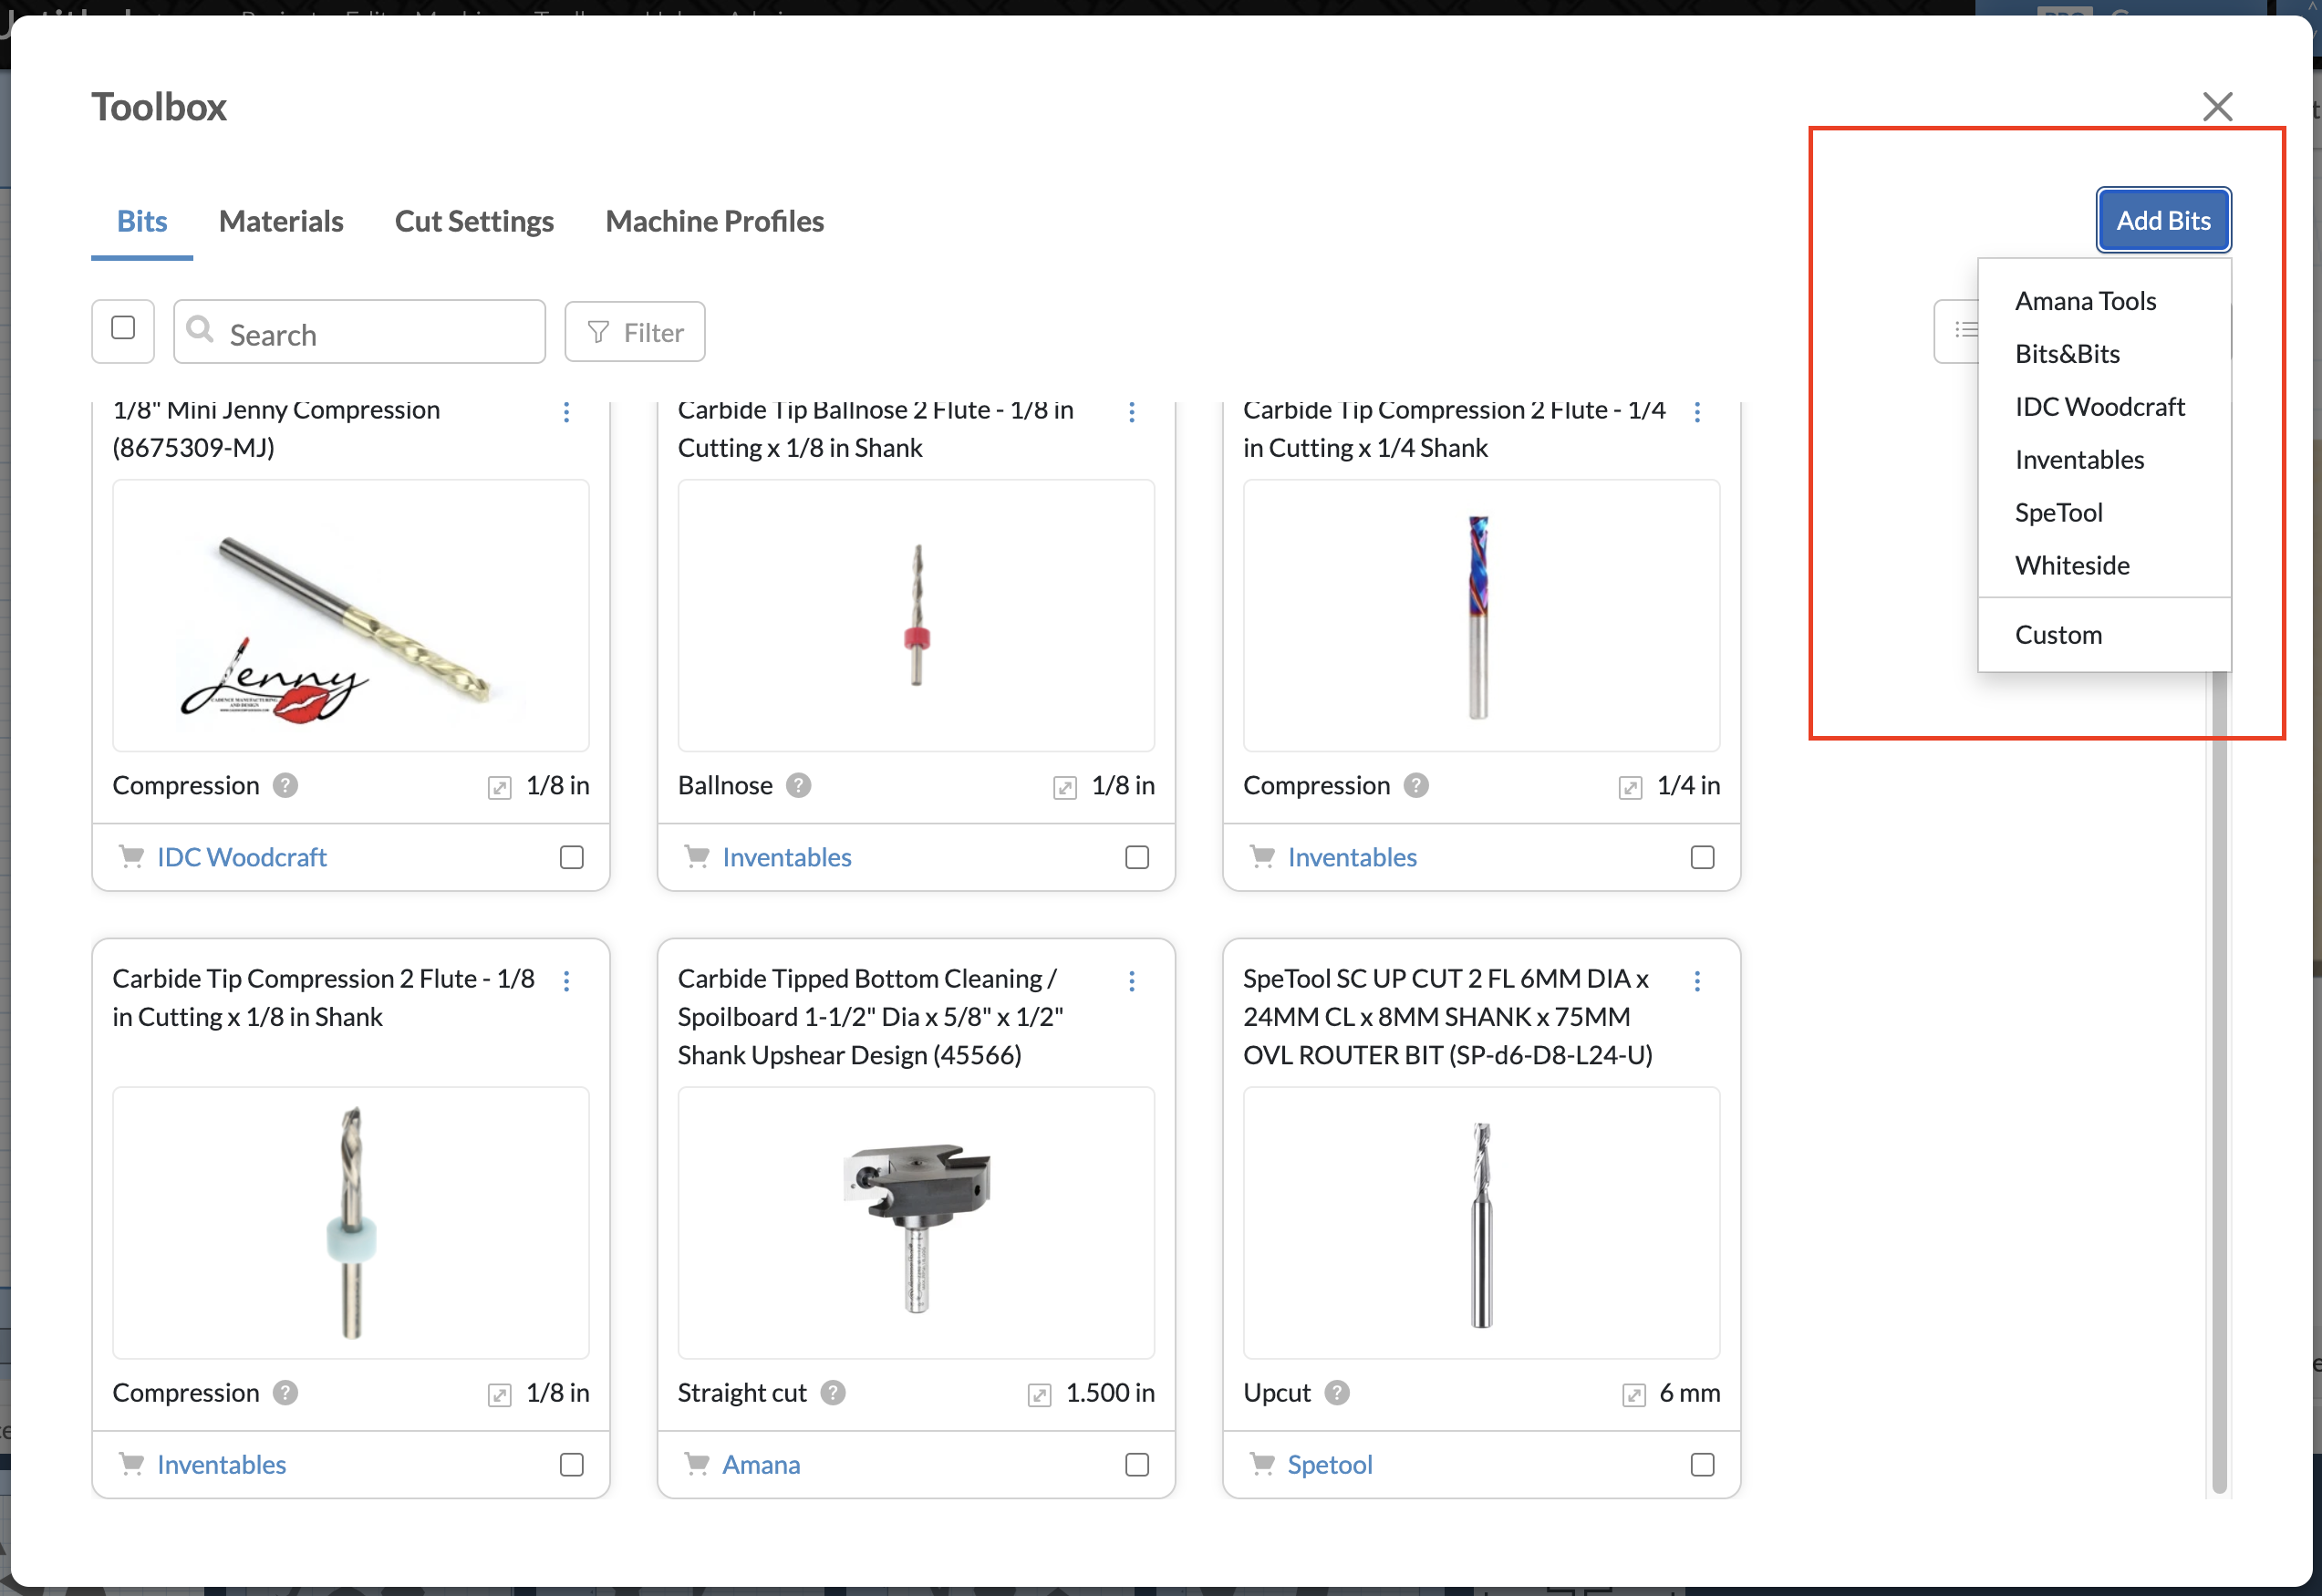 *For now, these new bits won’t include cut settings.
We’d love to hear your feedback as you explore the new additions. Let us know if you find any mistakes or have any suggestions for how we can make this feature even better.
Offset Shapes
You can now quickly offset shapes in Easel without having to go into the app library!
Offsetting creates a new shape from an existing one by widening or shrinking the existing shape.
One instance where this can prove useful is when you want to cut out around a design to remove it from the stock, such as when making signs.
Pro tip: When cutting out shapes, offsetting pairs well with the new Outline Bit feature that is currently in early access.
How to Use
There are 2 new ways to offset shapes in Easel:
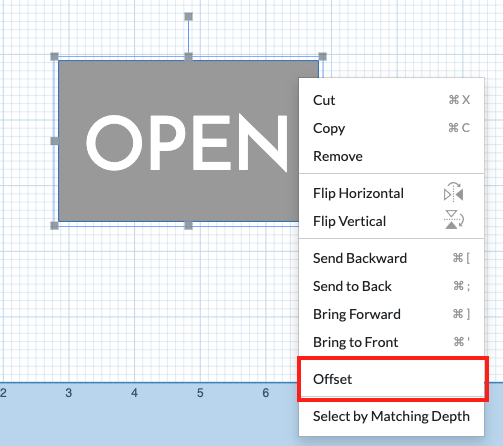
- Right-click on a shape, and then select the "Offset" option. (You can also right-click with multiple shapes selected.)
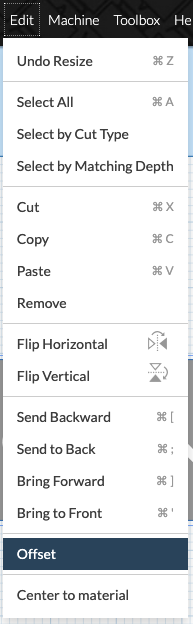
- With one or more shapes selected, choose "Offset" from the Edit menu.
From Right-click Menu
From Edit Menu
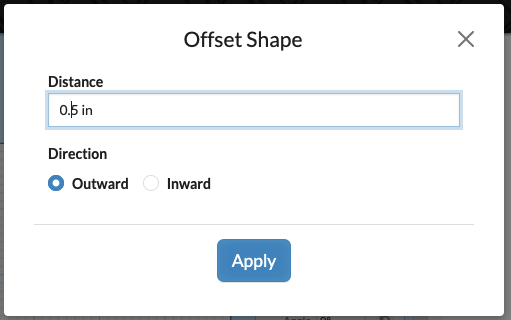
After selecting the offset action, a modal will appear letting you choose the offset distance and direction (inward or outward):
Happy offsetting!
June 2025
Sharing Tools & Trending Projects
It’s now easier than ever to share your Easel projects with the community. Check out the video below to learn more about these recent updates!
Here’s an overview of what’s new:
- Sharing Button
- Instantly share your projects with other makers, collaborators, and community members. Check out the new Share button next to the Carve and Jog options in Easel.
- Publishing to the Project Gallery
- It’s easier than ever to share your work to the Project Gallery. Enjoy auto-filled details, capture additional details about your project, and easily edit and manage your published content.
- Trending Collection
- Check out the hottest new projects in the gallery in the Trending collection. See what the community is making and contribute your own work for a chance to be featured!
As always, let us know what you think and stay tuned for more to come!