Solder Inlay for your woodworking projects


Instructions
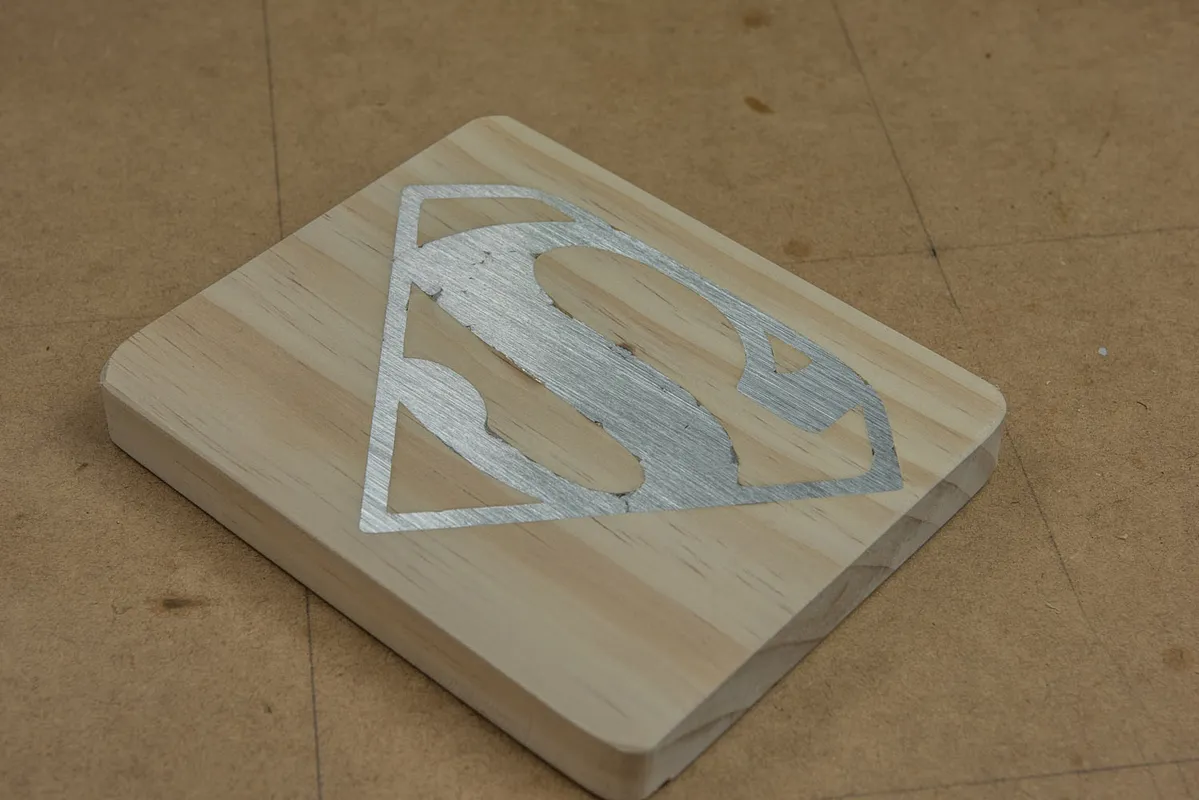
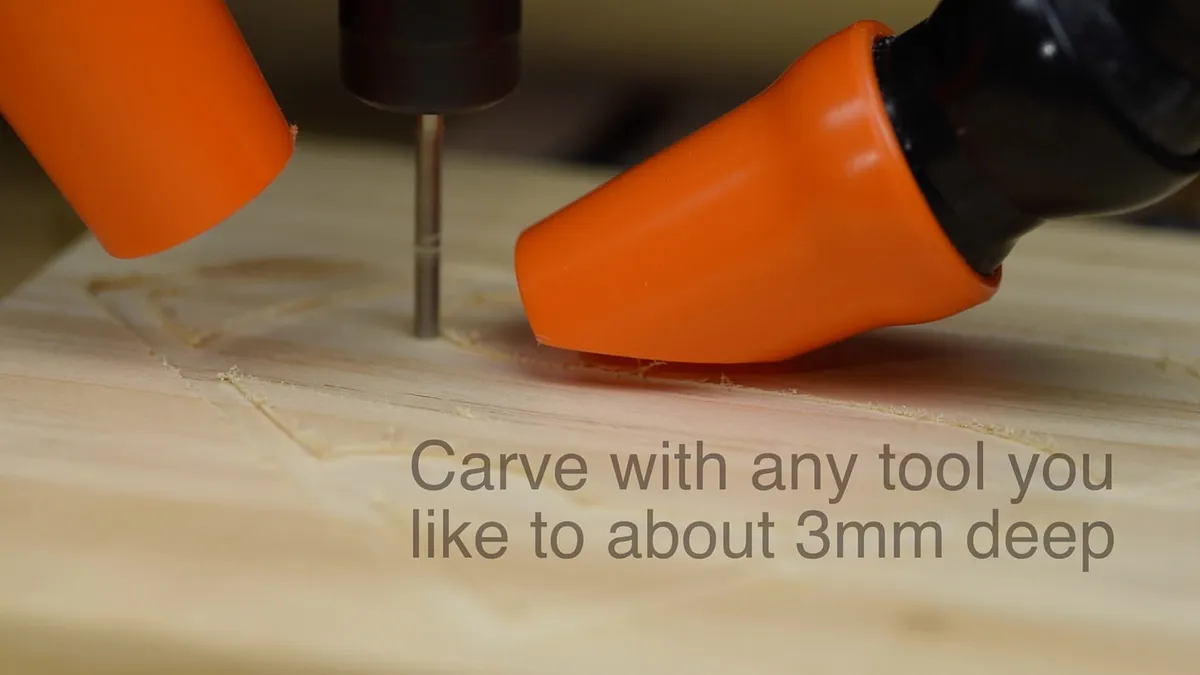
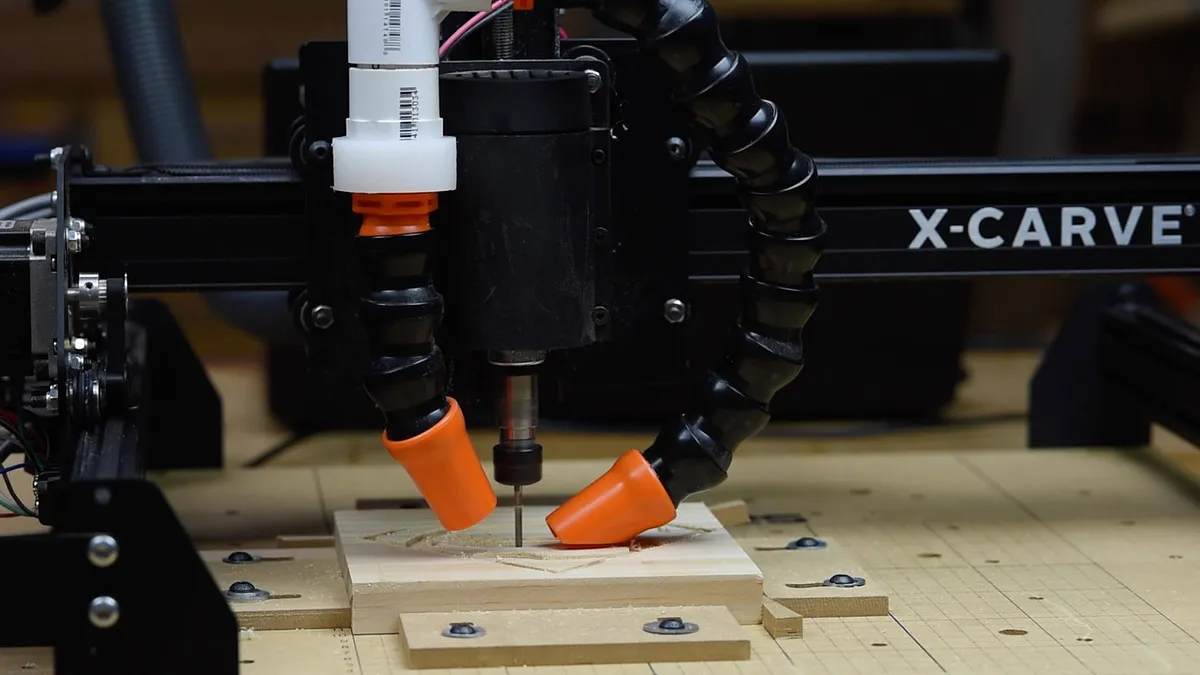
Carve the Wood
I used the X Carve CNC from Inventables to carve out a design to about 3mm deep, but you can use any sort of carving or boring tool like a Dremel, Drill Press, Router Table, Table Saw, Chisel, Scroll Saw etc.


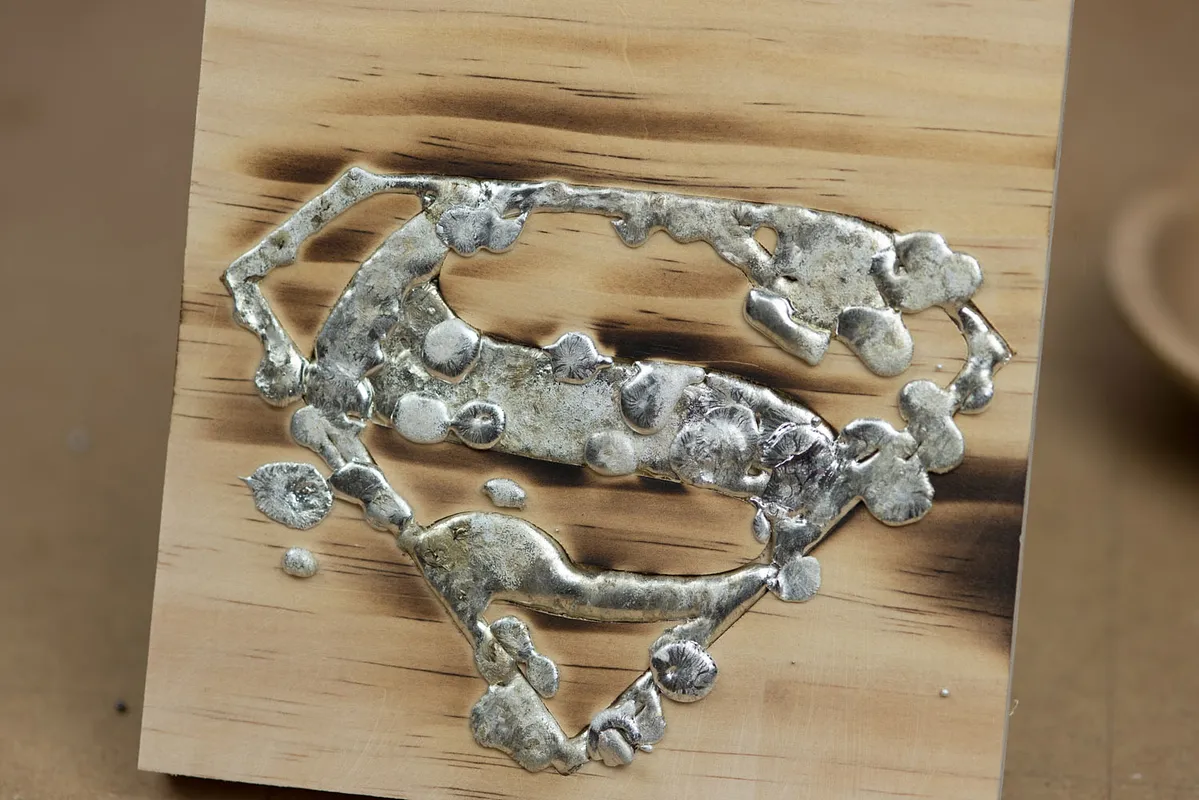
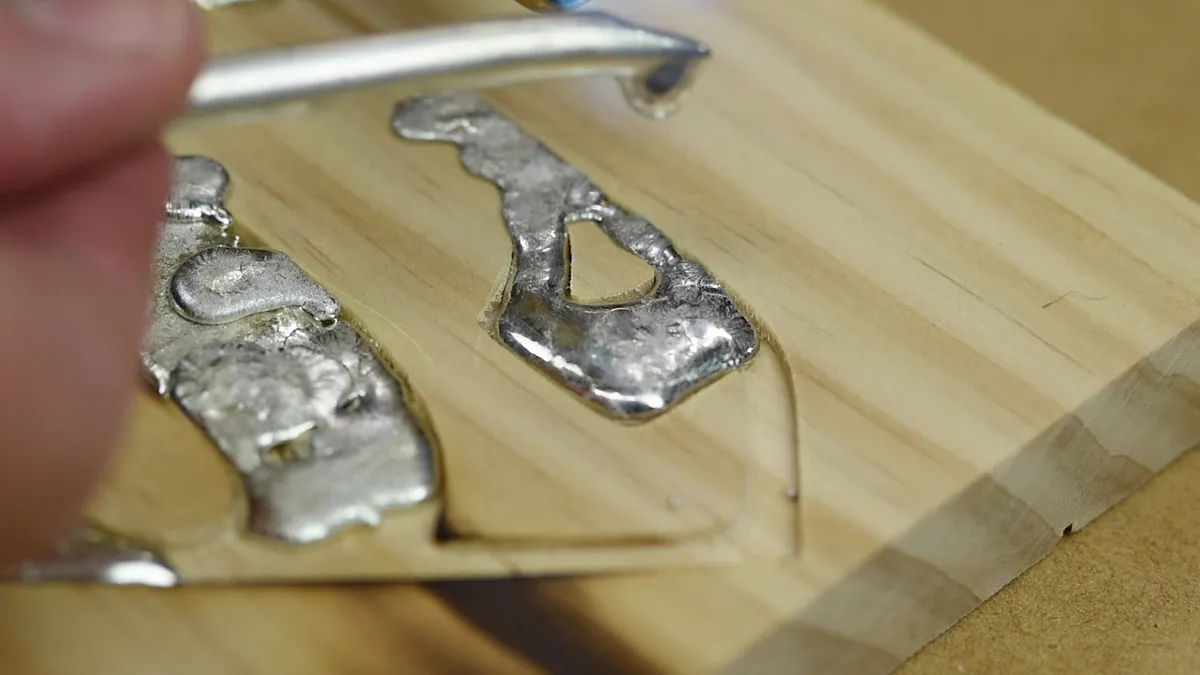
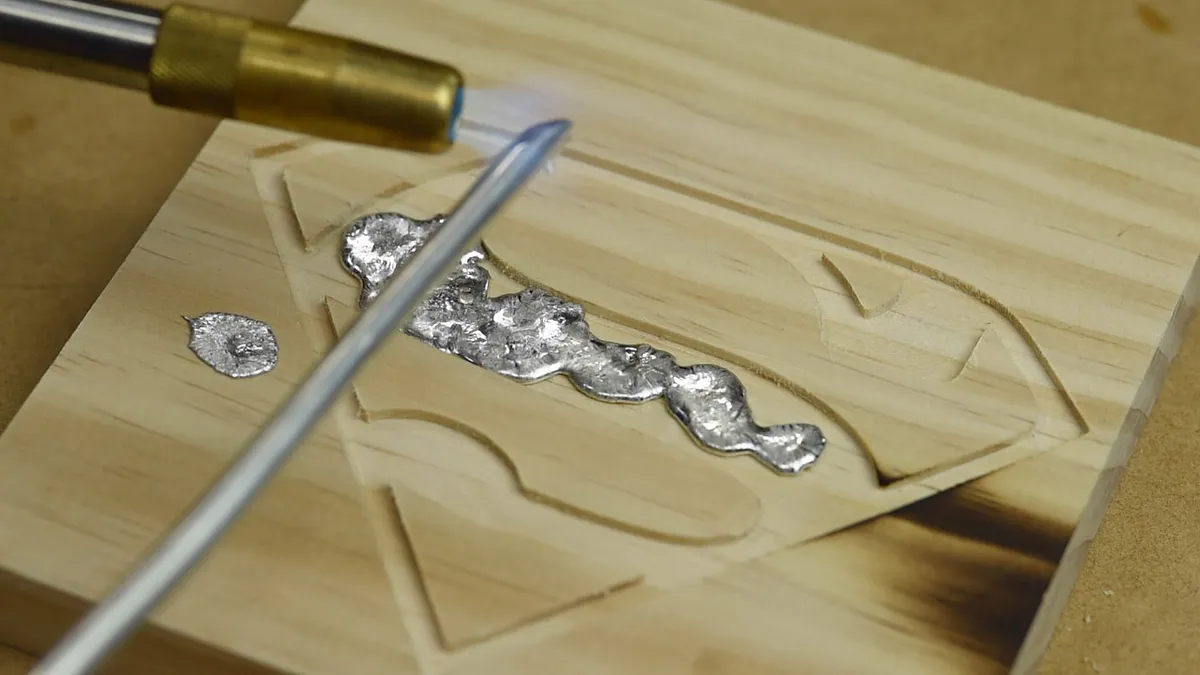
Melt the Solder to the wood
I used solid solder that is used in plumbing and using a blow torch melted it over the carving, I found clumping it together worked better as each drip would merge with the one next to it, keep going until you fill the mold with solder.

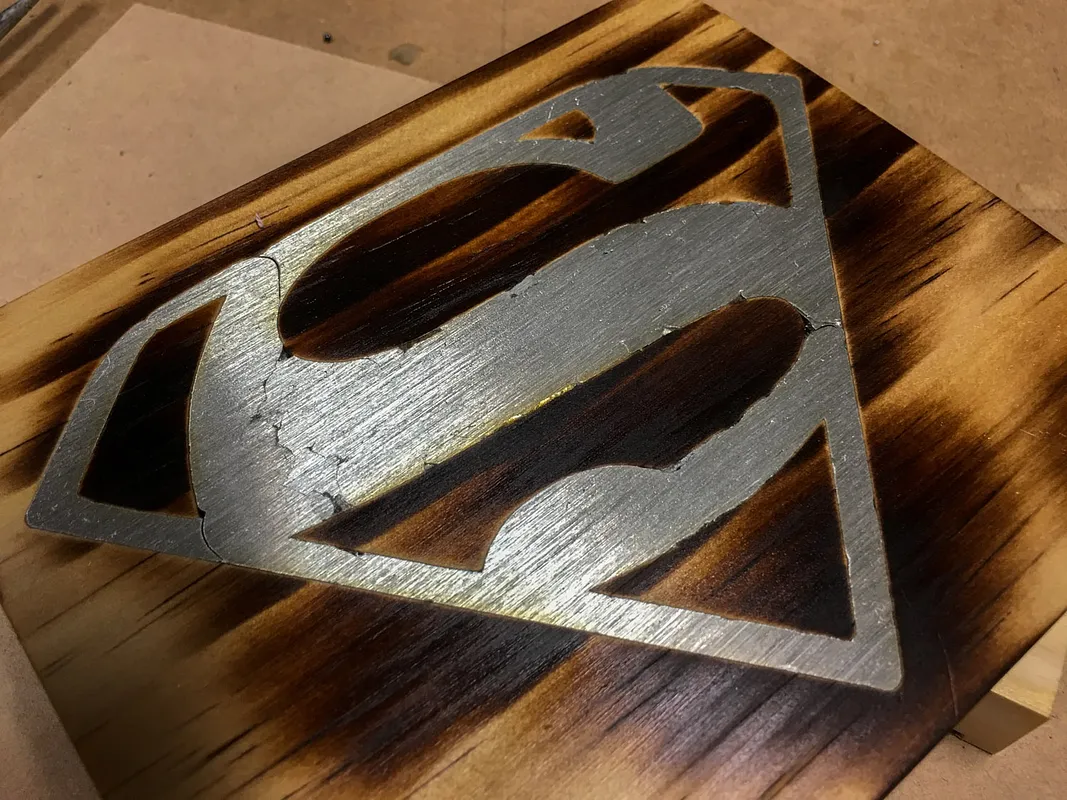
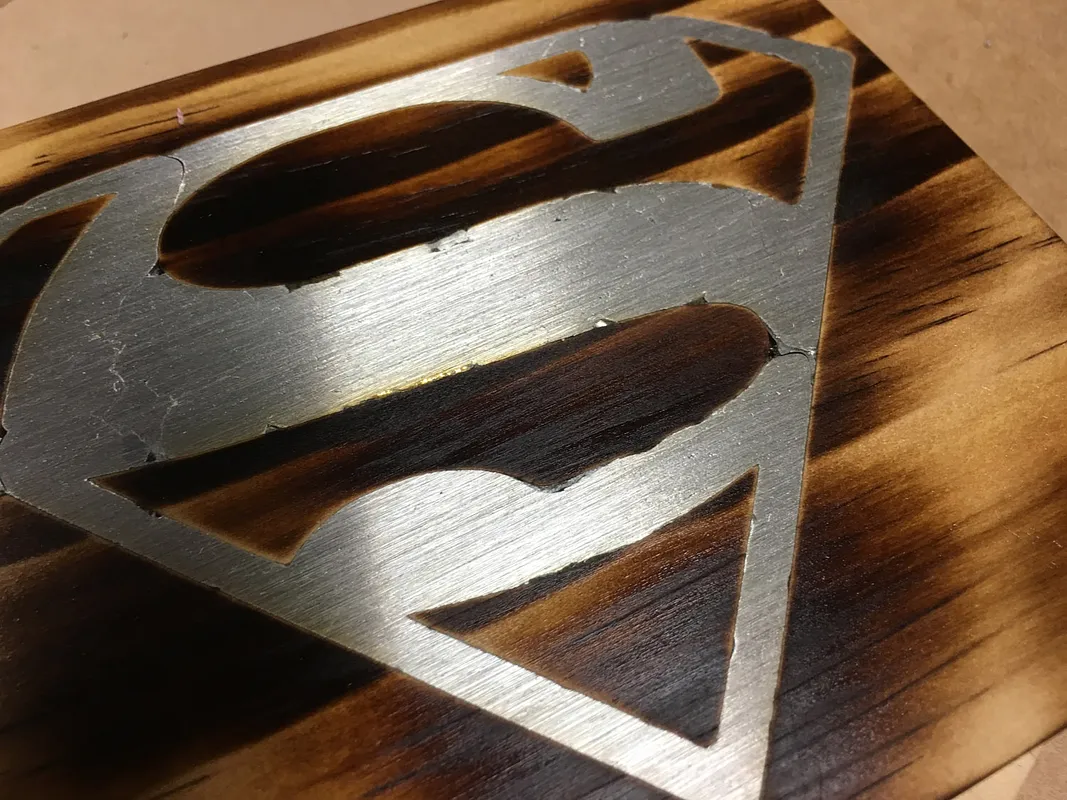
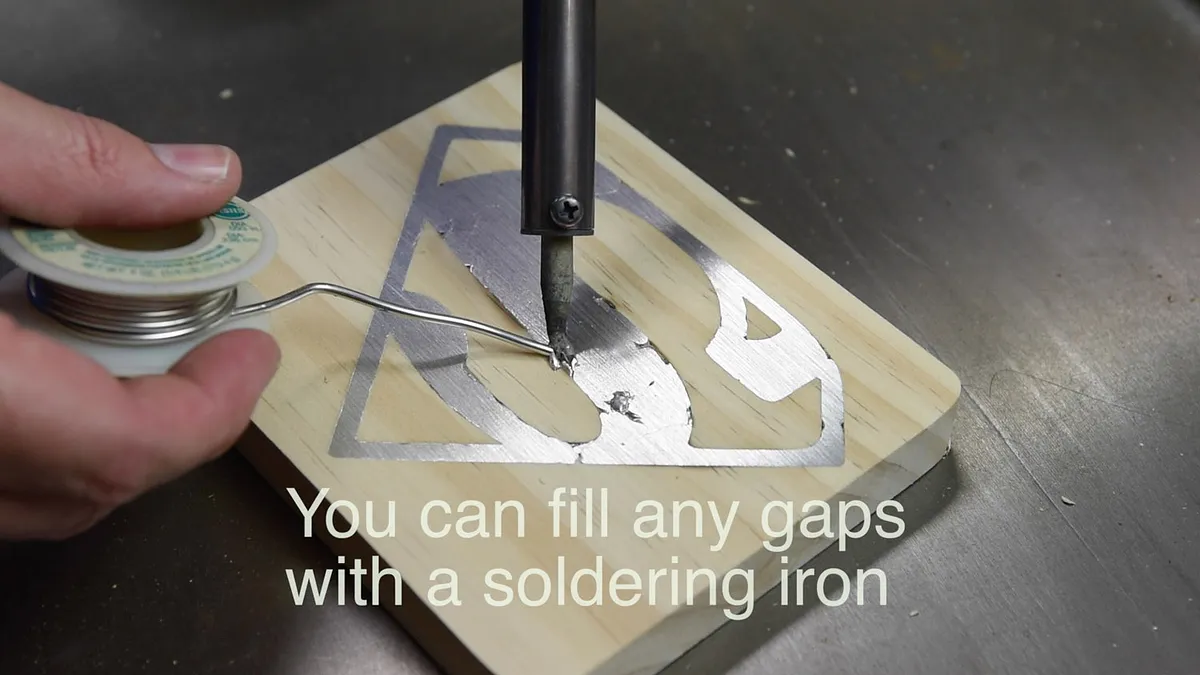
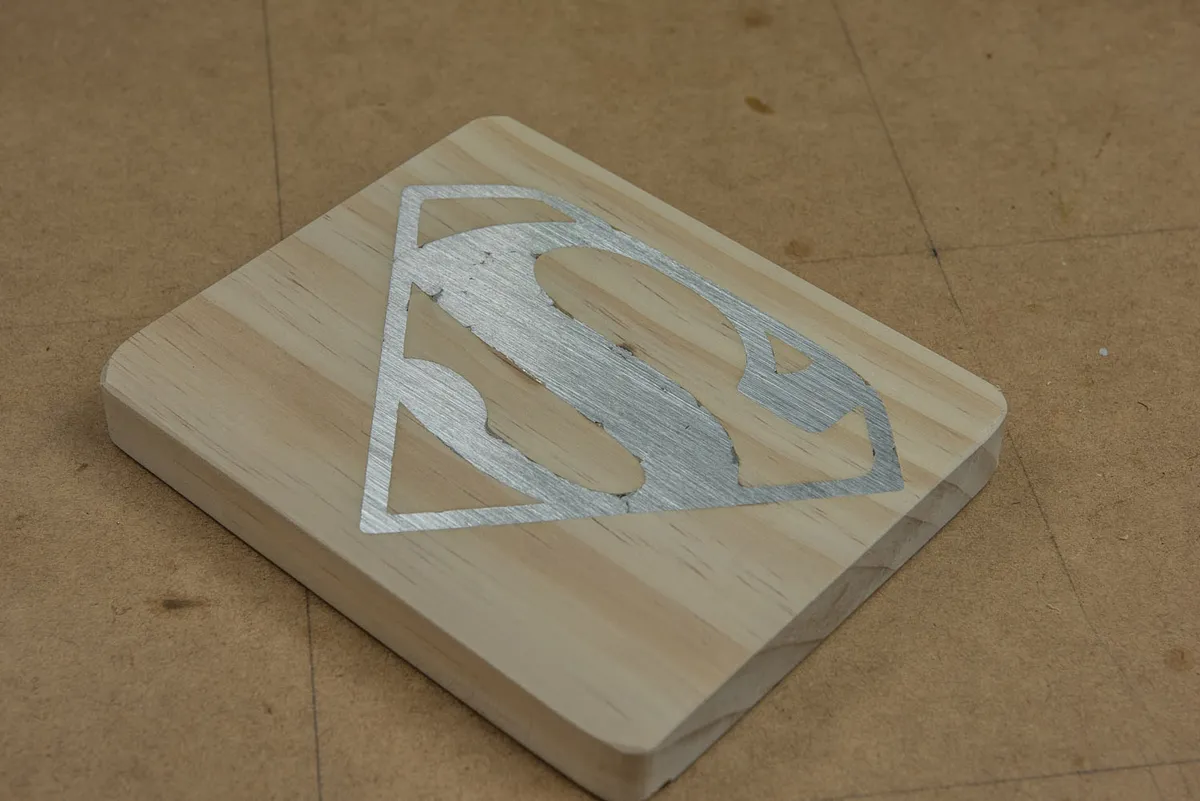
Sand the Solder flat
Using a belt sander to sand down the excess solder it did a pretty good job of quickly removing material, you can finish it off with a random orbit sander and some hand sanding to give it a bit of a polished look.
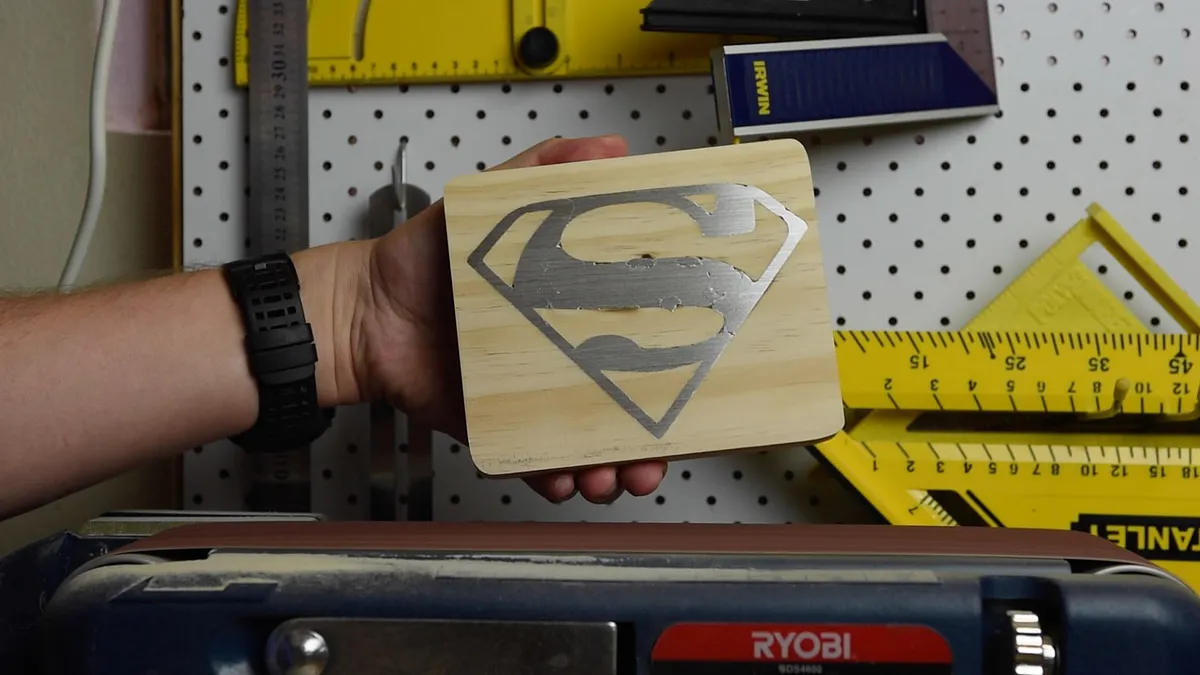
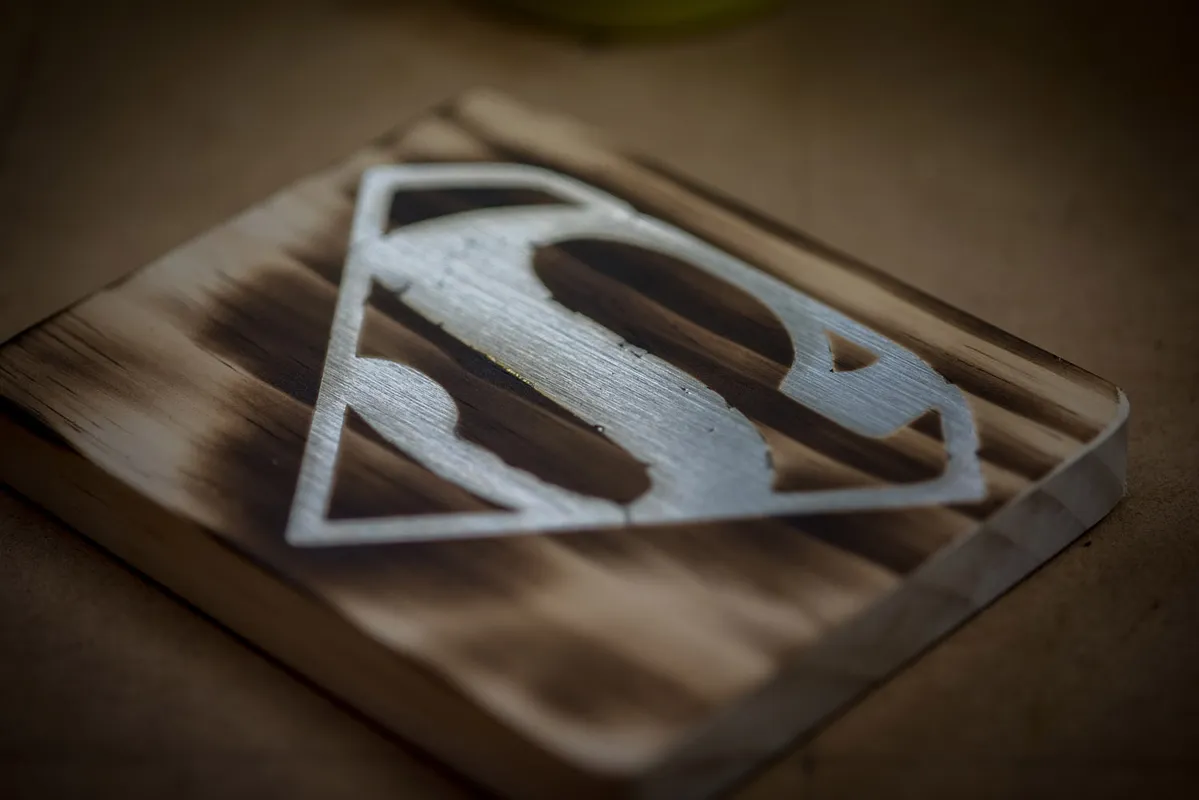
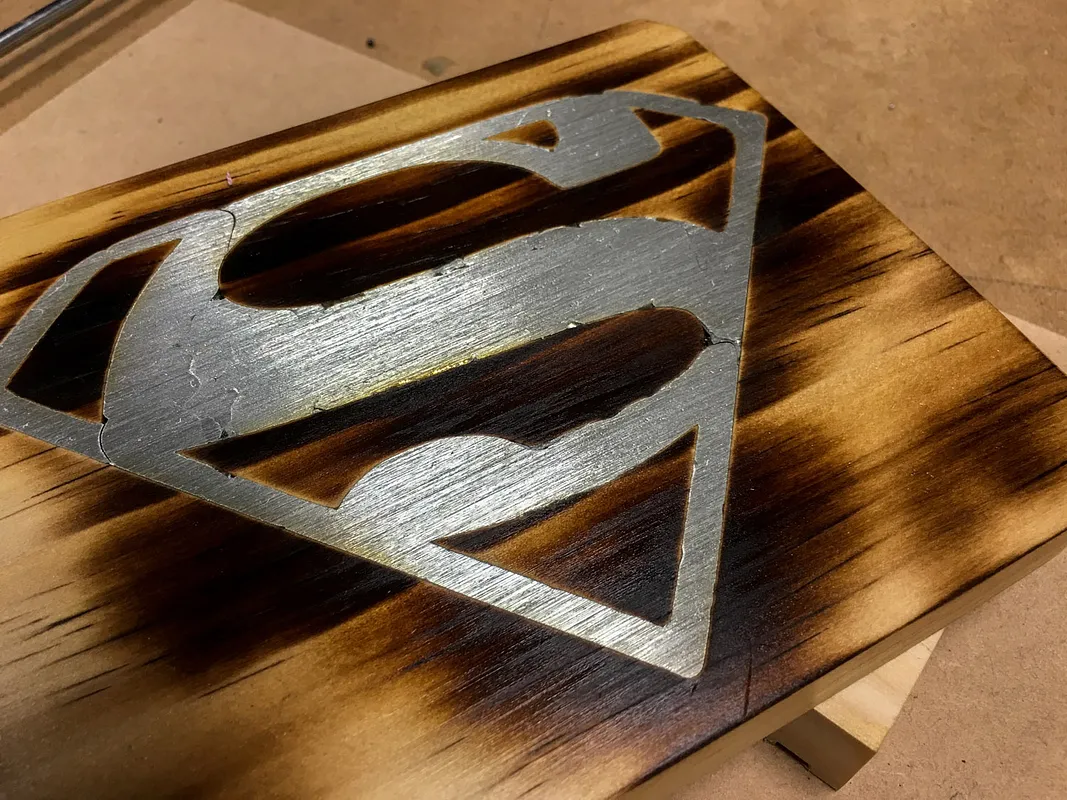
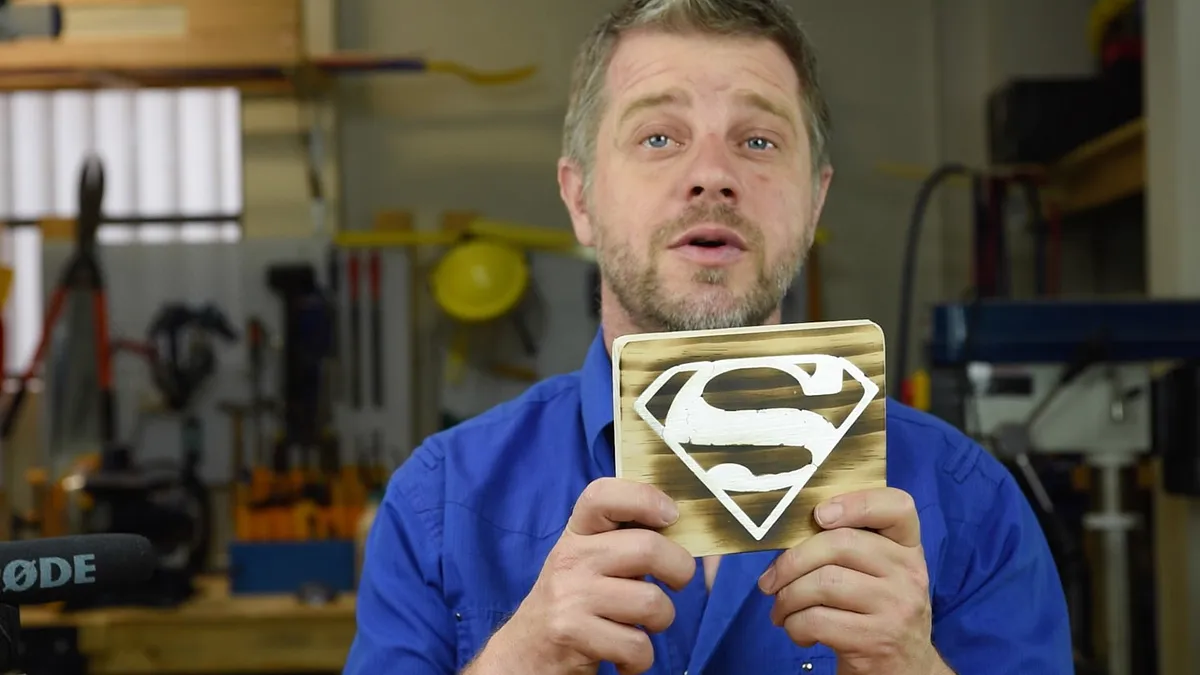
Burn it baby
I used a blowtorch to burn the wood around the Superman logo which looked pretty cool, you could also stain the wood if needed. I then used Minwax wipe on poly to finish it off.


Comments
Looks great! Do you have any estimate of how much solder it took to fill your piece?
Christian L'Orange · March 16, 2016
Suggestion: Look on Amazon for metal powders for the 'cold casting' crowd. You can find bronze, copper, aluminum, stainless. Mix this into a good 2 part epoxy like System Three T-88. Far easier than solder for metallic inlay look.
Richard Remski · October 31, 2016
what type of solder did you use?
Travis Santistevan · November 14, 2016
Nice and a great idea. You inspired me!
Jay Fonville · March 16, 2017