We use cookies to personalize content, interact with our analytics companies, advertising networks and cooperatives, and demographic companies, provide social media features, and to analyze our traffic. Our social media, advertising and analytics partners may combine it with other information that you’ve provided to them or that they’ve collected from your use of their services. Learn more.
to Share — to copy, distribute and transmit the work
to Remix — to adapt the work
to make commercial use of the work
Under the following conditions:
Attribution — You must attribute the work in the manner specified by the author or licensor (but not in any way that suggests that they endorse you or your use of the work).
With the understanding that:
Waiver — Any of the above conditions can be waived if you get permission from the copyright holder.
Public Domain — Where the work or any of its elements is in the public domain under applicable law, that status is in no way affected by the license.
Other Rights — In no way are any of the following rights affected by the license:
** Your fair dealing or fair use rights, or other applicable copyright exceptions and limitations;
** The author's moral rights;
** Rights other persons may have either in the work itself or in how the work is used, such as publicity or privacy rights.
Hello Jason,
I tried to make this project with the X-Carve (I am a beginner) and it didn't turn out for me. Not sure what I did wrong. I am going to try it again but I wanted to ask what bits you used? Thanks for your assistance.
Ed
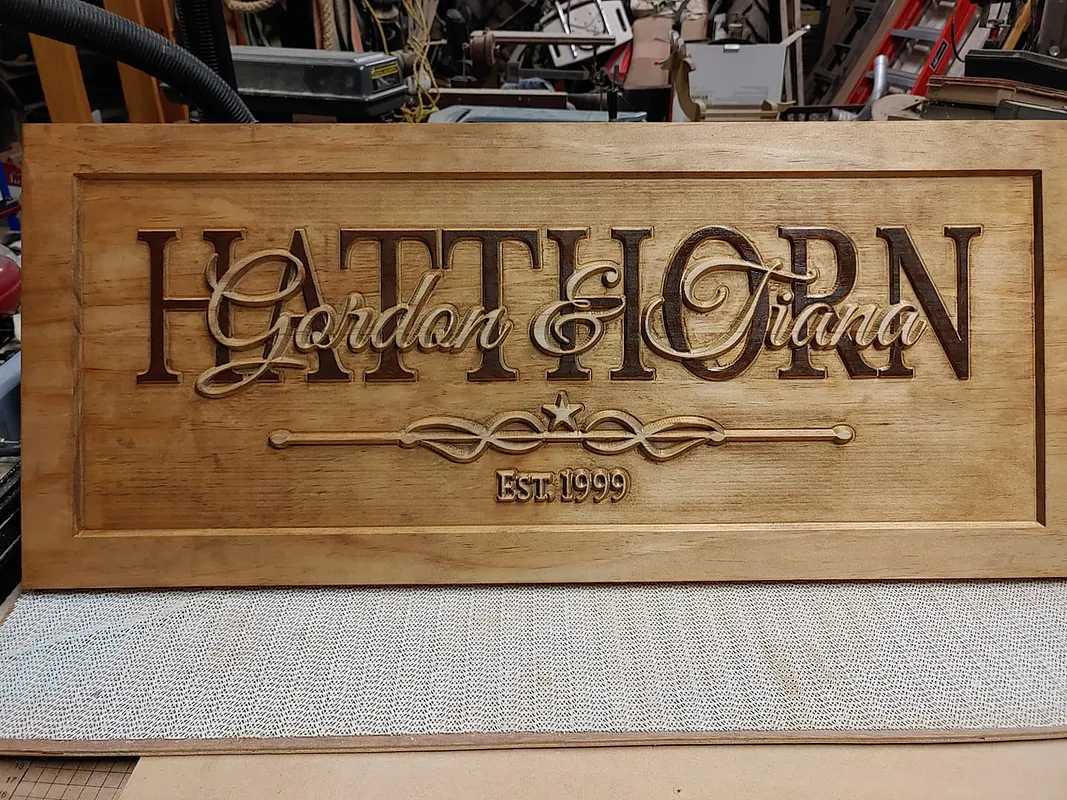
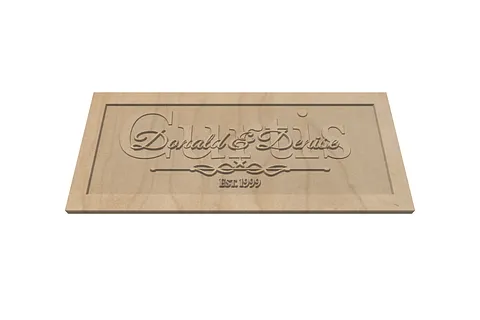
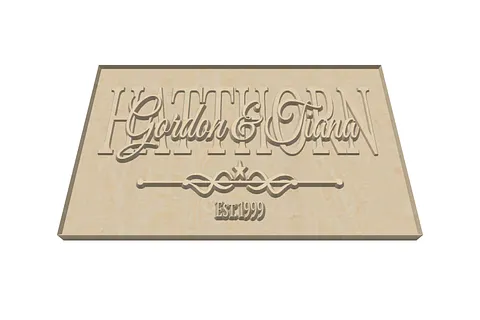
30" x 13" (yes you can cut more than 29.77" on an xcarve)
1/4" downcut 2 spiral endmill for roughing.
60 degree vbit for detail.
I typically buy a 3/4" x 7 1/4" x 6' board, cut it in half, joint the mating ends, and glue it up.
For cleanup after the carve, I use a magnifying headset and an exacto knife first. On a lot of the curves there will be some fuzzies that are easily removed, just tedious. Removing them helps the stain look a lot more even.
Then I'll go in with a piece of 120 grit and sand most everything. For tight areas, I'll superglue a piece strategically so it will fit in the corners. The superglue on the back of a chunk of 5" disc sandpaper can really stiffen it up into a fine point.
Once everything is sanded smooth, I'll use prestain to prevent blotchy coloring.
Then it's Varathane classic golden oak. This is the thin penetrating style.
Immediately after, I'll use Varathane premium dark walnut and some paint brushes to carefully paint the last name.
After about 24 hours and the stain is dry, I'll use 120 grit on my orbital to sand off the top of the uncarved stuff, first names, 'established', and the design.
Then it's 3+ coats of Deft lacquer. That stuff is amazing and easy to apply.
Some errors that you will encounter:
I haven't had a single one of these work perfectly in regards to z-probing correctly. I always have to run a toolpath again. Still not sure how this gets messed up. I've tried many different methods.
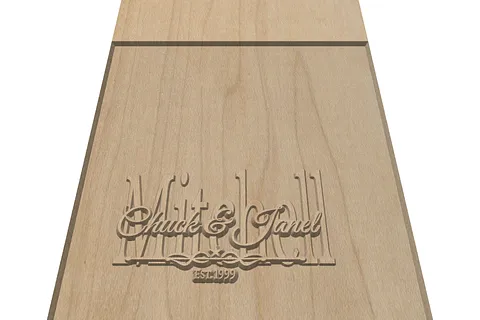
Blowing out the delicate ends. I slow down the detail carve when it gets to the thin tips of letters and for all of the 'established' section. When an end gets blown out, I just sand it at an angle. As long as it's bare wood like the rest of the word, no one will notice it's not flat like the rest.
Jason, Wonderful information, I have a question for you, I have the Shapioko 4 Carvide 3D, unfortunately I can't connect my CNC with the program, in this case, how can I work the bit changes? Do you know if when I download my g-code it will automatically download these bit changes too? Thank you.
Hello, I have a friend that has a cnc. He is a ag instructor for a high school and has offered to make a couple signs for my granddaughters for their 4H projects. I just want to design the sign and send him the file to do. Can I do that here with you?


Comments
Hello Jason, I tried to make this project with the X-Carve (I am a beginner) and it didn't turn out for me. Not sure what I did wrong. I am going to try it again but I wanted to ask what bits you used? Thanks for your assistance. Ed
EDWARD BLACKPro · November 23, 2020
30" x 13" (yes you can cut more than 29.77" on an xcarve) 1/4" downcut 2 spiral endmill for roughing. 60 degree vbit for detail. I typically buy a 3/4" x 7 1/4" x 6' board, cut it in half, joint the mating ends, and glue it up.
Jason Peltier · November 23, 2020
For cleanup after the carve, I use a magnifying headset and an exacto knife first. On a lot of the curves there will be some fuzzies that are easily removed, just tedious. Removing them helps the stain look a lot more even.
Jason Peltier · November 23, 2020
Then I'll go in with a piece of 120 grit and sand most everything. For tight areas, I'll superglue a piece strategically so it will fit in the corners. The superglue on the back of a chunk of 5" disc sandpaper can really stiffen it up into a fine point.
Jason Peltier · November 23, 2020
Once everything is sanded smooth, I'll use prestain to prevent blotchy coloring. Then it's Varathane classic golden oak. This is the thin penetrating style. Immediately after, I'll use Varathane premium dark walnut and some paint brushes to carefully paint the last name.
Jason Peltier · November 23, 2020
After about 24 hours and the stain is dry, I'll use 120 grit on my orbital to sand off the top of the uncarved stuff, first names, 'established', and the design. Then it's 3+ coats of Deft lacquer. That stuff is amazing and easy to apply.
Jason Peltier · November 23, 2020
Some errors that you will encounter: I haven't had a single one of these work perfectly in regards to z-probing correctly. I always have to run a toolpath again. Still not sure how this gets messed up. I've tried many different methods.
Jason Peltier · November 23, 2020
Blowing out the delicate ends. I slow down the detail carve when it gets to the thin tips of letters and for all of the 'established' section. When an end gets blown out, I just sand it at an angle. As long as it's bare wood like the rest of the word, no one will notice it's not flat like the rest.
Jason Peltier · November 23, 2020
AWESOME! Thank you!
EDWARD BLACKPro · December 06, 2020
I don't see the 1/4" downcut 2 spiral endmill for roughing bit on Inventables bit list. Where'd you buy yours?
Anita Chang · March 15, 2021
Anita: It's a little pricey, but it's a workhorse. The Amana 46421-K. toolstoday.com/v-14076-46421-k.html
Jason Peltier · March 15, 2021
Aloha, Jason. I was looking into the Amana bits. Do they last long?
Anita Chang · March 16, 2021
Anita, ive used both Seinci Labs bits as well as Amana, the Amana bit easily out lasts and out preforms the later.
Travis LangloisPro · January 03, 2022
lots of great info. still learning basic skills but thank you
cmckercherPro · February 12, 2022
great info from everyone, Thanks
DOUGPro · February 23, 2023
Jason, Wonderful information, I have a question for you, I have the Shapioko 4 Carvide 3D, unfortunately I can't connect my CNC with the program, in this case, how can I work the bit changes? Do you know if when I download my g-code it will automatically download these bit changes too? Thank you.
Ana Monrroy · March 10, 2023
hello can you tell what spindle speed you use ? and feed rate? thank you so much
Igor ParshynPro · April 17, 2024
Hello, I have a friend that has a cnc. He is a ag instructor for a high school and has offered to make a couple signs for my granddaughters for their 4H projects. I just want to design the sign and send him the file to do. Can I do that here with you?
Bruce AKIN · March 10, 2026