LED Fidget

Instructions
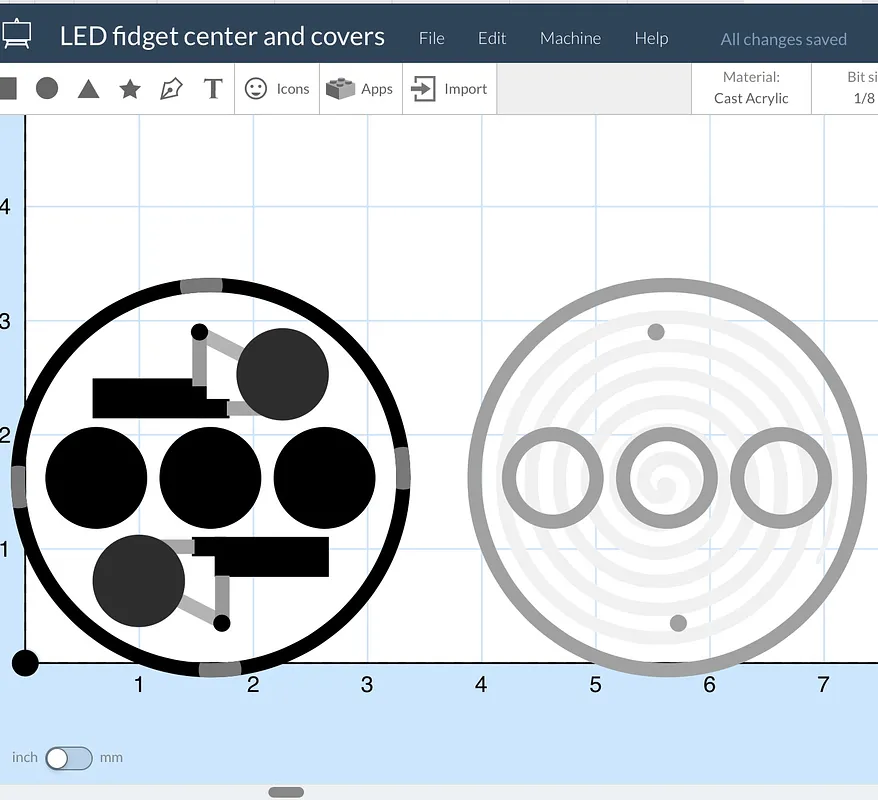
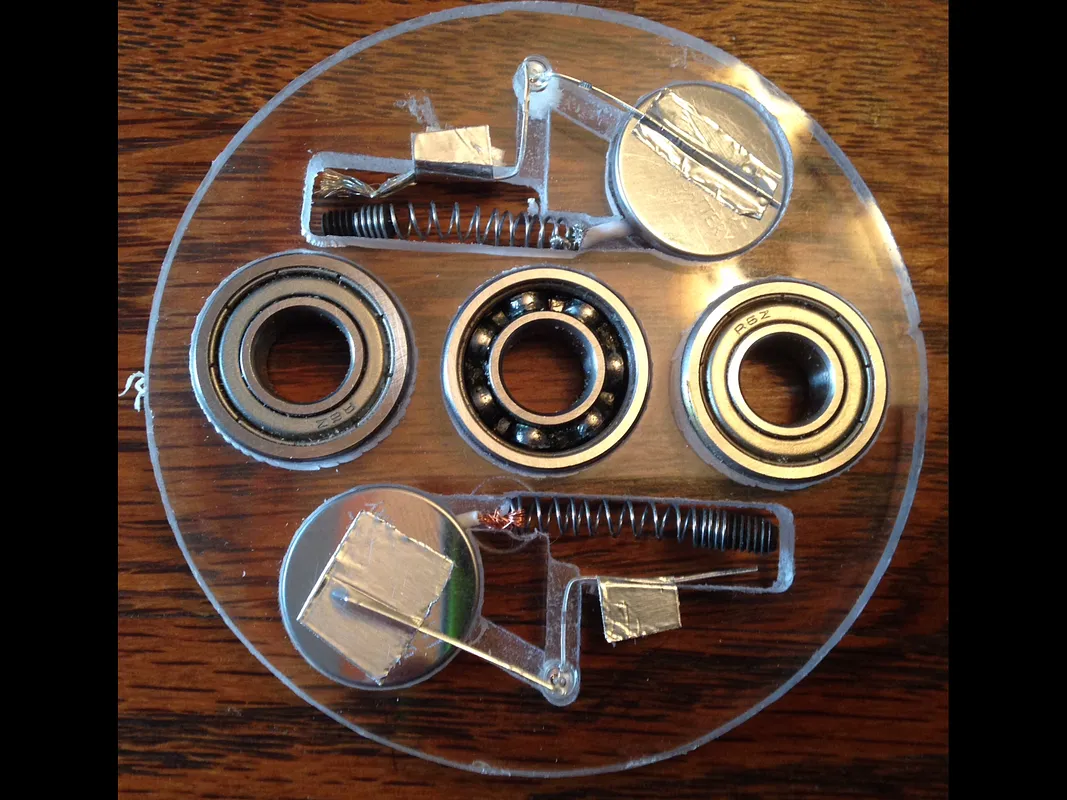
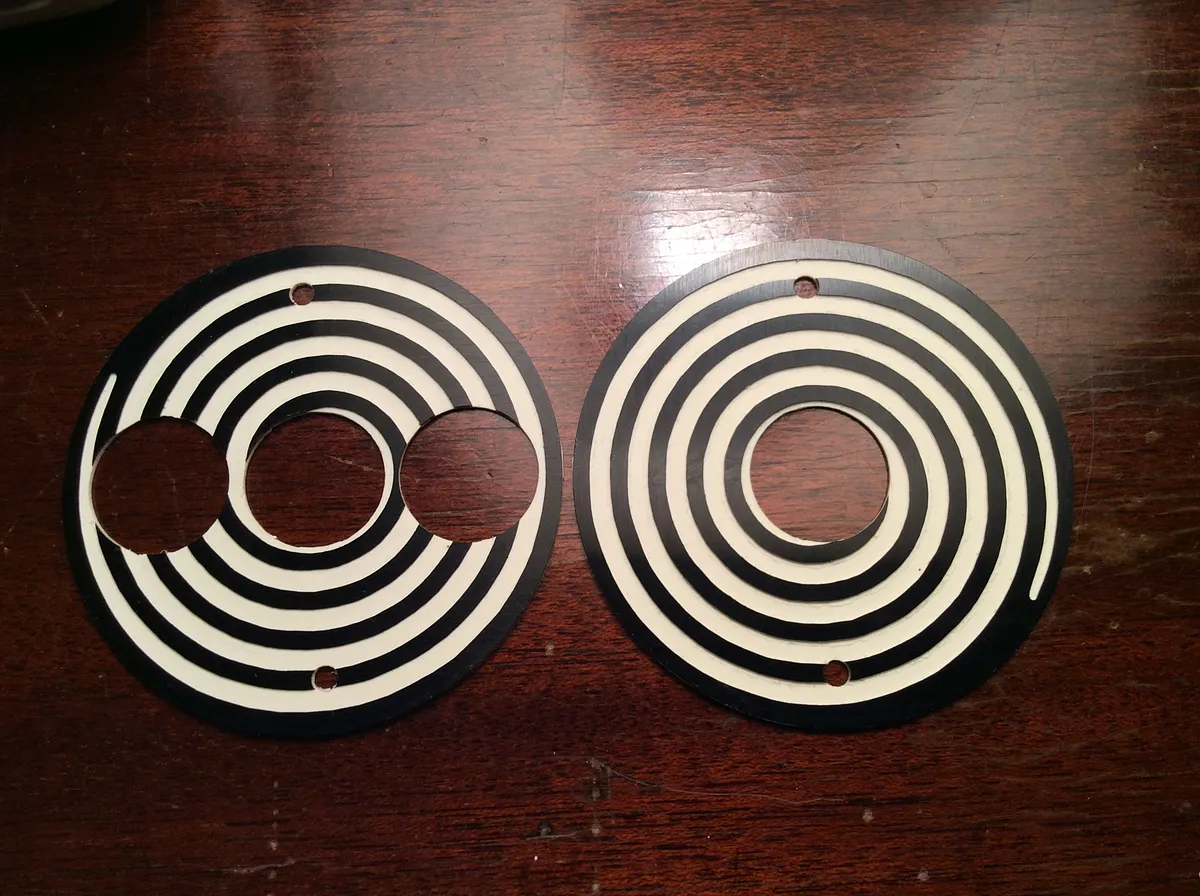
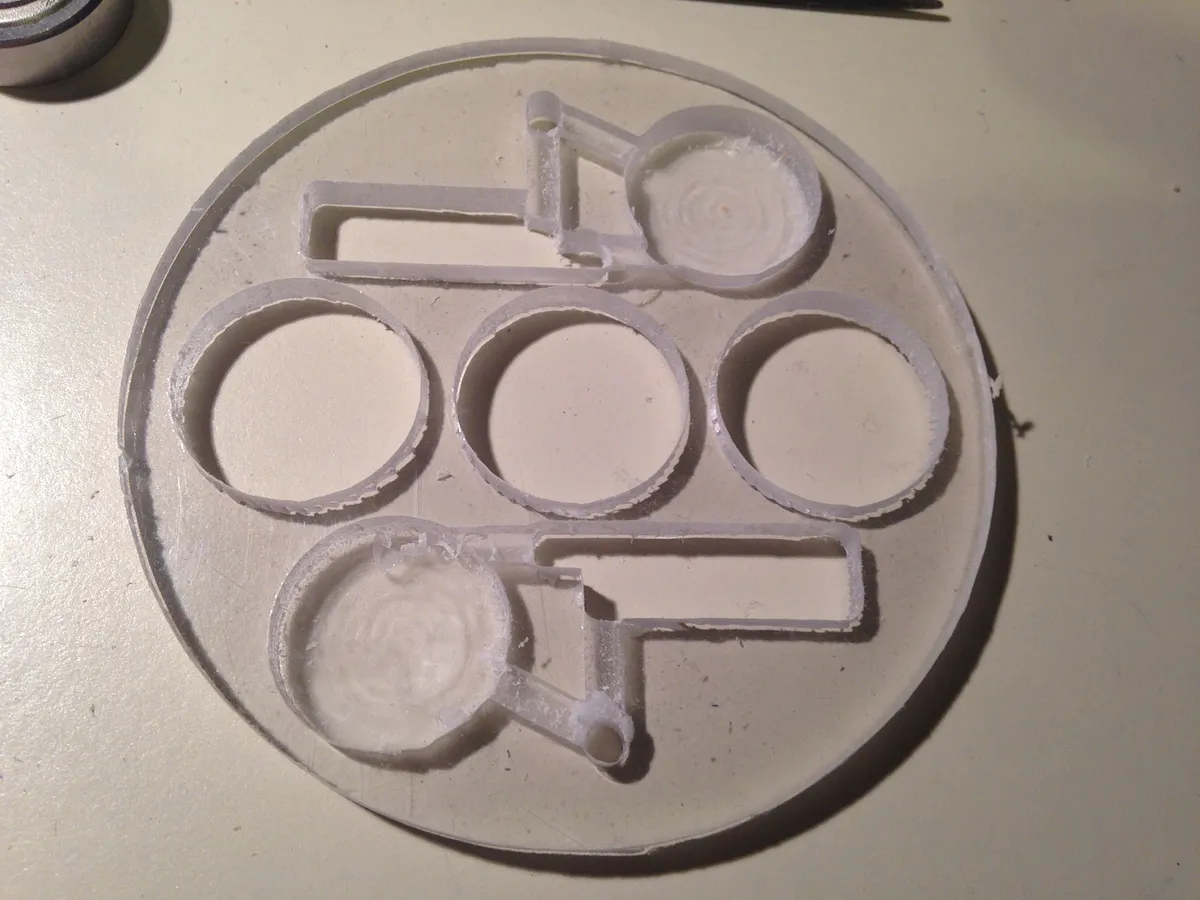
Cut pieces
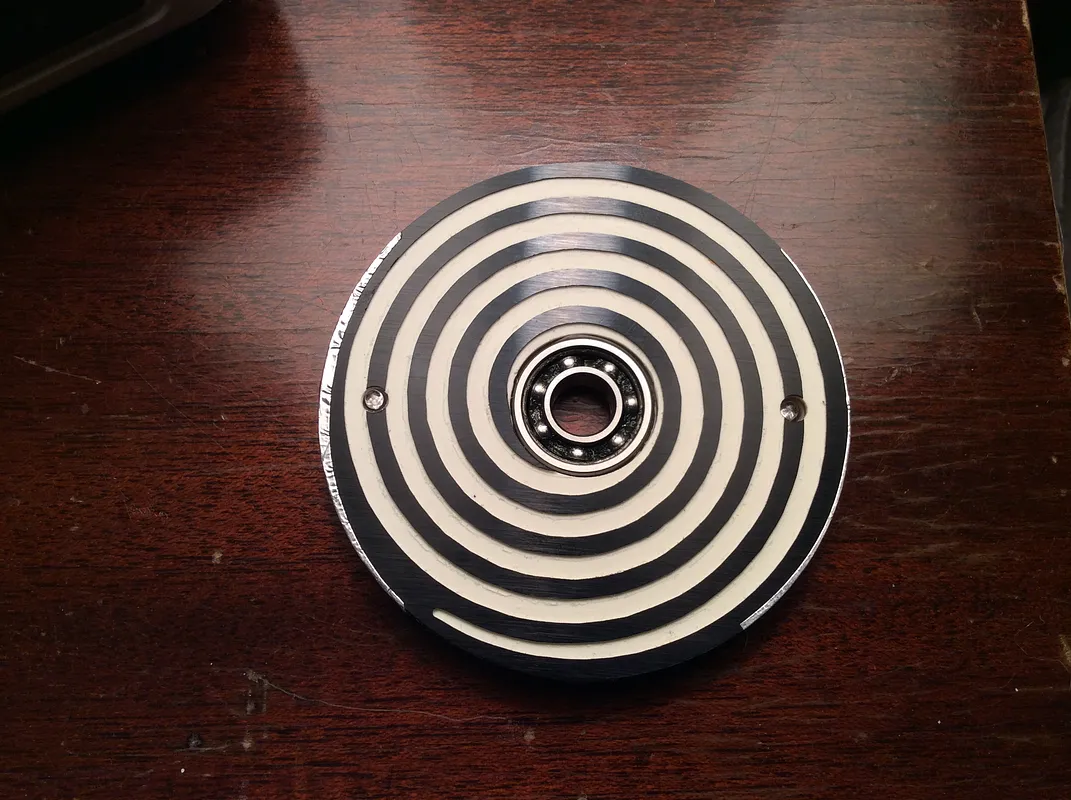
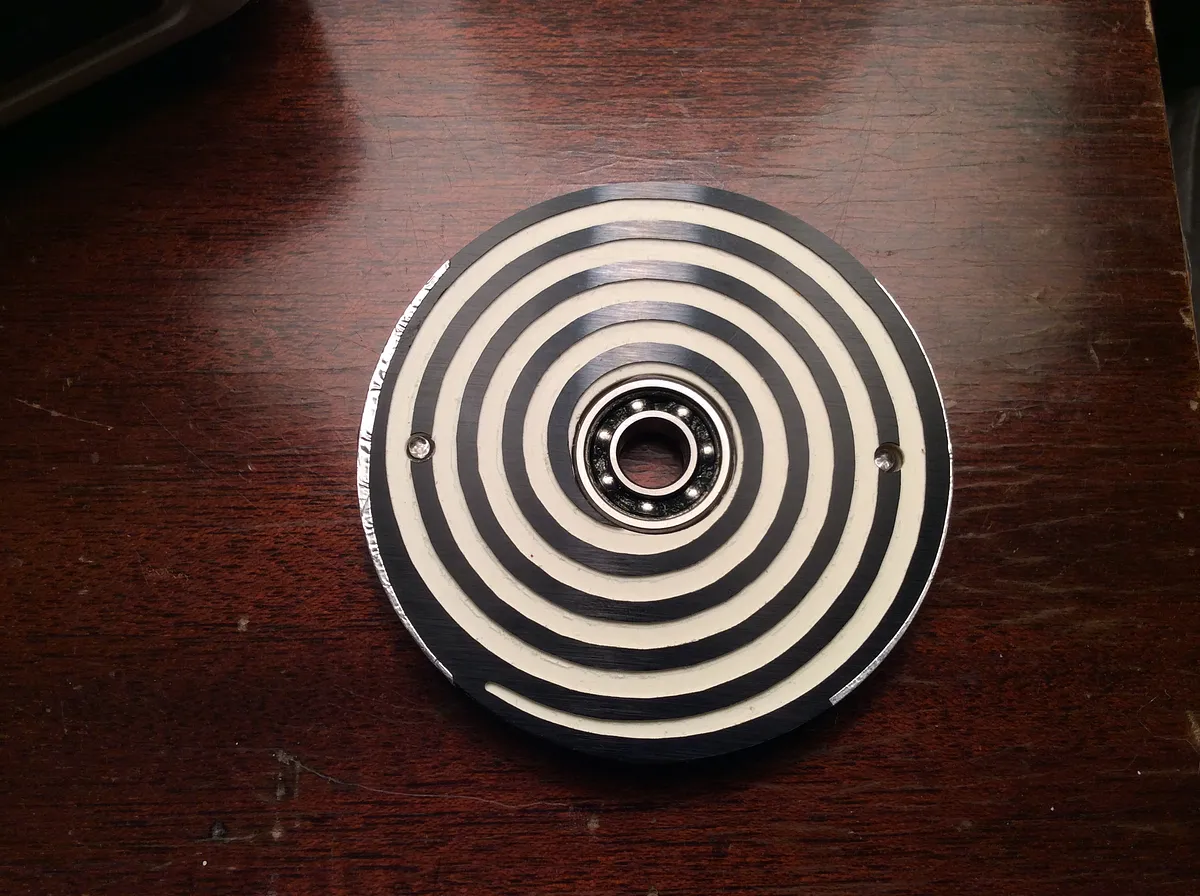
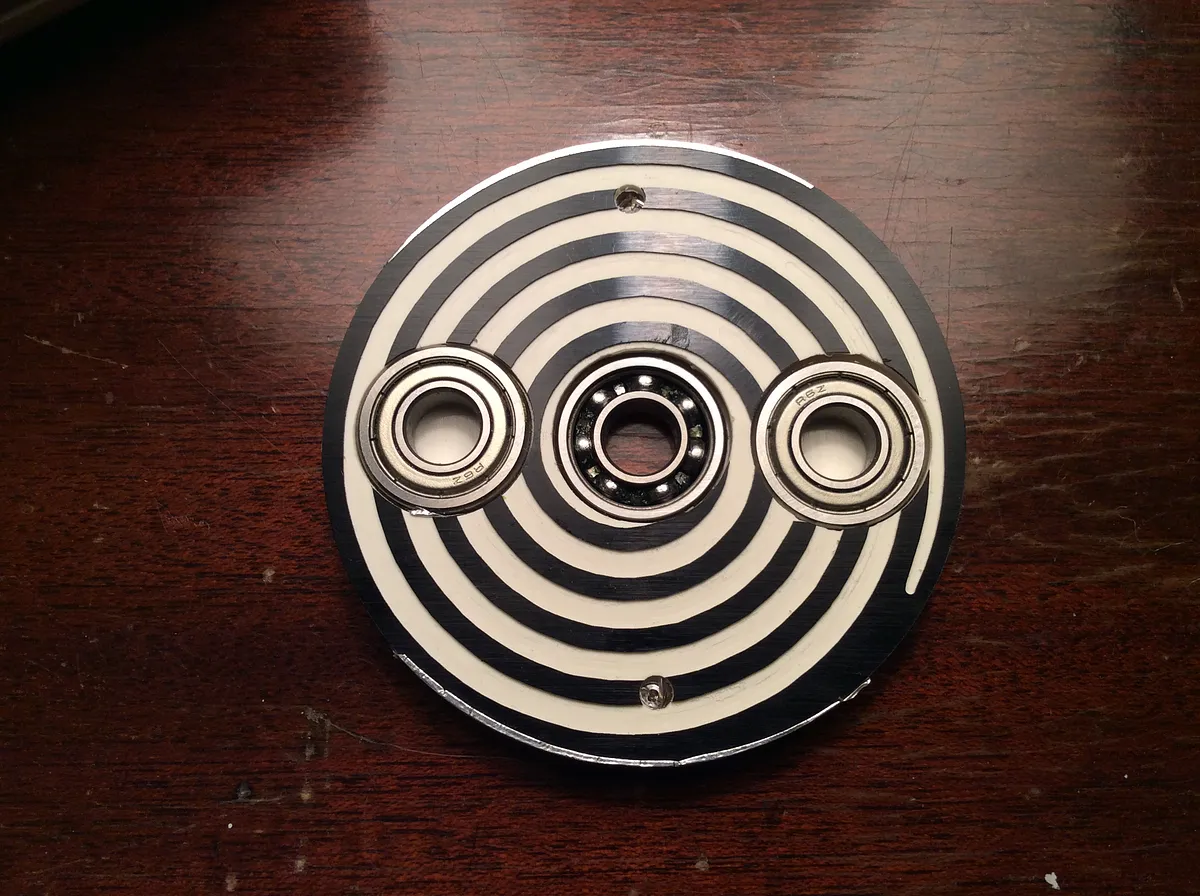
Cut center plate from acrylic using 1/8" two flute straight bit. Cut the covers from two color engraving plastic using 1/16" single flute upcut bit. Because the bearings were thicker than the center plate, I also cut opening in the back cover to accommodate them. If your acrylic is thicker you can skip the two outer bearing holes.
Wire LED circuit
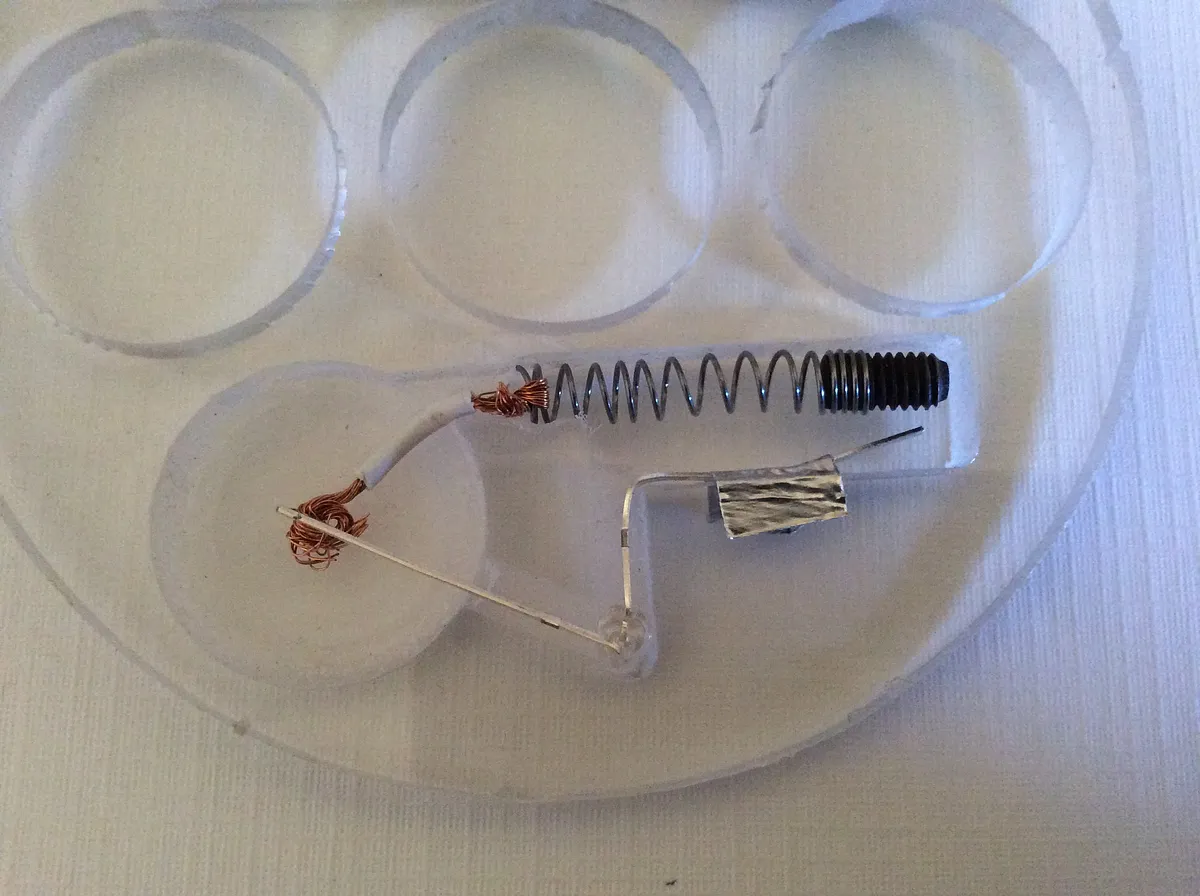
The LED circuit consists of three elements, the Battery (CR2032), an LED and the switch.
To make the spring for switch, remove a spring from an old ball point pen. Test fit the spring by pressing it in the small square extension to the rectangle opening, should be a tight fit. If not it can be wrapped with the foil tape later ( or adjust the design accordingly). Stretch the spring a bit to make it more flexible and cut it so it fits. Screw a set screw ( or screw with head cut off) into one end of the spring and test it again for length. The end should move freely.
Wire the switch by taking a short piece of wire, strip a short section at one end and slip it between a couple of loops on the spring. Twist the wire to secure it. At the other end of the wire, strip a longer section and create a ball. Wire should be long enough for the ball to reach the center of the circle cut for the battery.

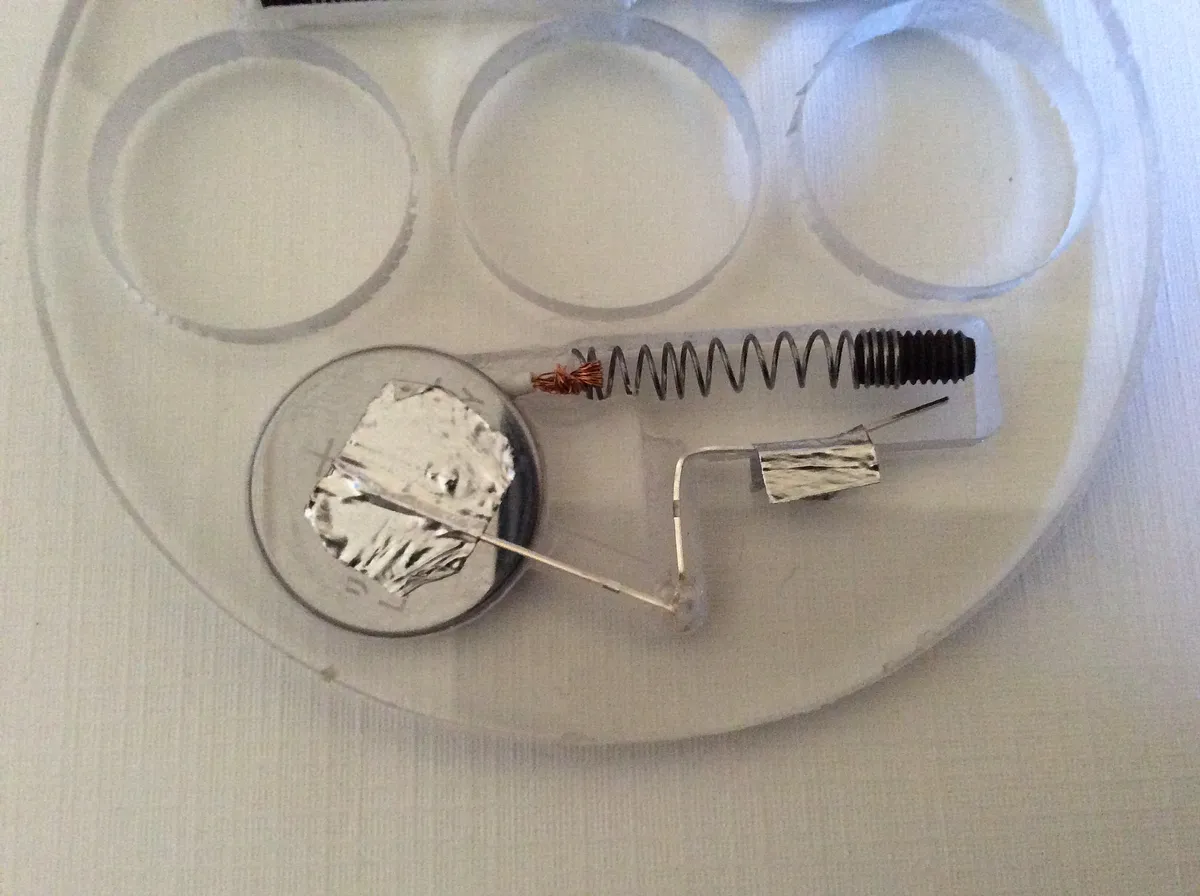
LED and battery assembly
Bend the long lead of the LED so it rests on top of the battery and the short lead run under the spring in the switch opening. Tape the lead to hold it in place.
Insert battery and test before installing cover plates
Install covers
Install the covers and attach with tape around edge
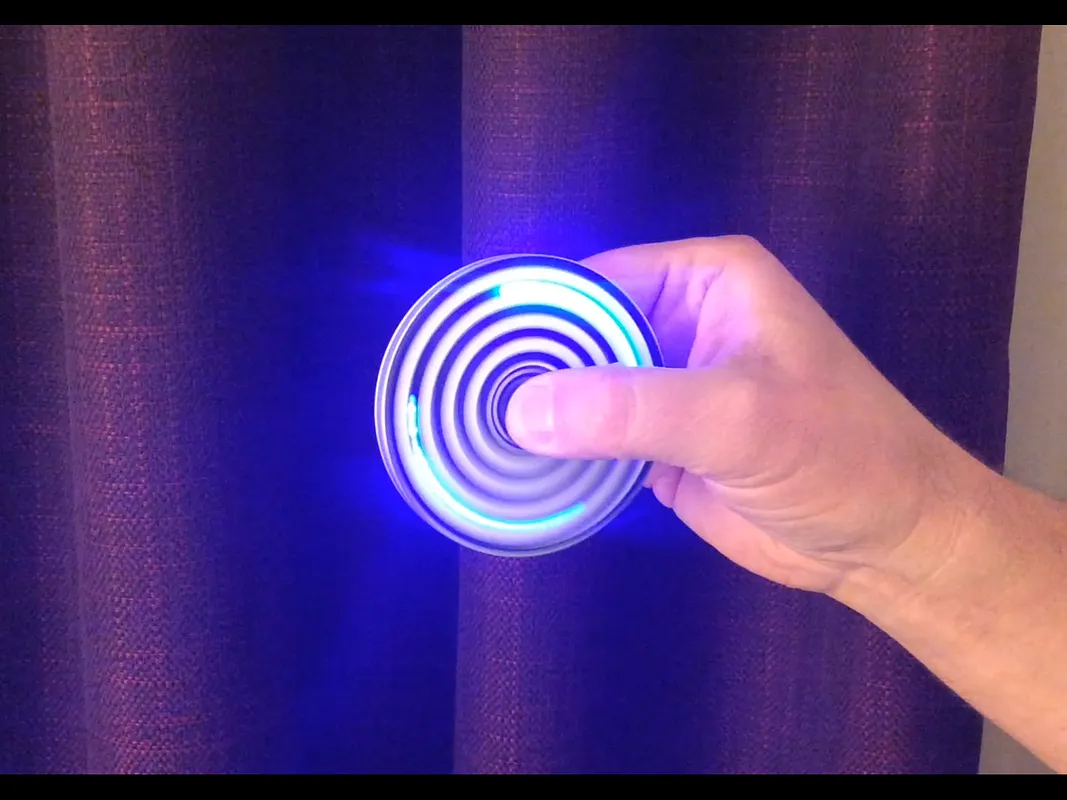
Spin it
Give it a test spin
Comments