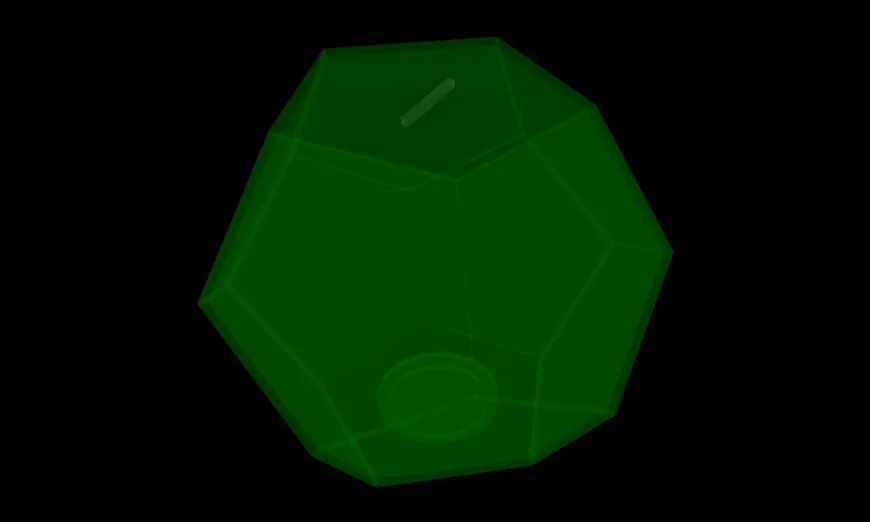
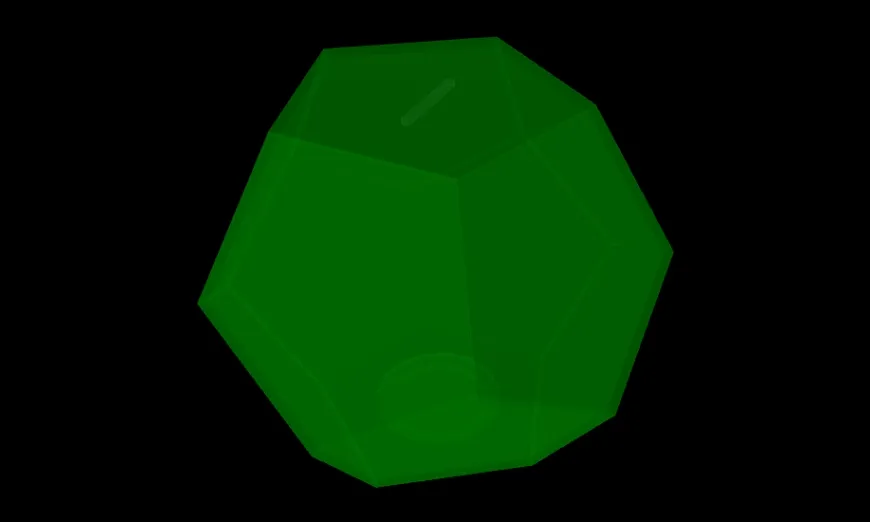
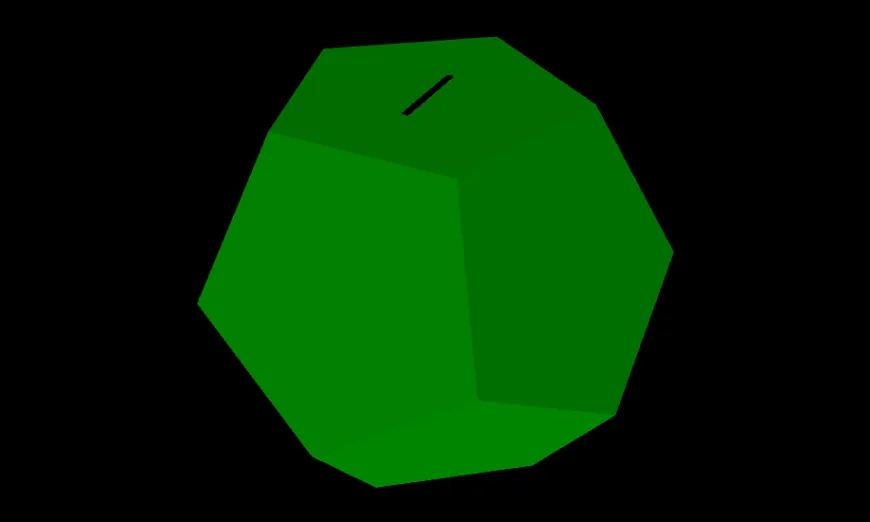
Acrylic D12 Coin Bank
Additional Materials and Notes
Additional Materials: * Acrylic Solvent Glue (Weld-On 3 or similar) * Fine grit wet sandpaper (~320-500) * Scotch Tape (Sellotape to those in the UK) * Clean cloth rag
Optional Materials * Needle file * Small piece of thin (<= 1/8in thick) craft foam * Contact Cement or Hot glue gun
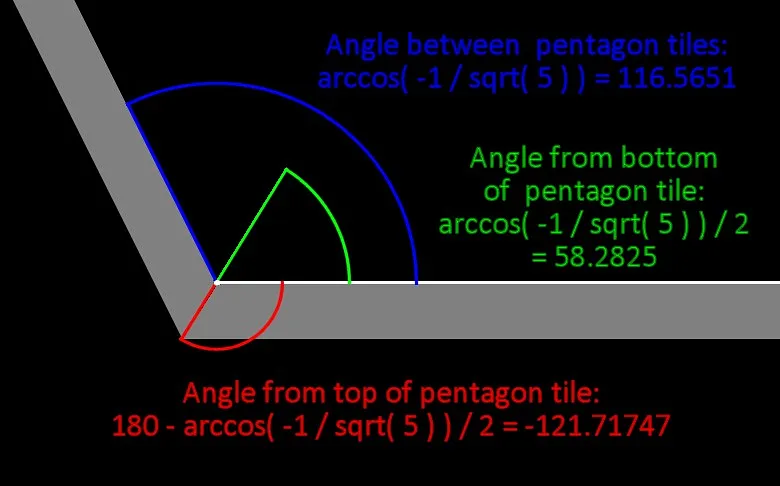
Notes: * CC licenses are a poor choice for design plans (Architectural precedent say the Copyright also applies to the products of plans) ** My Clarity Waiver: You may omit all license notices on Products of these plans. * "Front" (of the Acrylic) = "Bottom" (as placed on the CNC) = "Outside" (of the finished project) ** "Back" = "Top" = "Inside" * Unimportant (to this project) trivia, so that you don't have to look it up for related projects ** Diameter of Circulating Coins: < 38.2mm ** Thickness of Circulating Coins: < 3.4mm ** D12 height = Pentagon Radius * 2.61803~ ** Pentagon edge cut and join angles angles as pictured below
Acrylic / Machine Prep
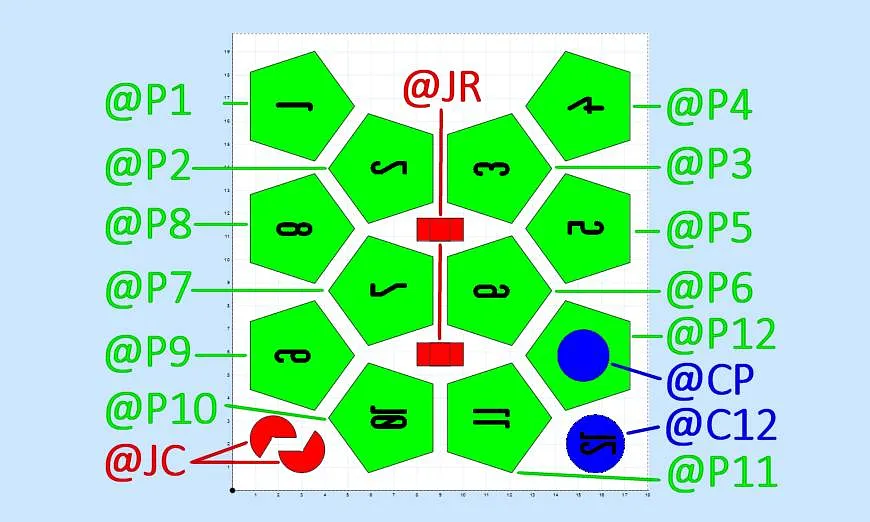
Secure to your CNC Table in the same orientation as listed in the cut files. If you are using an acrylic sheet that has a distinct facing, make sure the "back" side is facing up (this will be the inside)
Place the correct bit in your spindle (1/8in Upcut Endmill)
Zero Your Machine
Note: If your acrylic's 'front' has a protective film, painters tape + CA glue is the preferred hold down method. If it doesn't, double sided tape should be used since CA glue vapors might cause surface clouding. You can use tabs instead, but this will probably take more sanding effort than it's worth.
Cutting And (Optional) Sanding Jig Assemby
(Optional) Sanding Jig Cut (~4 minutes)
** If you already have this from a previous project (or have a method of getting the correct angle listed in notes at top) then you can skip to Step 2 ** Run the "Optional Sanding Jig" workpiece from Easel. ** When it finishes, remove just the 4 cut pieces (but not the acrylic sheet they're cut from)
Run the "Rough Cut Pass" workpiece from Easel. (~29 minutes)
(Optional) Assemble the Sanding Jig
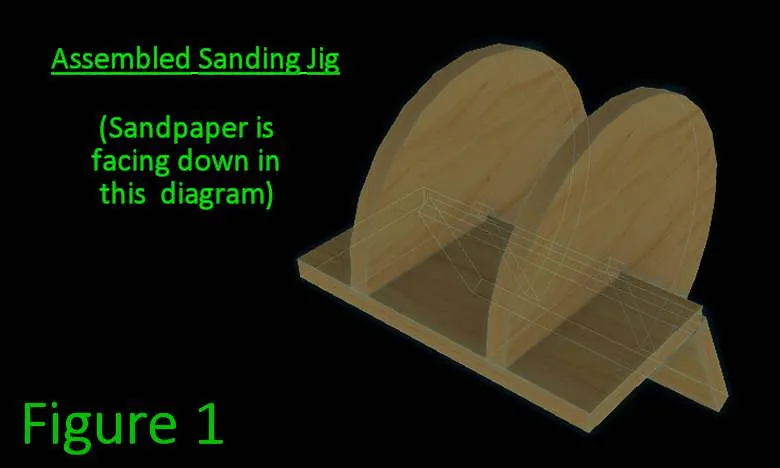
** If you already have this from a previous project (or have a method of getting the correct angle listed in notes at top) then you can skip to Step 4 ** Remove any protective films from the 4 Sanding Jig parts (2x @JC + 2x @JR). [1] [2] ** Place one rectangular @JR piece on the edge of your table, grooves facing up. ** Place a semicircle @JC piece into each groove at 90 deg, and apply acrylic glue (using capillary method). Repeat for the other flat piece. The flat pieces will overlap a bit in the center, this is expected. See Figure 1 below for what it should look like. ** Jig should be stiff enough to use after all other parts are cut and shaped. If the glued joints are still flexible, wait up to an additional hour. ** place a piece of sandpaper on the open face of the @JR part that rests a bit under the other.
When the "Rough cut Pass" is finished, Change Bits to the 60 deg v-bit
Re-zero your Z-Axis only
Run The "Shaping Pass" workpiece from Easel. (~23 minutes)
fn1.Note: When assembling the Sanding Jig, if the protective film is plastic, you can try leaving it on to test if the acrylic glue will bond to it. if it doesn't then you can leave it on further parts until instructed to check that it's removed (this can help avoid marring or spills of glue while working).
fn2.Note: During assembly of the Sanding Jig is a good time to test if your sandpaper is fine enough to get a clear acrylic bond. You can lightly sand the grooves and flat edges of the semicircles before gluing. if it comes out less than perfect you should use a finer grit on the rest of the parts.
Estimated time: 60 minutes
Edge Sanding
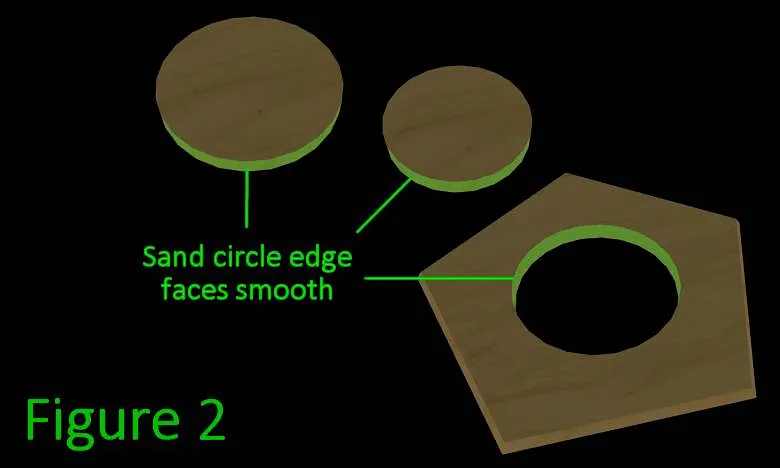
The two circular pieces (@CP & @C12) and the circular inset (@P12) can be hand sanded [Figure 2]. These will touchable (but mostly hidden) edges so use your discretion for smoothness/polish.
[Optional] The numbers may have some small peaks in the corners, I like them, but a needle file can take these out quickly if you prefer.
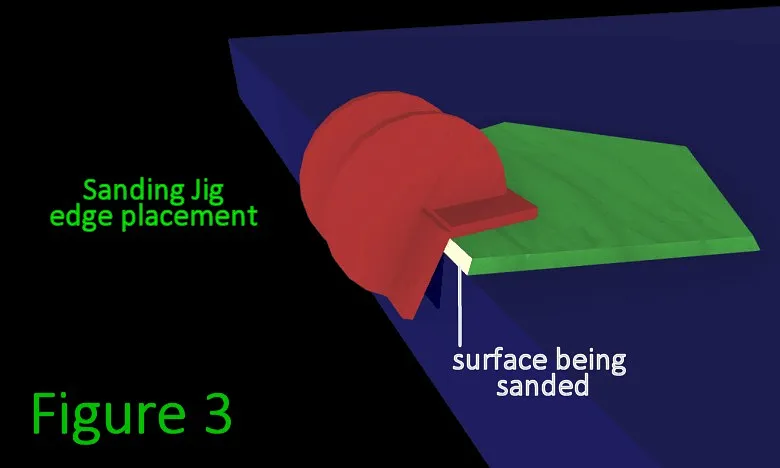
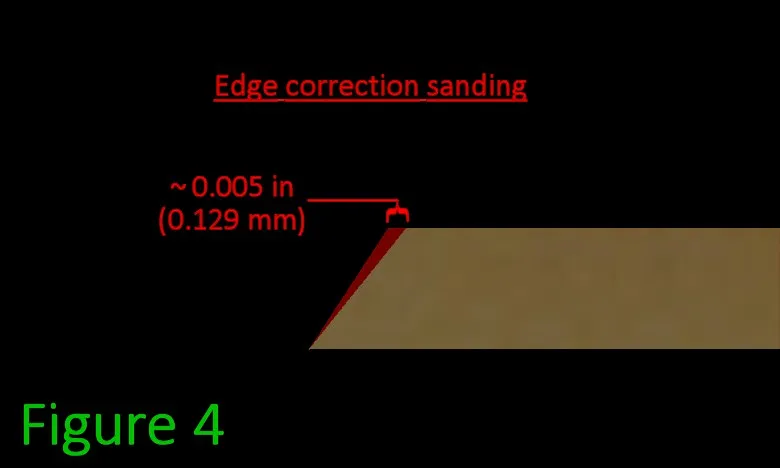
For each pentagon (@P1-@P12), place an edge at the edge of the table [Figure 3]. If there is no protective film on top place a piece of paper over it so that the sanding jig does not scratch the top. Use the sanding jig to form the edge to the correct angle. you're only taking the top edge in by ~5/1000in (0.129mm) [Figure 4] [3]. Repeat for all outside edges of each pentagon.
Make sure to wipe down all sanded edges with a damp cloth.
fn3.Note: You may be wondering, "why didn't we just cut the exact angle to begin with?". If we try to cut it as a contour shape we won't get as clean of an edge (bad for gluing), and that method takes more time than the sanding does. It's possible to use adjustable v-bits but they are bulky and not quite precise enough, and are very expensive (as are custom v-bits). It may seem like a small amount, but it really makes a difference in glue bond clarity and strength. For thicker pieces the difference results in larger visible gaps on the outside edges if not corrected.
Estimated time: 20 minutes
Glue Up
The actual work time of this section is short, but minimum glue drying times may be longer depending on different factors
Check that you've removed any protective film from the top of the small circle @CP, and the bottom of the large circle @C12.
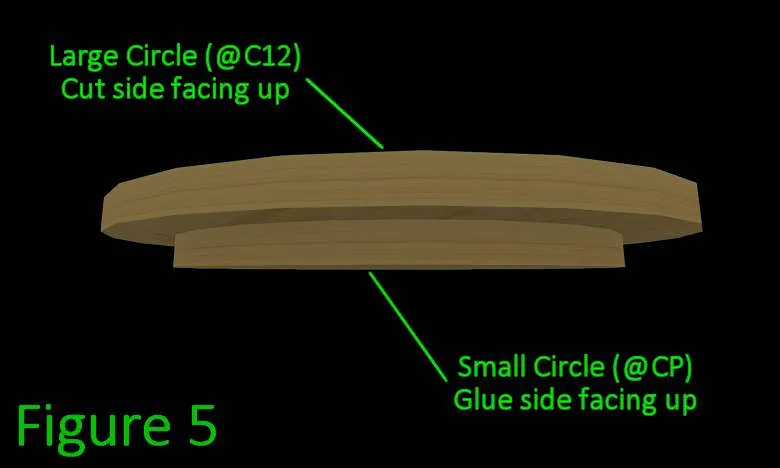
Soak the top of the small circle in the acrylic glue (~3-5min), then place the soaked surface in the center of the bottom side of the larger circle and allow to dry [Figure 5].
Remove any protective film from all pentagons
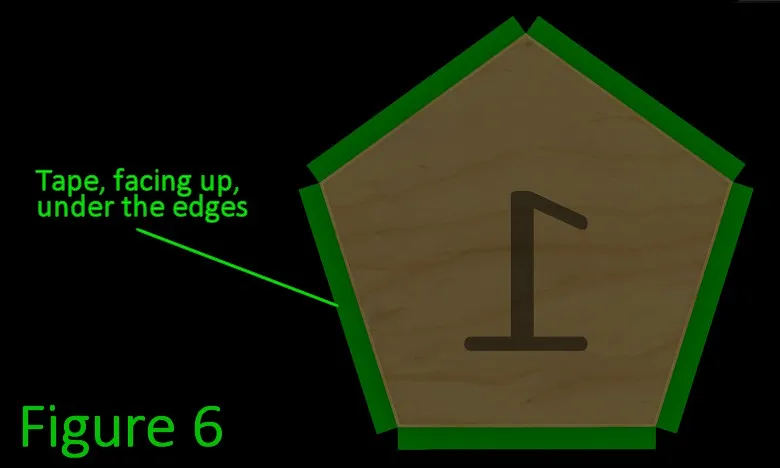
Place clear tape halfway overlapping all the bottom edges of pentagon @P1 [Figure 6].
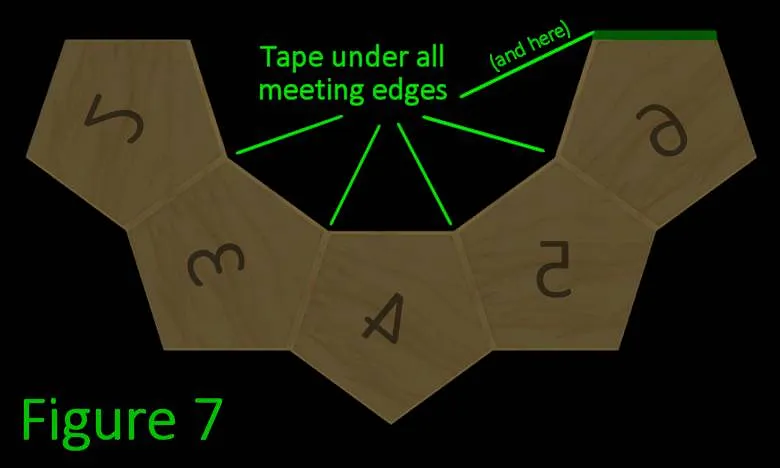
Place pentagons @P2 - @P6 in the pattern shown in [Figure 7], being careful to match up their edges exactly. Place a piece of clear tape on the bottom face of each matching edge.
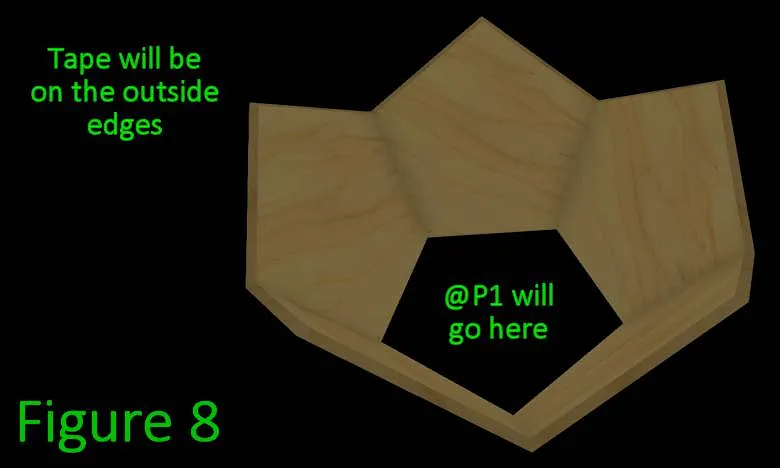
Folding inward match the edges of pentagons @P2 & @P6 [Figure 8].
Carefully place pentagons @P2 - @P6 over pentagon @P1, and tape those edges up.
Check to make sure all edges line up perfectly flush, adjust if necessary.
Apply acrylic glue from the inside (using the capillary method), starting around pentagon @P1, and then doing the edges between @P2 - @P6.
Check the open edges with a remaining pentagon to ensure the glued parts are in the proper alignment, adjust with light pressure if needed and allow to dry 5 mins. After 5 mins, test if it sags when resting it on one of the other faces, repeat this step.
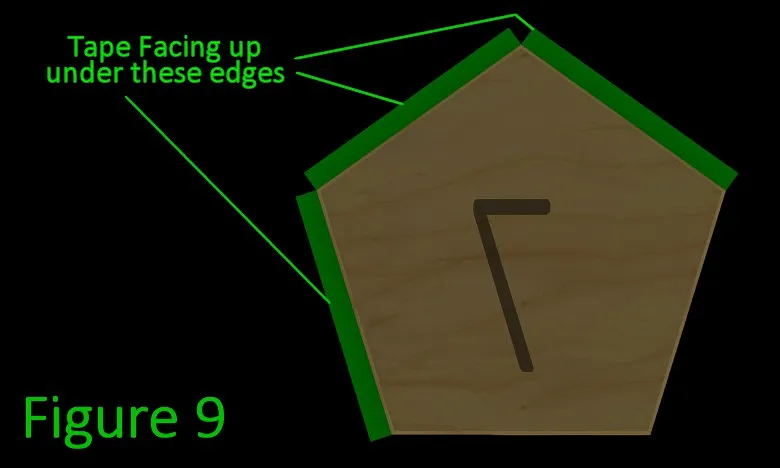
Place clear tape on pentagons @P7 - @P11 as shown in [Figure 9]
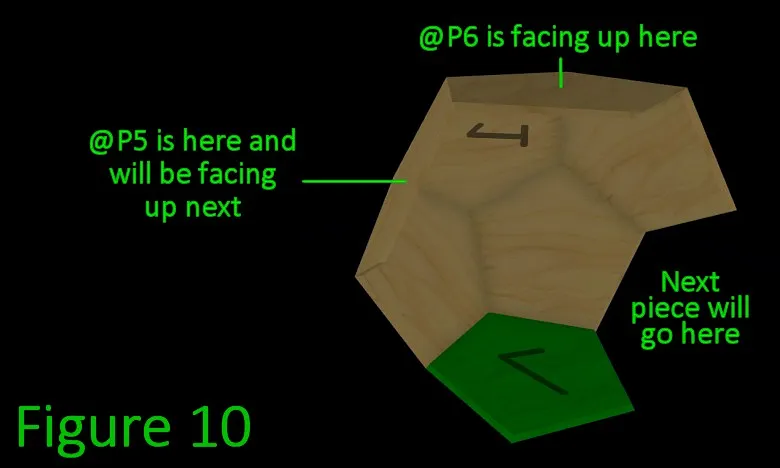
With pentagon @P6 facing straight up, rest the partially completed dome on pentagon @P7 , tape it into place with the top of the number pointed towards pentagon @P1,and glue the newly matched edges [Figure 10]. repeat for pentagons @P8 - @P11, with pentagons @P5, .@P4, @P3, & @P2 in order, Lastly rest on pentagon @P1.
Quickly test to make sure the last pentagon @P12 matches up with the remaining space, and if not, use light pressure to adjust the glued parts and hold in place for a few minutes, then allow to dry 5-10mins.
Place tape under the edges of pentagon @P12 exactly as you had with with pentagon @P1 in Figure 6.
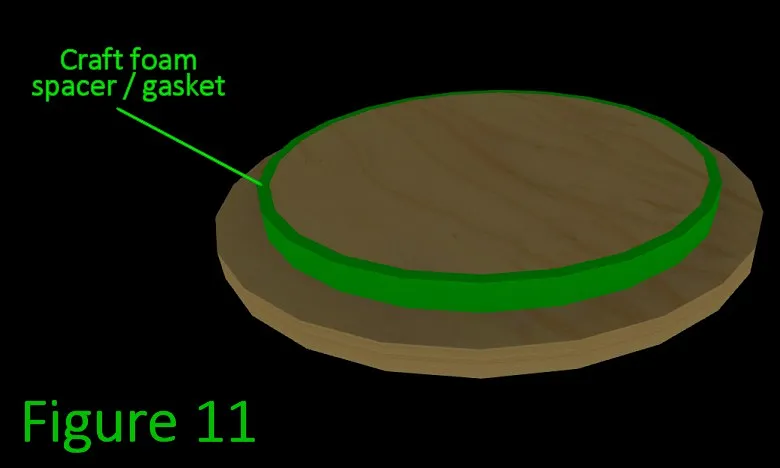
[Optional] Cut a strip of thin (<= 1/8in thick) craft foam long enough to fit around the smaller circle @CP edge, and glue it into place with contact cement or hot glue [Figure 11]. This helps restrict the movement of the coin release plug.
Place final pentagon @P12 face down, and loosely place the previous glued circle Parts @CP & @C12 so they rest inside the cutout.
Double check that you have removed all protective films, after this last step you will not be able to get at the ones inside.
Quickly, using a cotton swab or piece of rag held at the end of your glue bottle tip, soak the outside edge of the final pentagon, and the remaining inside edge of your D12, using several passes to prevent drying. Then immediately place the D12 structure on top of the final piece (pentagon 1 at top, obviously). Secure the remaining tape, and allow to dry for a full day
Stand back, enjoy your handiwork, you can sand and buff the edges if you prefer a more rounded feel or if there are any rough edges. (Never flame polish glued edges, they will crack, usually rather than later)
