Round Ornament Jig

Instructions
Secure blank for jig
Secure 12"x12" piece of plywood to your machine.
Estimated time: 2 minutes
(Optional) Save Work Coordinate Offset
If you have homing switches, save an XY location in the lower left corner to G55.
Estimated time: 1 minutes
Cut jig pockets
Zero the Z axis on plywood blank and cut out the pockets and locating holes for the Jig.
Estimated time: 30 minutes
Create blanks
Cut out and tweak the blanks until they fit into the jig. Cut as many blanks as you want to create ornaments.
Estimated time: 26 minutes
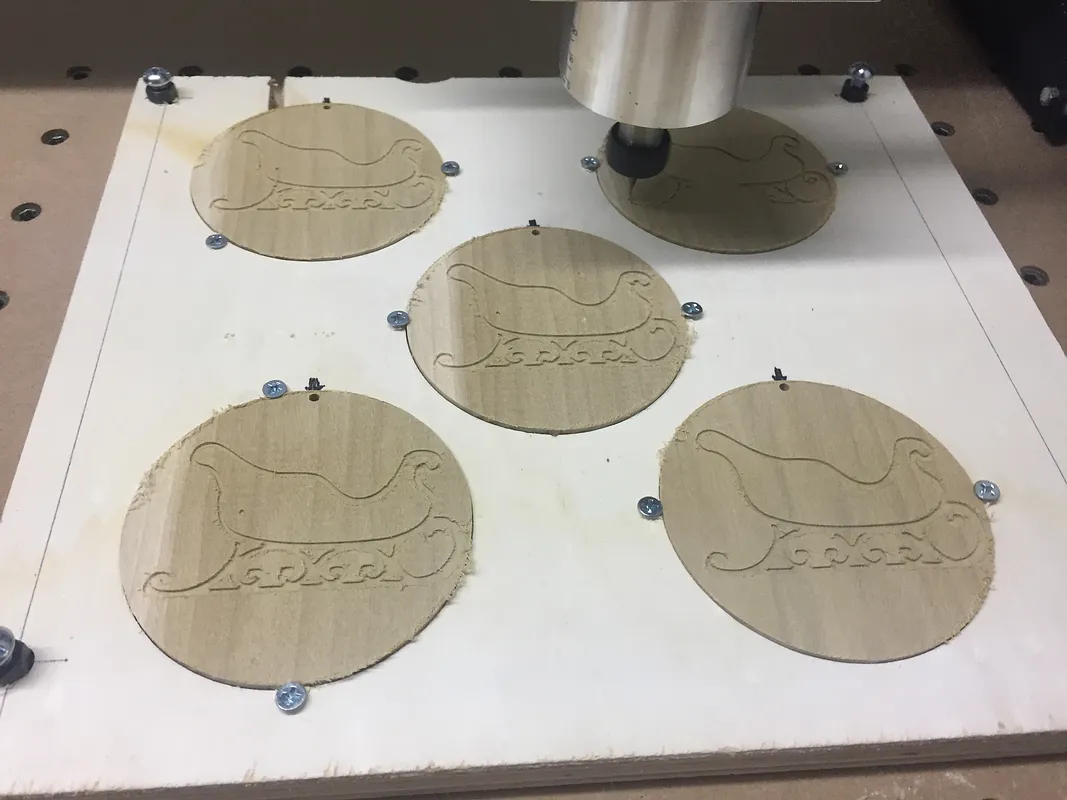
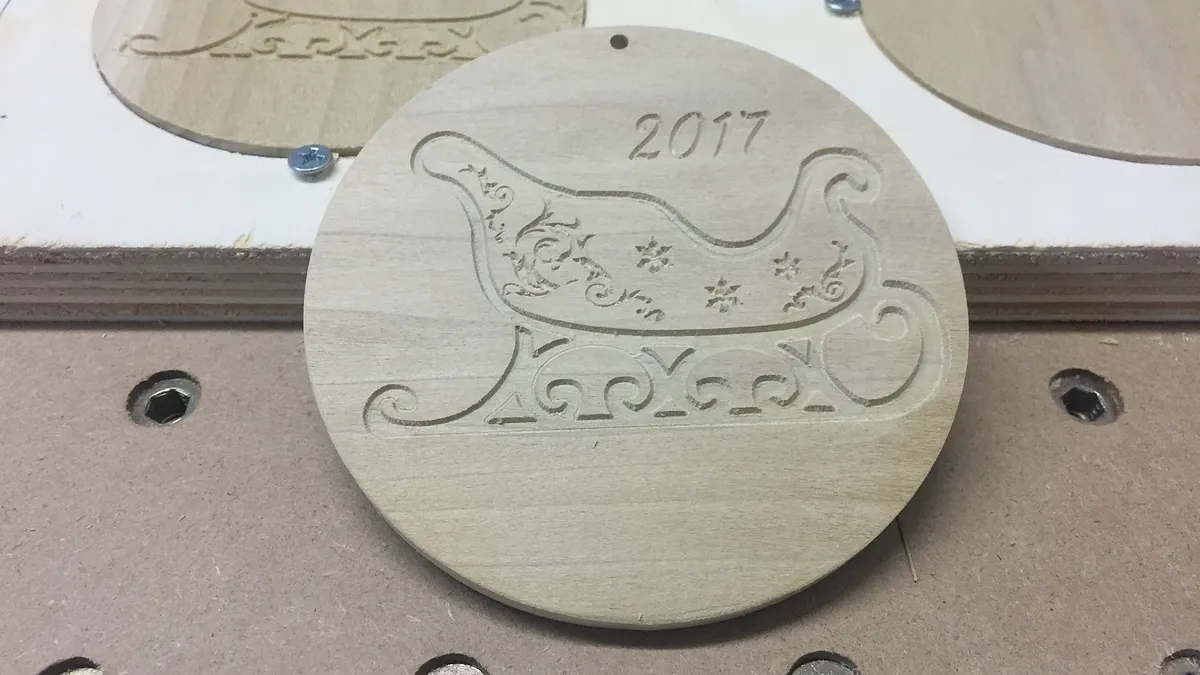
Secure blanks, engrave front
Secure blanks in jig with a couple wood screws around the perimeter.
Run the operation(s) for the front, zeroing the Z axis on the surface of one of the blanks. Use the same blank each time you zero the tool in case there are slight variations.
Estimated time: 45 minutes
Flip blanks, engrave back
Flip the blanks in the jig.
Run the operation(s) for the back, zeroing the Z axis on the surface of one of the blanks. Use the same blank each time you zero the tool in case there are slight variations.
Estimated time: 45 minutes
Comments