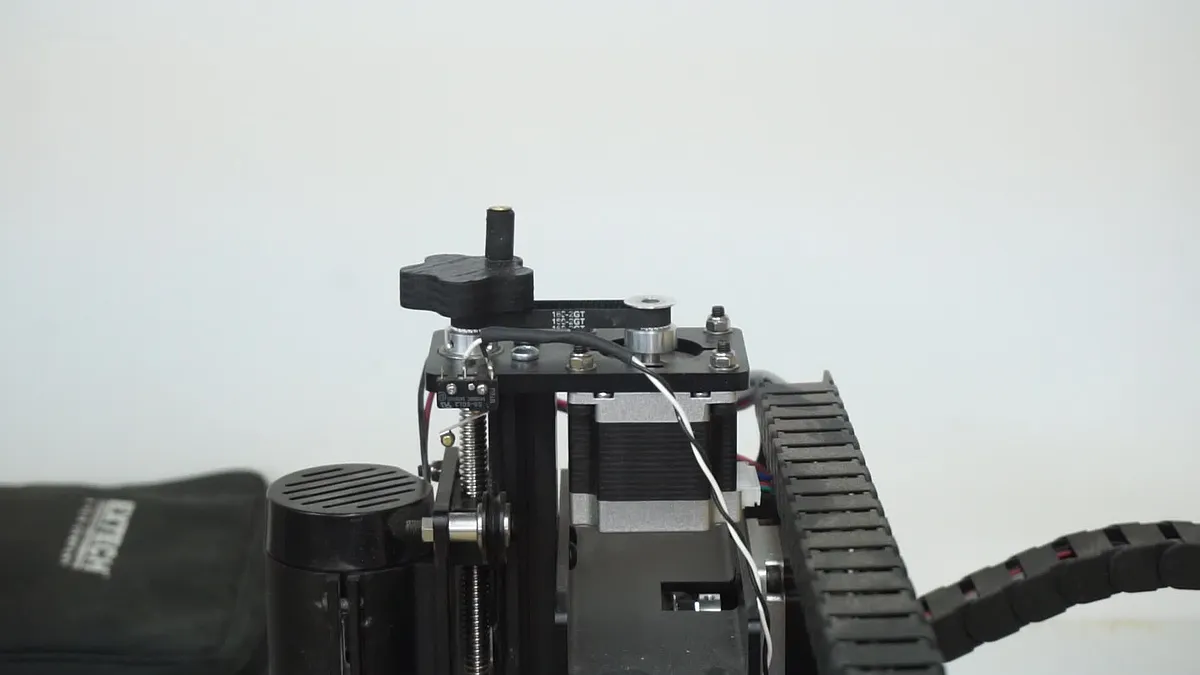
Z-Axis Adjusting Knob


Instructions
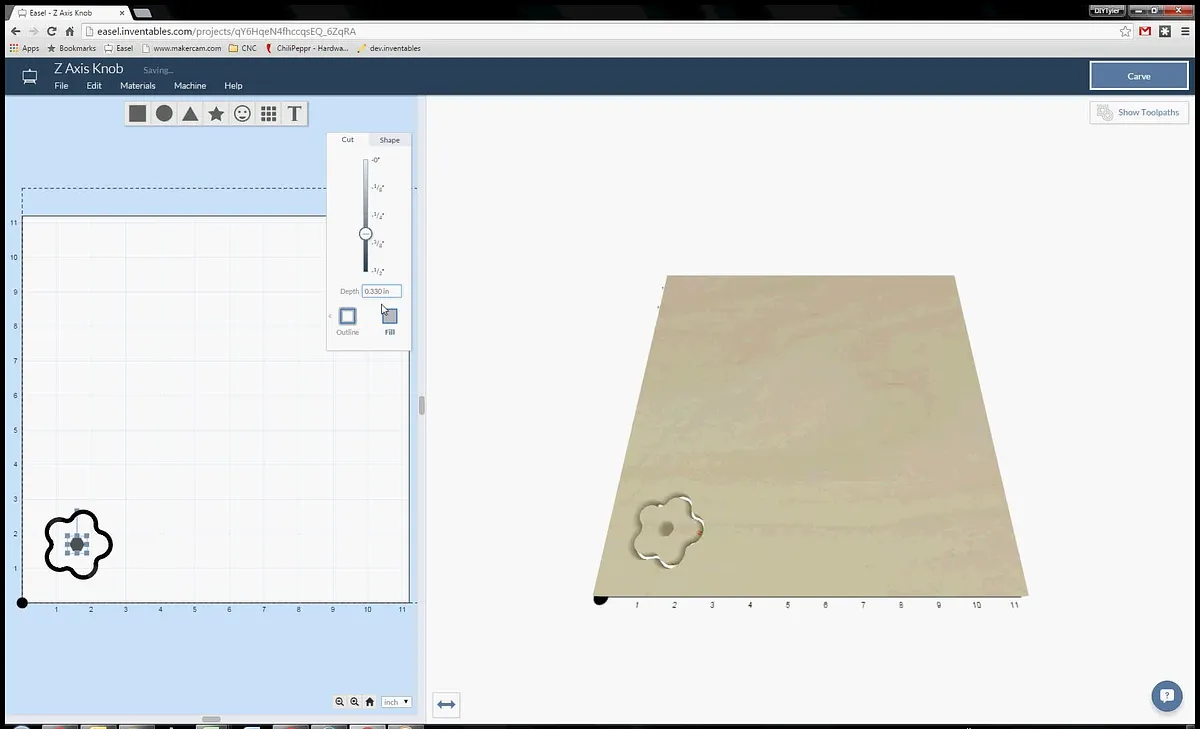
Make shape on computer
Came up with the shape I was after using sketchup, exported to .svg using the "Sketchup to SVG" plugin and imported into Easel.
Once in easel I used the interactive tabs to move some of the tabs on top of each other effectively decreasing the total number of tabs. In the end I wanted two tabs in a location that could easily be broken off.
Estimated time: 5 minutes

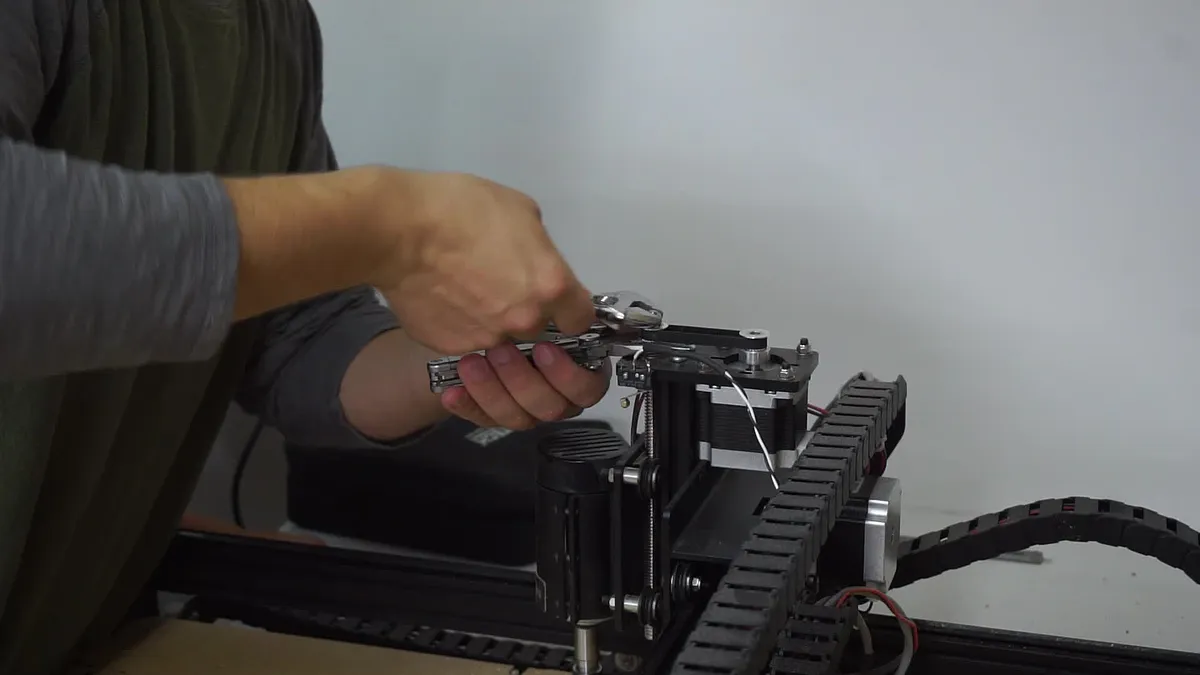
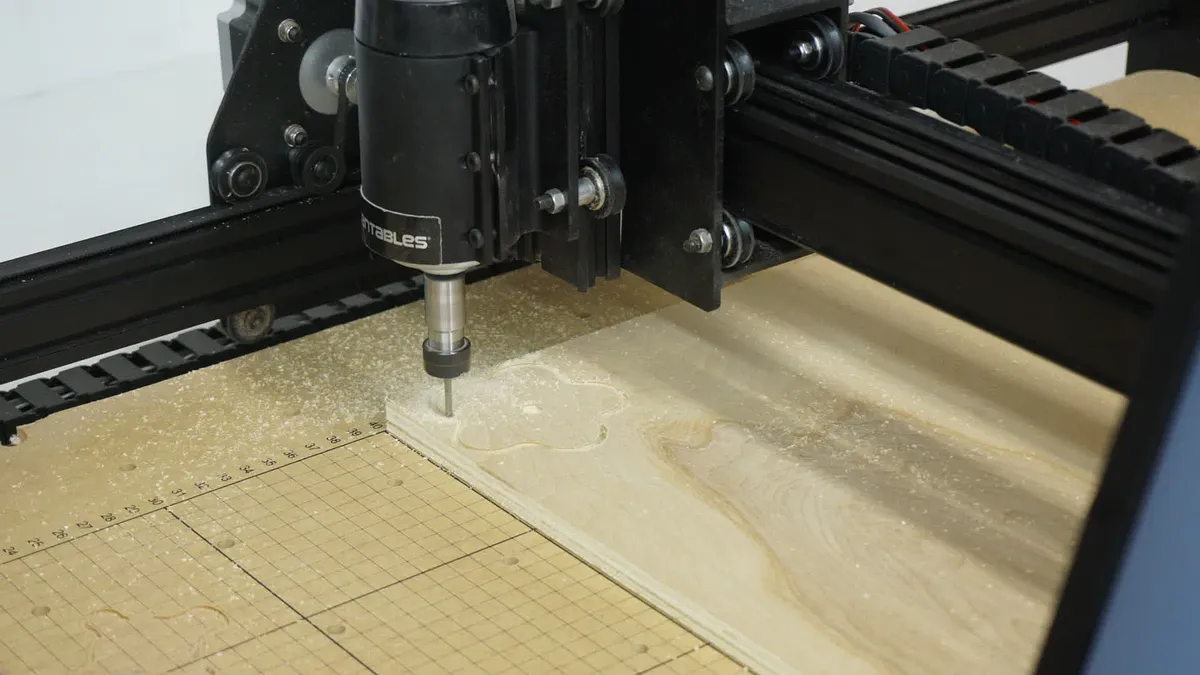
Carve
Carved using the X-Carve equipped with a 1/8 bit.
Estimated time: 5 minutes
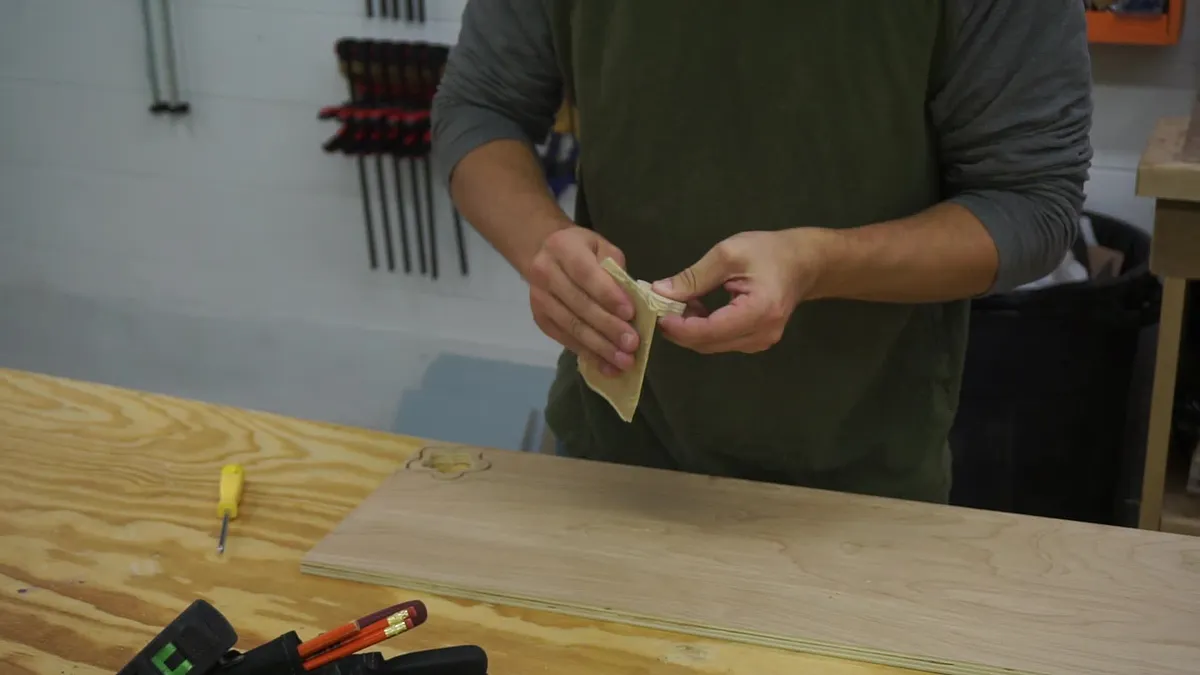
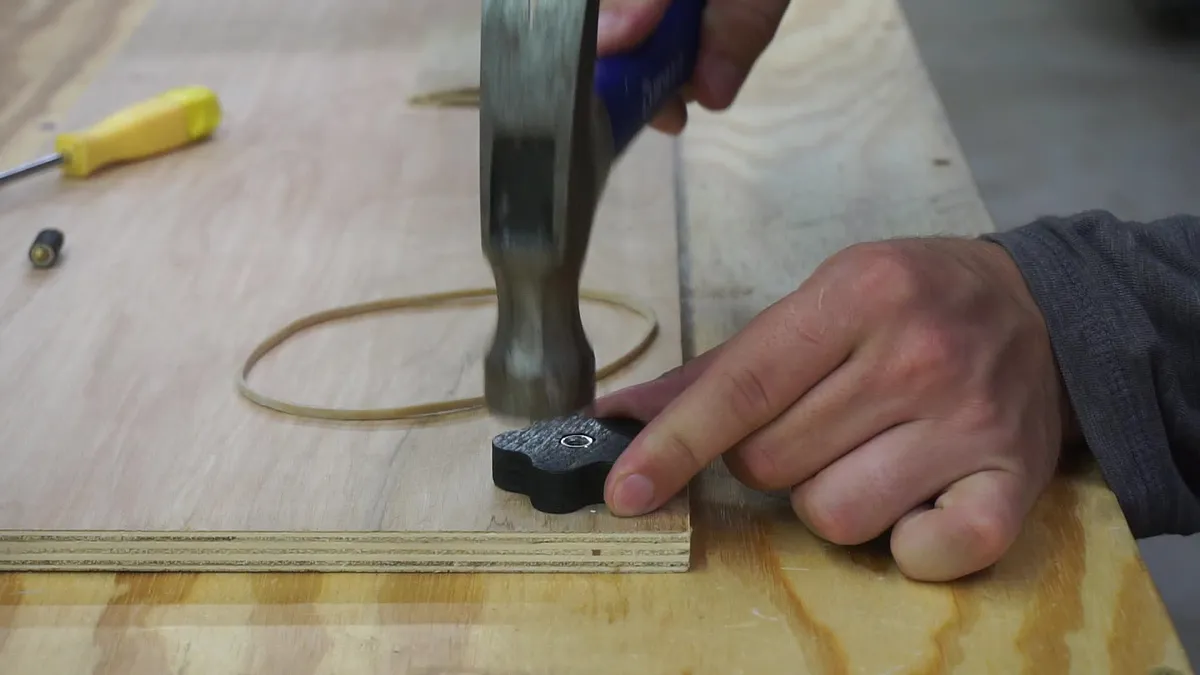
Sand, paint and insert nut
Remove your carved knob from the rest of the board. Sand, paint if you want to and insert the nut that is on top of the Z-Axis motor pulley....nylon down into the knob.
Estimated time: 5 minutes


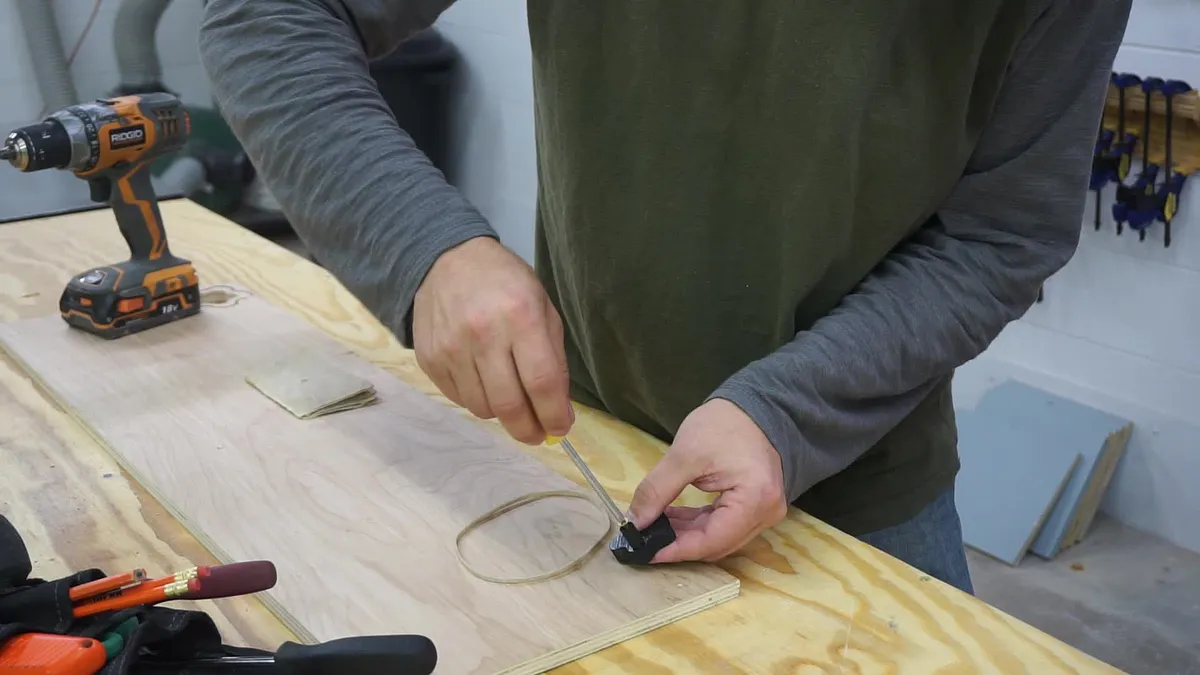
Dowel Turning Pin
Drill and countersink a small section of dowel, add to the knob so you can quickly turn the know without taking your hand off it.
Estimated time: 2 minutes

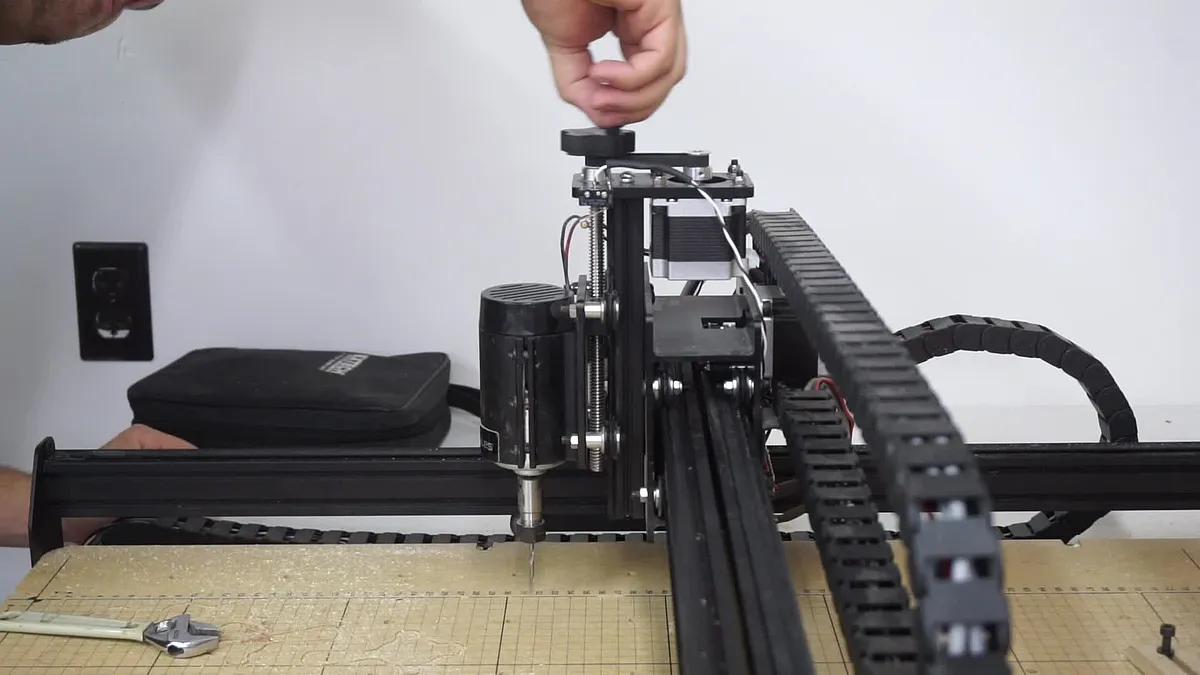
Re-Install
Reinstall the nut and knob back to the top of the Z-Axis and you are done!
Estimated time: 1 minutes

Watch and Learn
Check out our channel for more projects.
Estimated time: 3 minutes
Comments
Nice design, and it looks to be quite useful. Question: doesn't this throw off position-tracking? In other words, if Work Zero has been set and this is then used to manually move the spindle, the code-interpreting program (Easel, UGS, whatever) will not know that Z has changed, correct?
Fred Sawtelle · March 16, 2017
If you change the height manually after you set the Z height it will mess up your cut. This is really for before/after cutting to manually move the head around if you need to.
DIYTyler · March 17, 2017