"Boldly Go" Space Mobile


Instructions
Carve Easel Files
Open the Easel projects and carve the shapes you'd like to carve. I added a few extra designs in case you want to expand the design!
Estimated time: 45 minutes
Glue String Between Letters
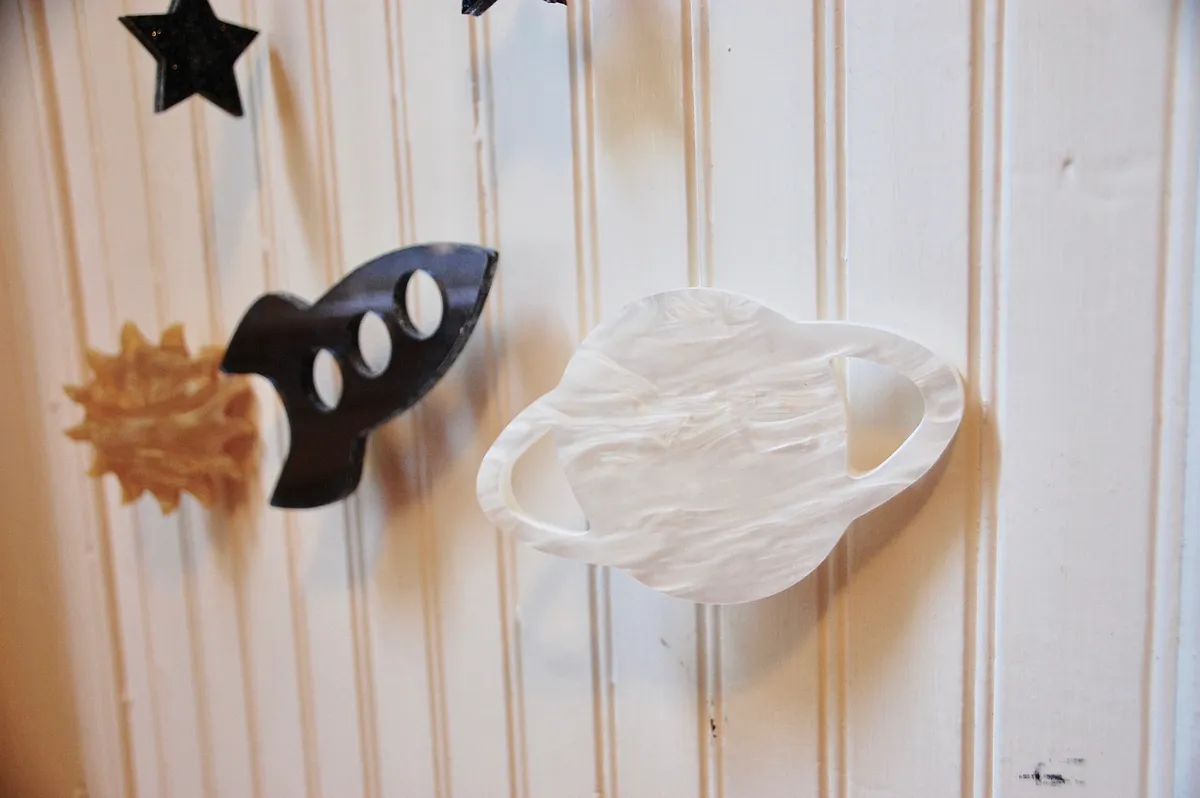
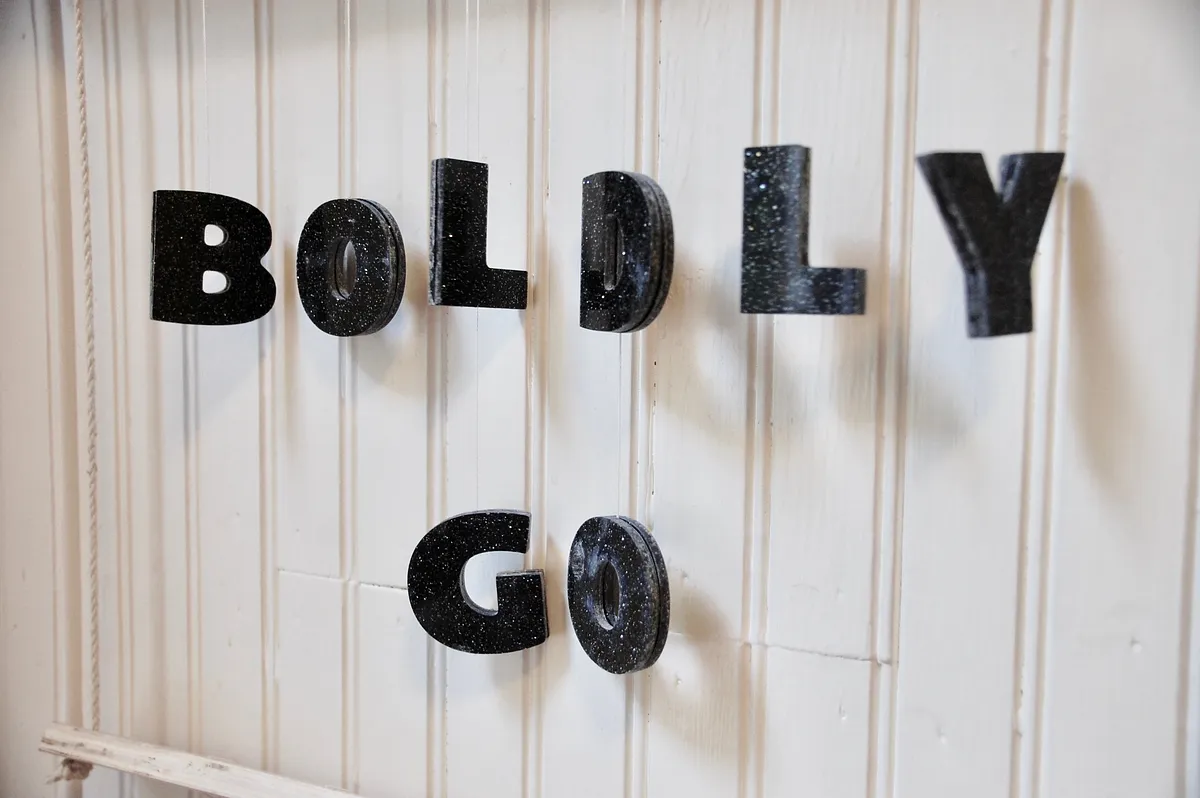
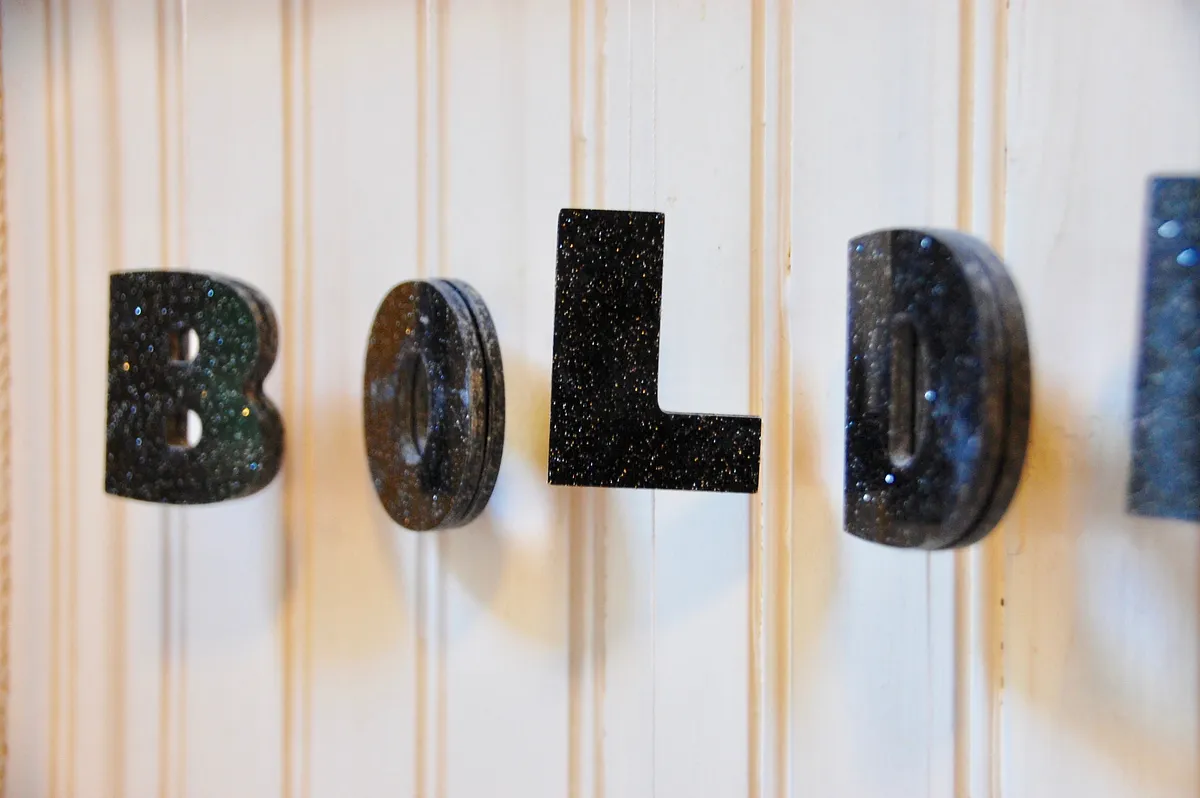
I carved mirror images of each shape, so the string is secured between the hanging elements (rather than drilling holes into the acrylic. To me, this makes the mobile look more finished and allows the shapes to spin freely.
Set everything out and put mirrored pieces together (both B's, both D's, both suns, etc.). It's easier to work with the pairs when they are already grouped. Think of it this way: the outside of the shape will be the part that we see when the mobile hangs; the inside of the shape will be the part glued to the inside of corresponding shape. Position the pairs so the outside of the shape is facing down (on your work surface) and the inside of the shape is facing up (ready for gluing).
Lay down the string on the inside of one of the shapes. Arrange the string on the inside of the shape. Using the Jet glue and a pair of gloves, apply glue to the string and inside of one of the shape. Press the inside part of the corresponding shape on top of the bottom shape, so the string and glue are secured between the two shapes.
Estimated time: 20 minutes
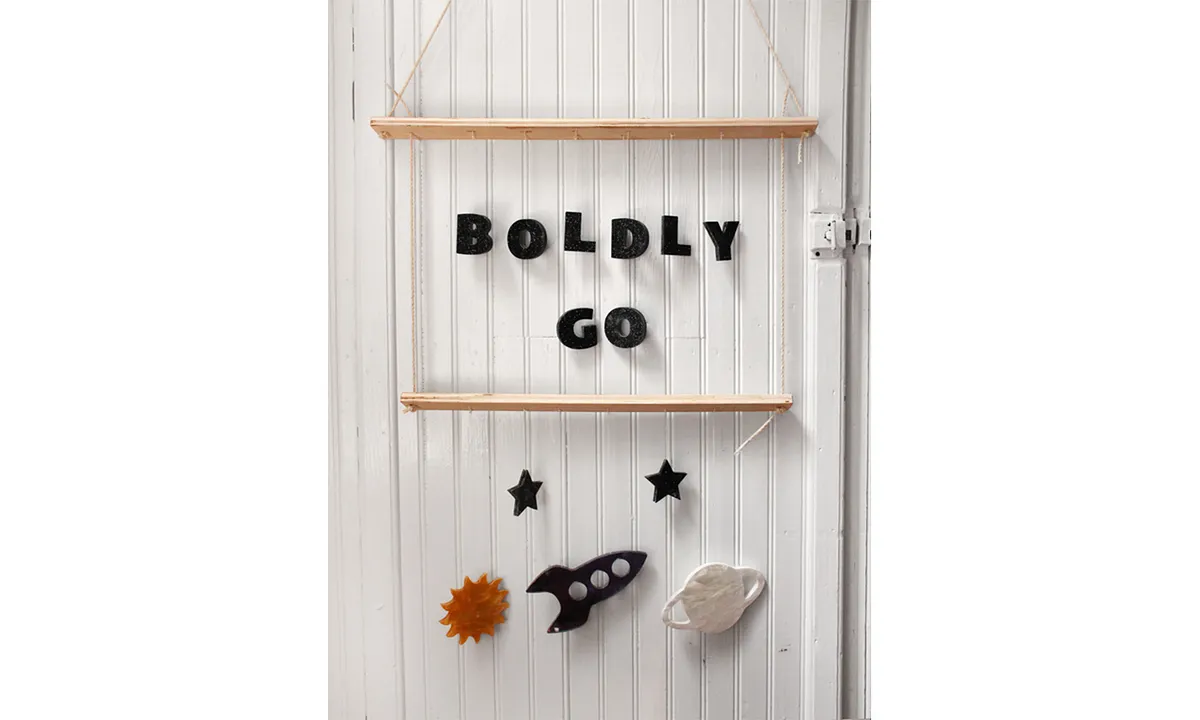
Drill holes in Wood
Lay everything out as you'd like to see it to determine the spacing. Mark the Baltic birch plywood with holes for where the string will hang off the plywood rails.
Drill holes through the markings on your wood. Thread with the string for the hanging shapes. Tie off the thread to secure the shapes.
Hang up and enjoy!
Estimated time: 20 minutes
Comments