Pinewood Derby Car


Instructions
Design Car in Fusion 360
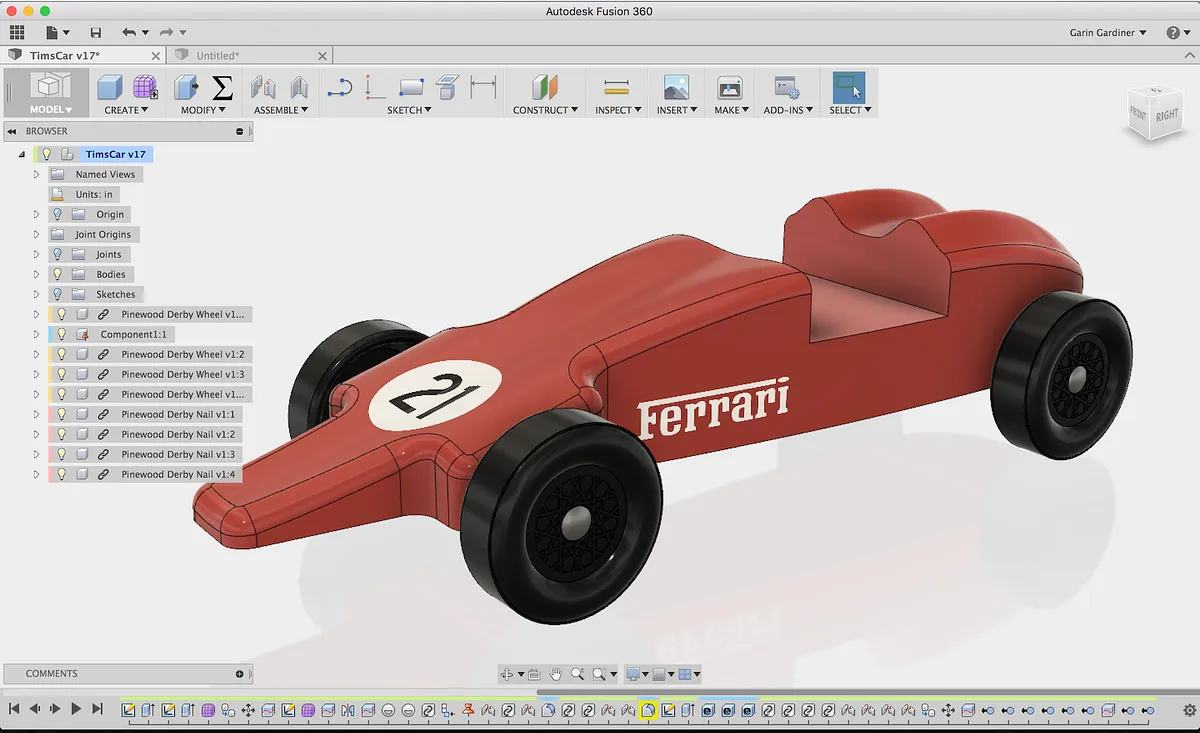
We used Fusion 360 to build a parametric block that matched all the specs of a "pinewood derby stock":http://a360.co/1T3lysY. We then built used the sculpt environment to build a cool shape around the block and split it away leaving just the part of the car we wanted to mill out.
Estimated time: 60 minutes
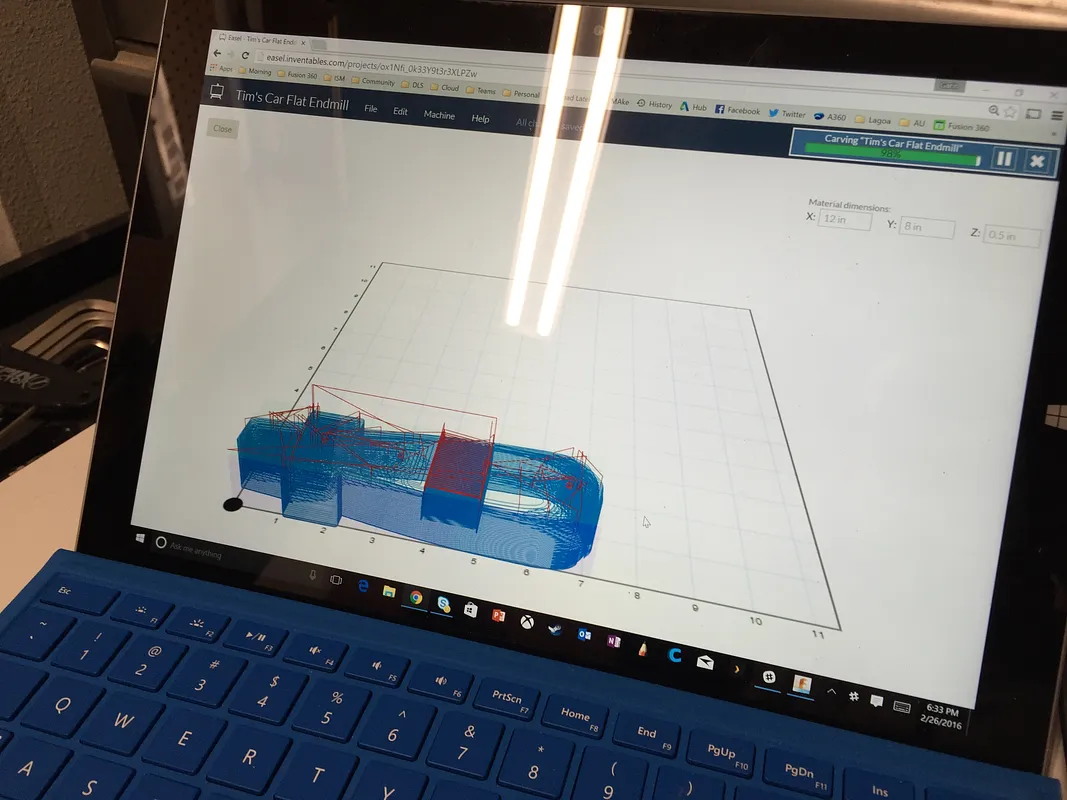
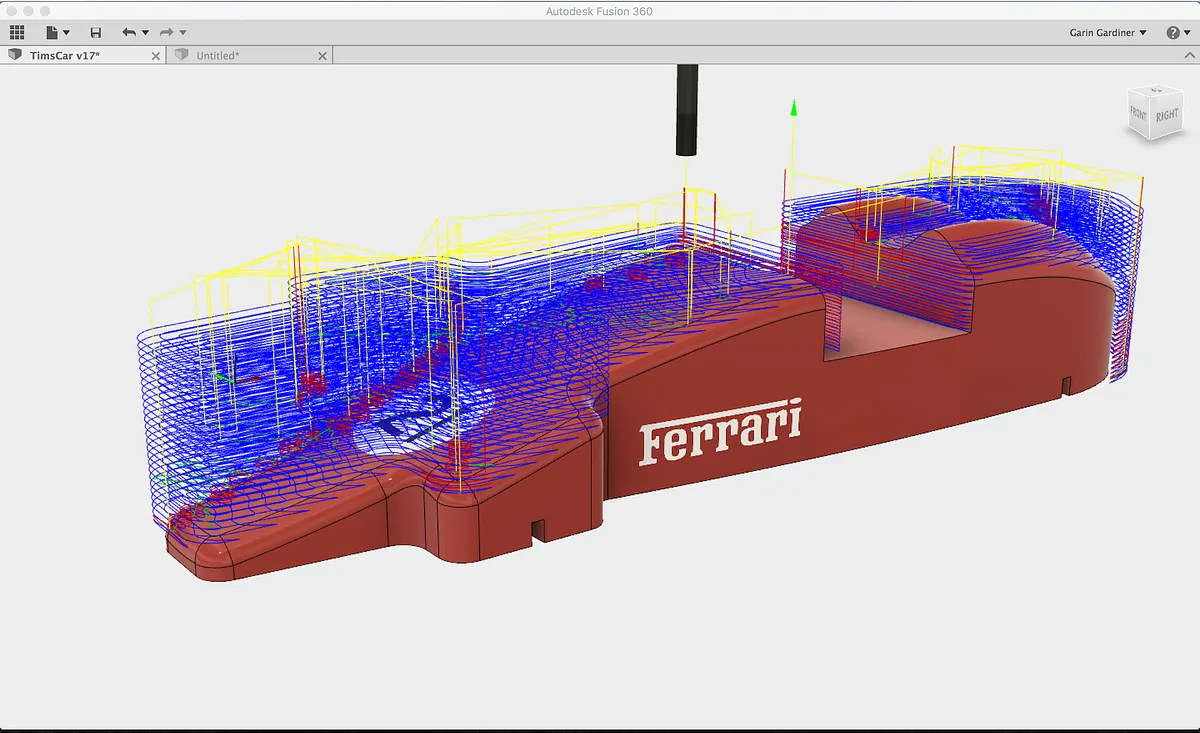
Create Toolpath and Export G-code
We created one setup with a 1/8" flat mill to remove most of the material and a second setup for a finer finish with a 1/8" ball nose. This will require a bit change after running the first gcode but pretty easy to do. For more details you can see "Patricks Youtube video":https://discuss.inventables.com/t/new-feature-g-code-sending-through-easel/17483?u=garin on this setup.
Estimated time: 20 minutes
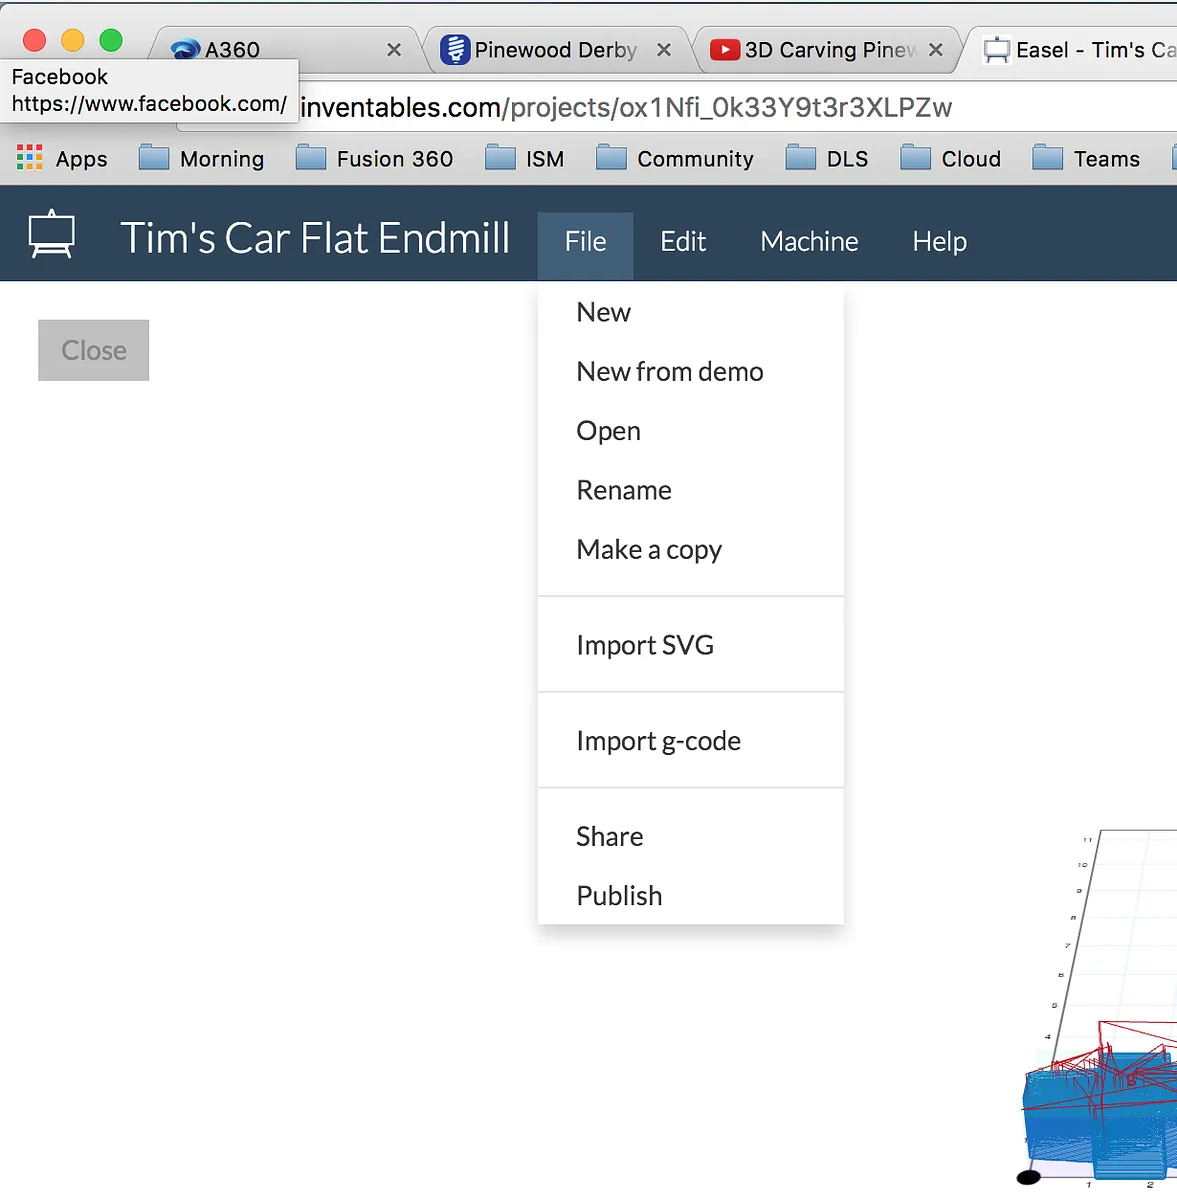
Import Gcode into Easel
For this step the folks at Inventables have made it about as easy as they can to bring in g-code from external sources. I don't think its turned on for everybody just yet but there will be an option under the File pulldown to "Import g-code". If you want this option and don't have it, you can "ask for it":https://discuss.inventables.com/t/new-feature-g-code-sending-through-easel/17483?u=garin it on the forms and they typically turn it on for you in a day or two (now that service). You can then import the attached 2 files into a new project and and cut right from Easel.
Estimated time: 2 minutes

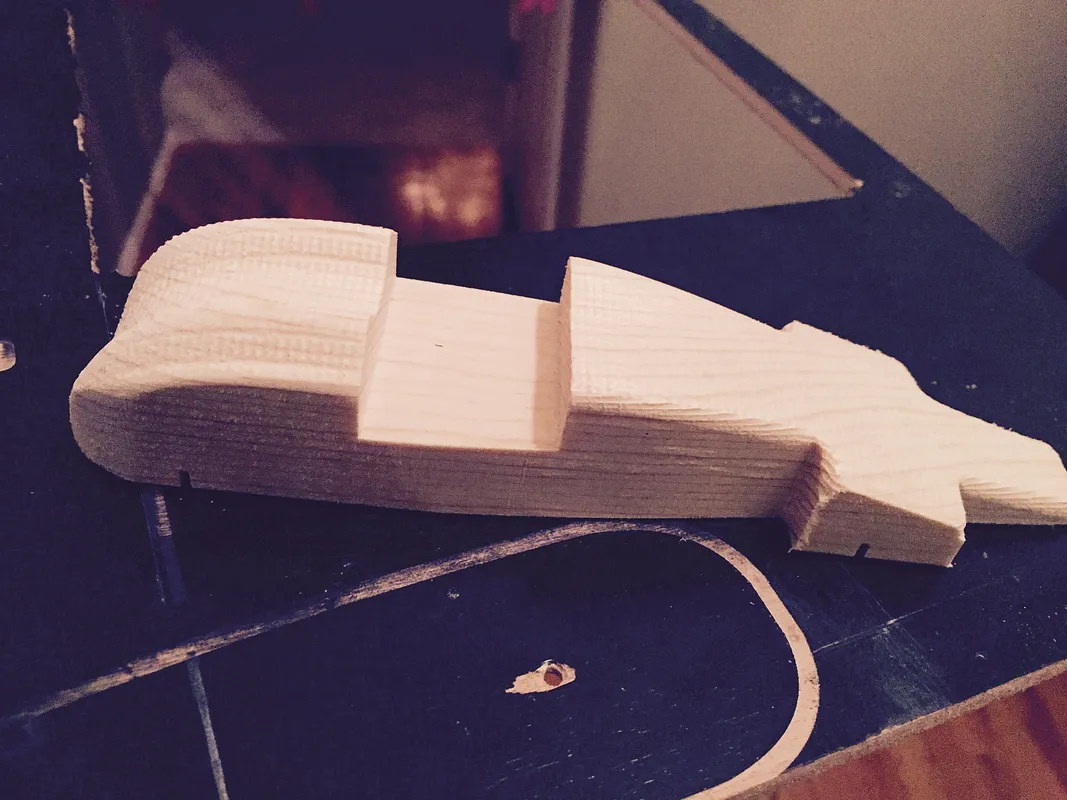
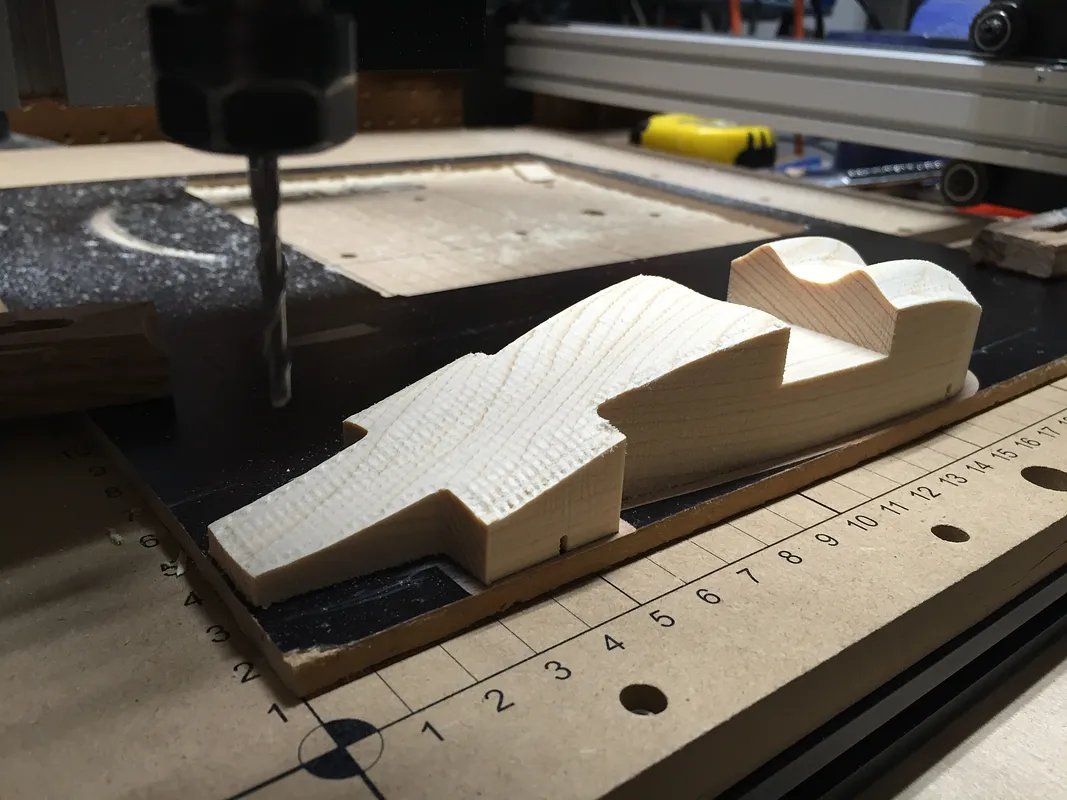
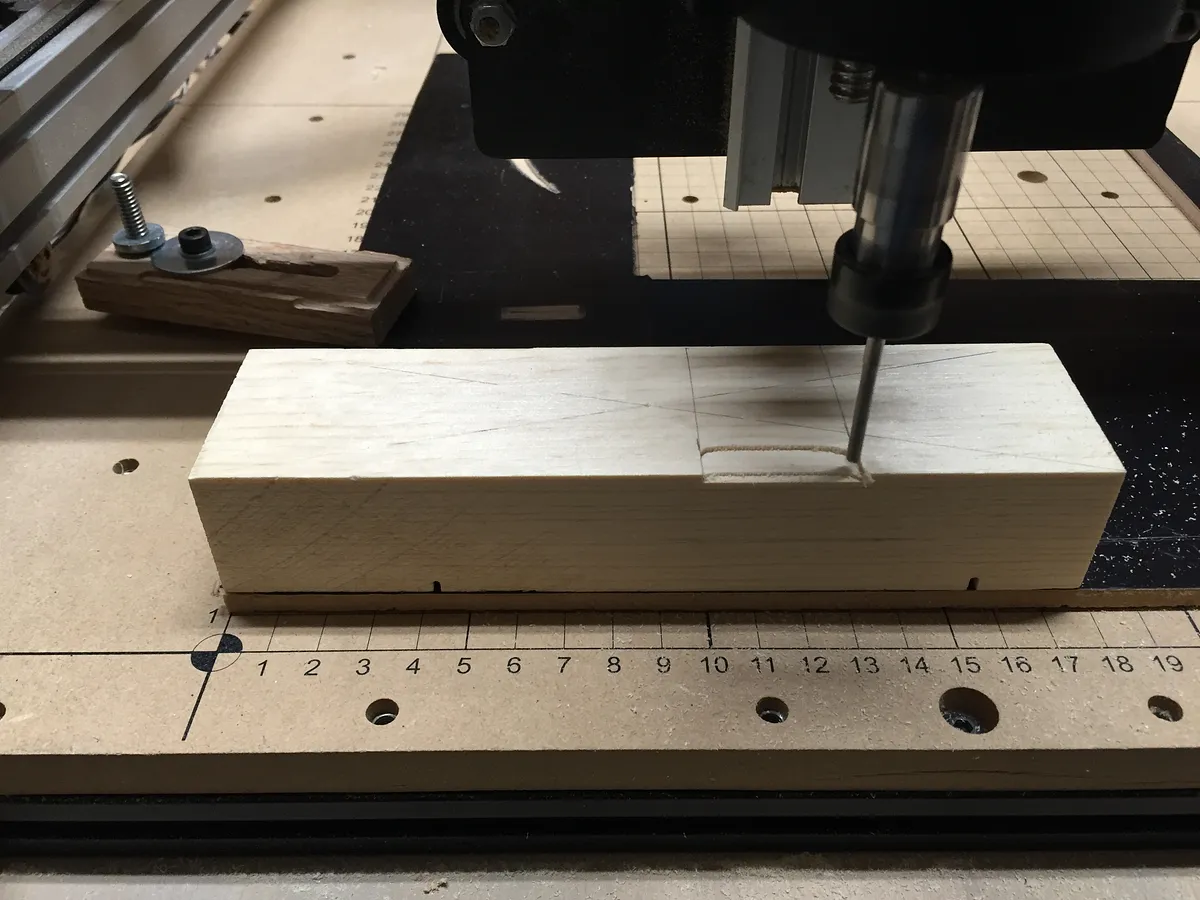
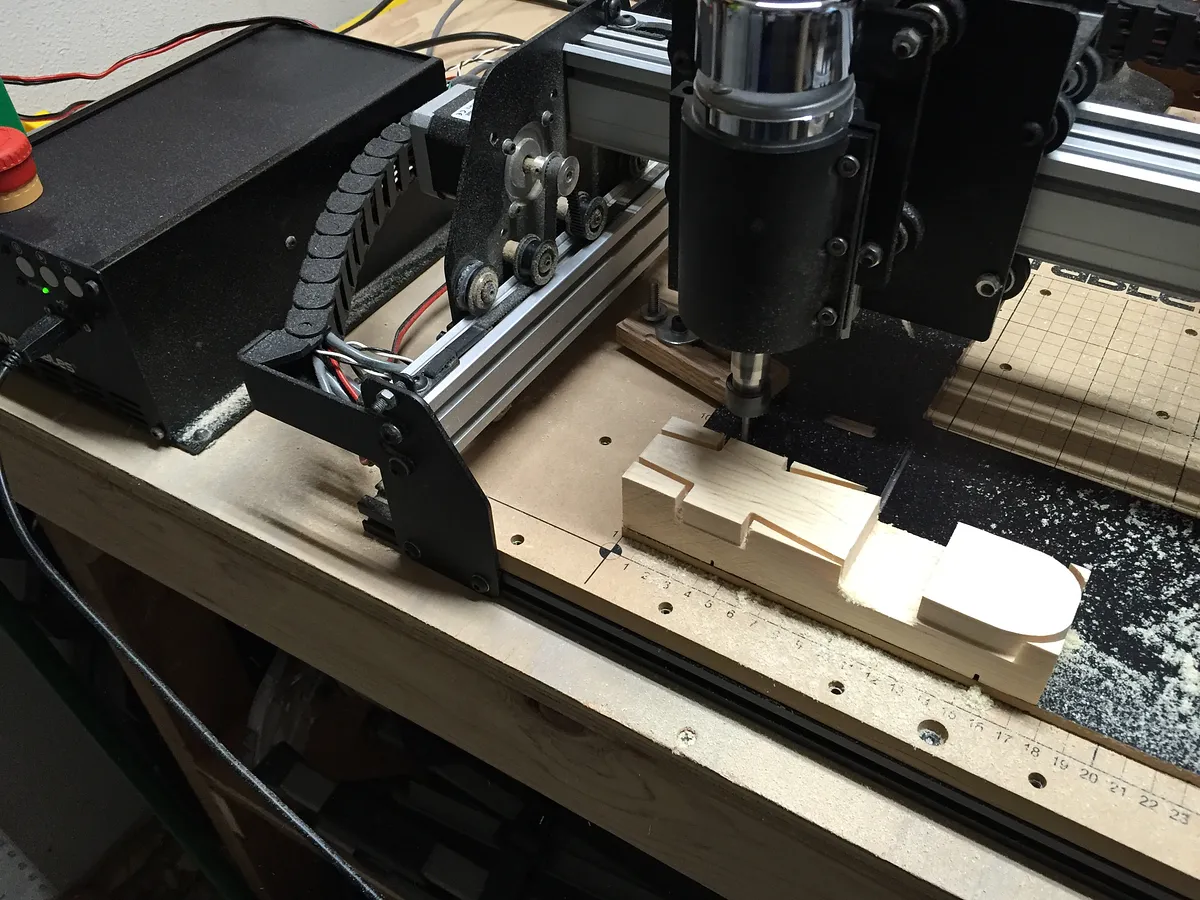
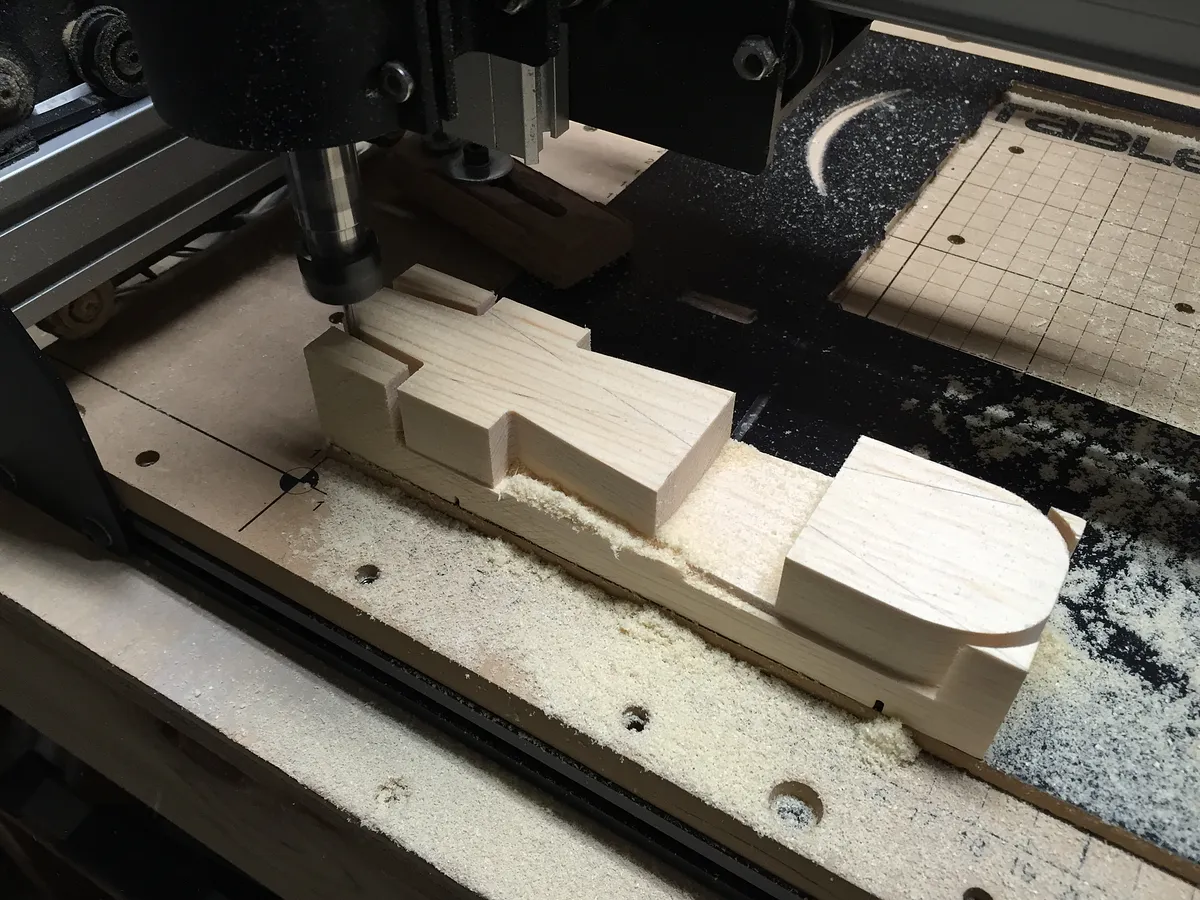
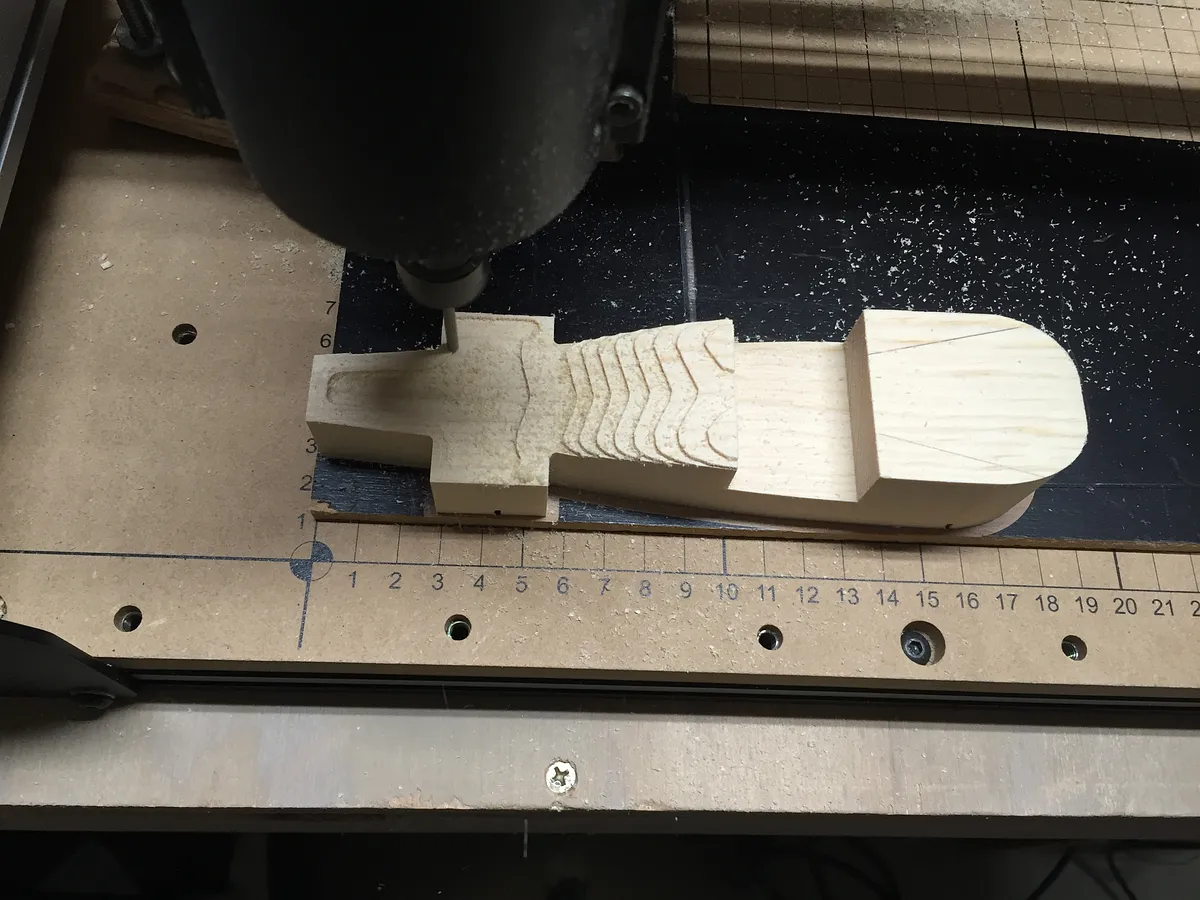
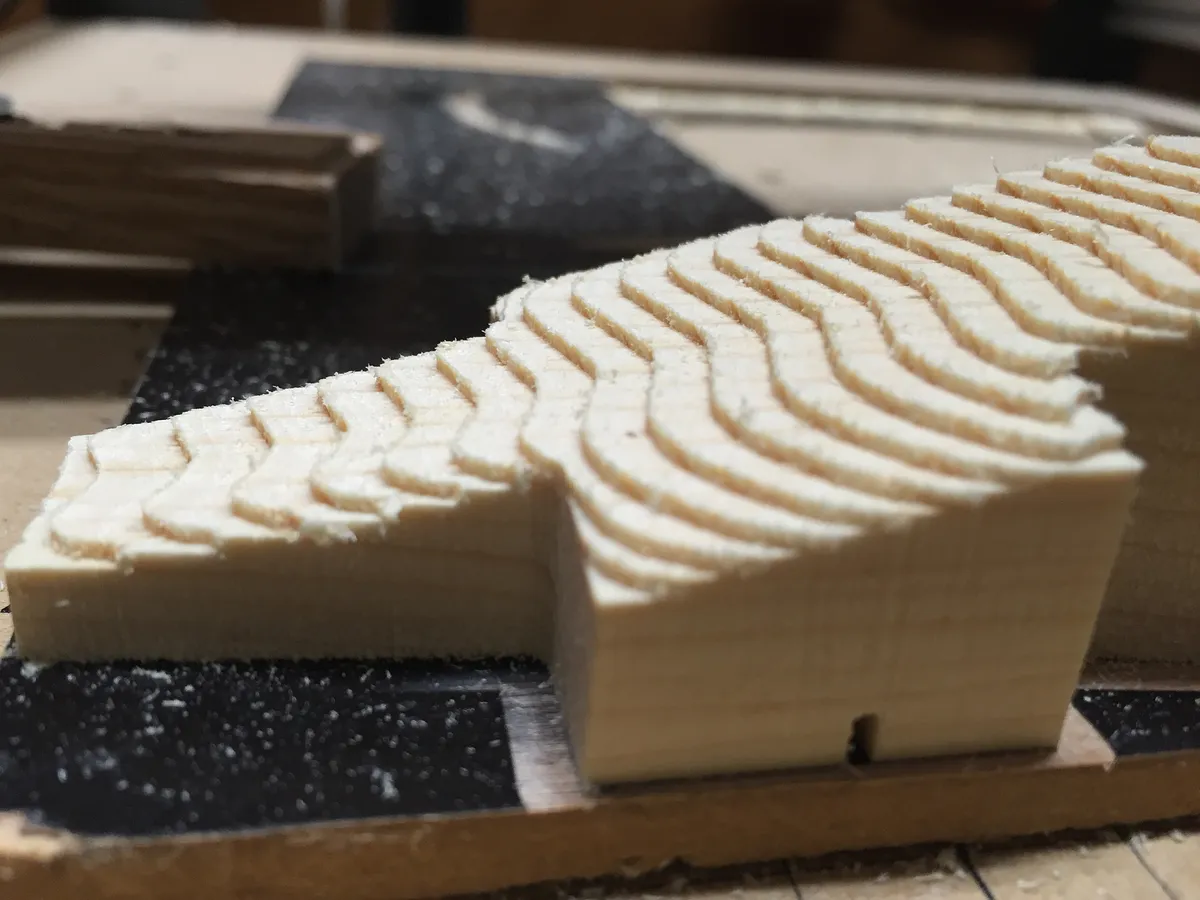
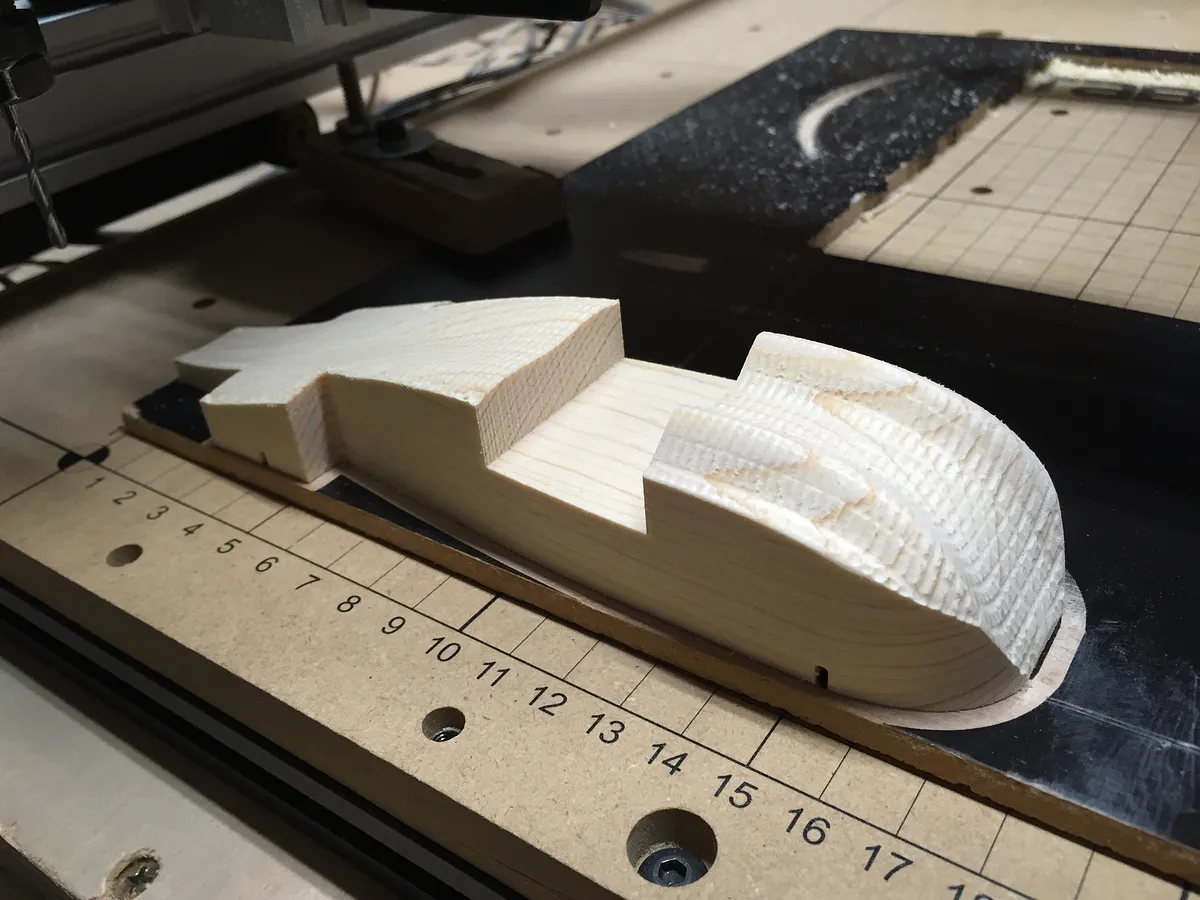
First Pass with Flat End Mill
I screwed my Pinewood derby block on a 1/4" plywood plate with short screws and clamped it down to my wasteboard. With the stock clamped down I opened the first project to cut out the outline and remove most of the material with a 1/8" Flat Mill.
Estimated time: 120 minutes

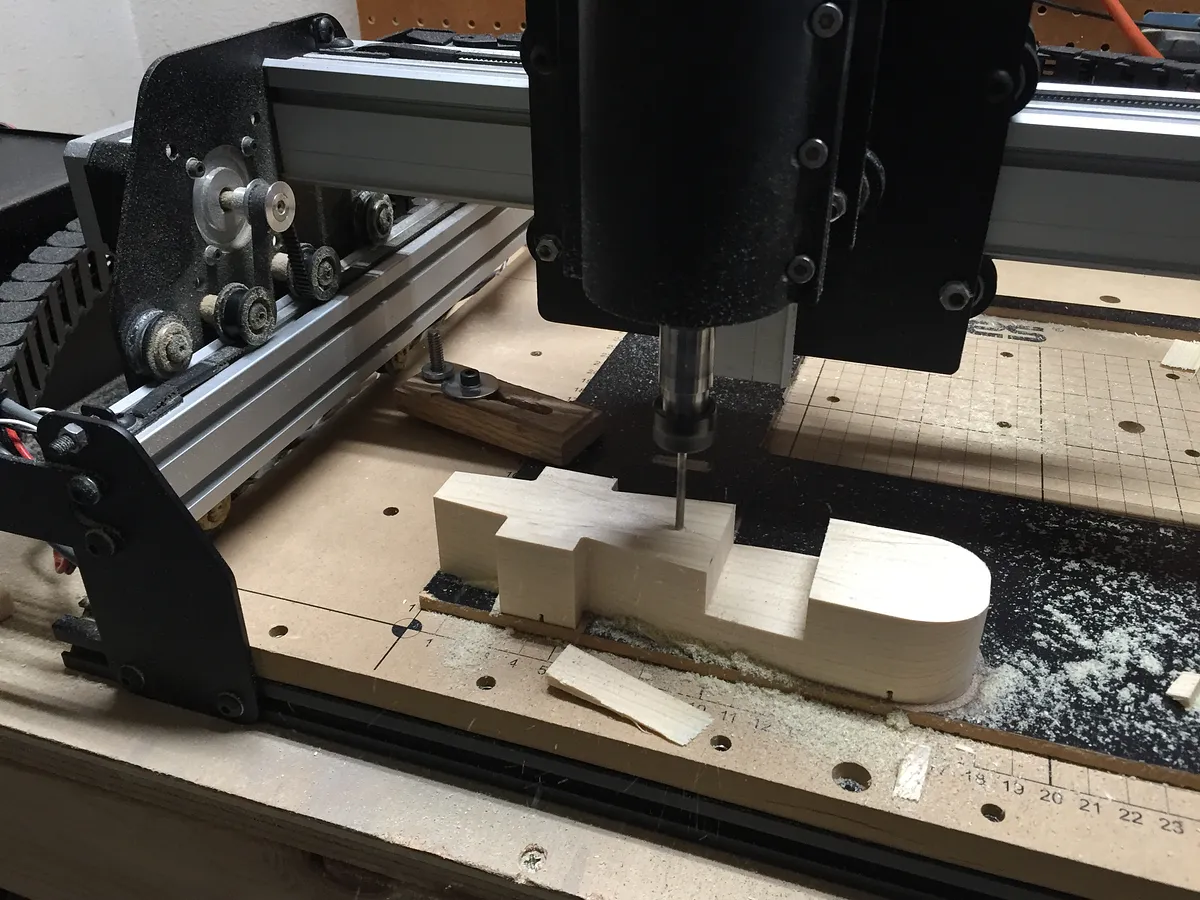
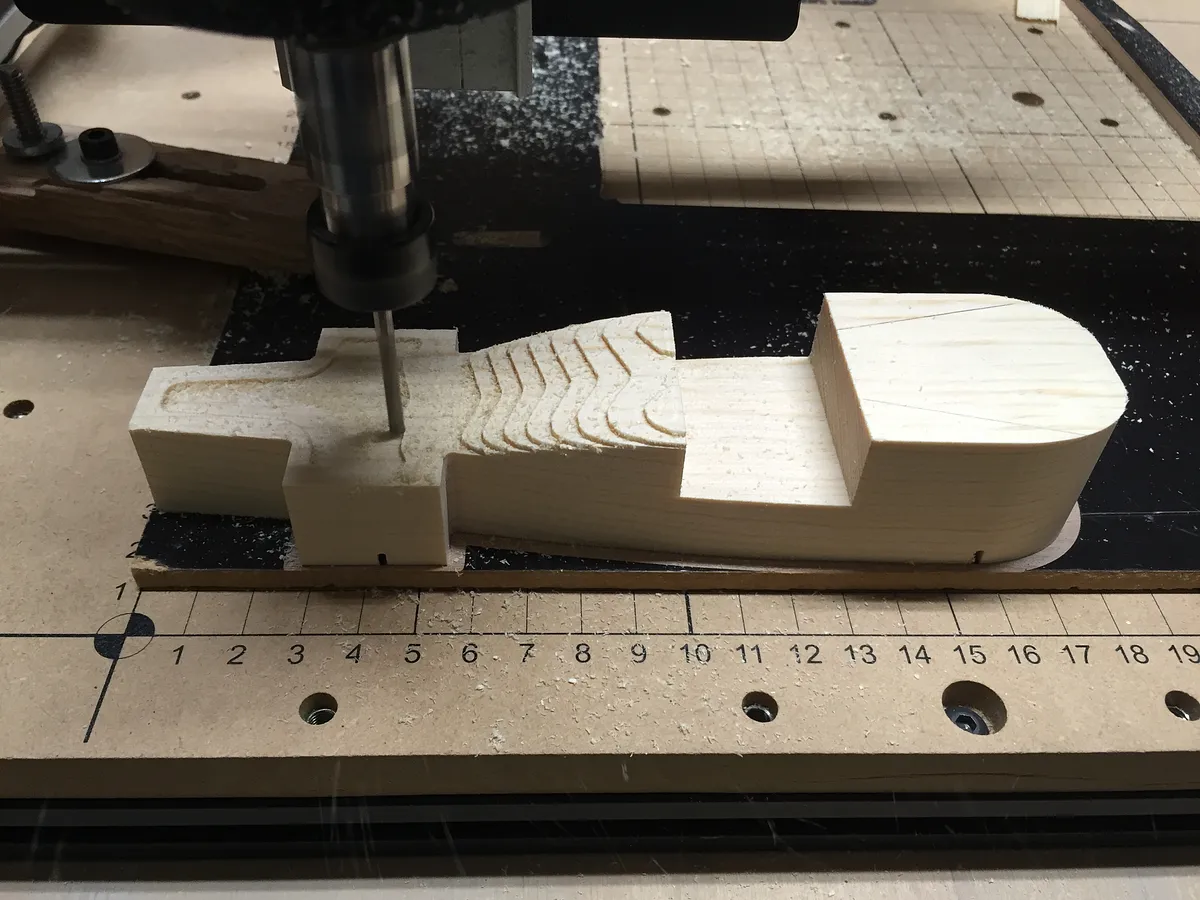
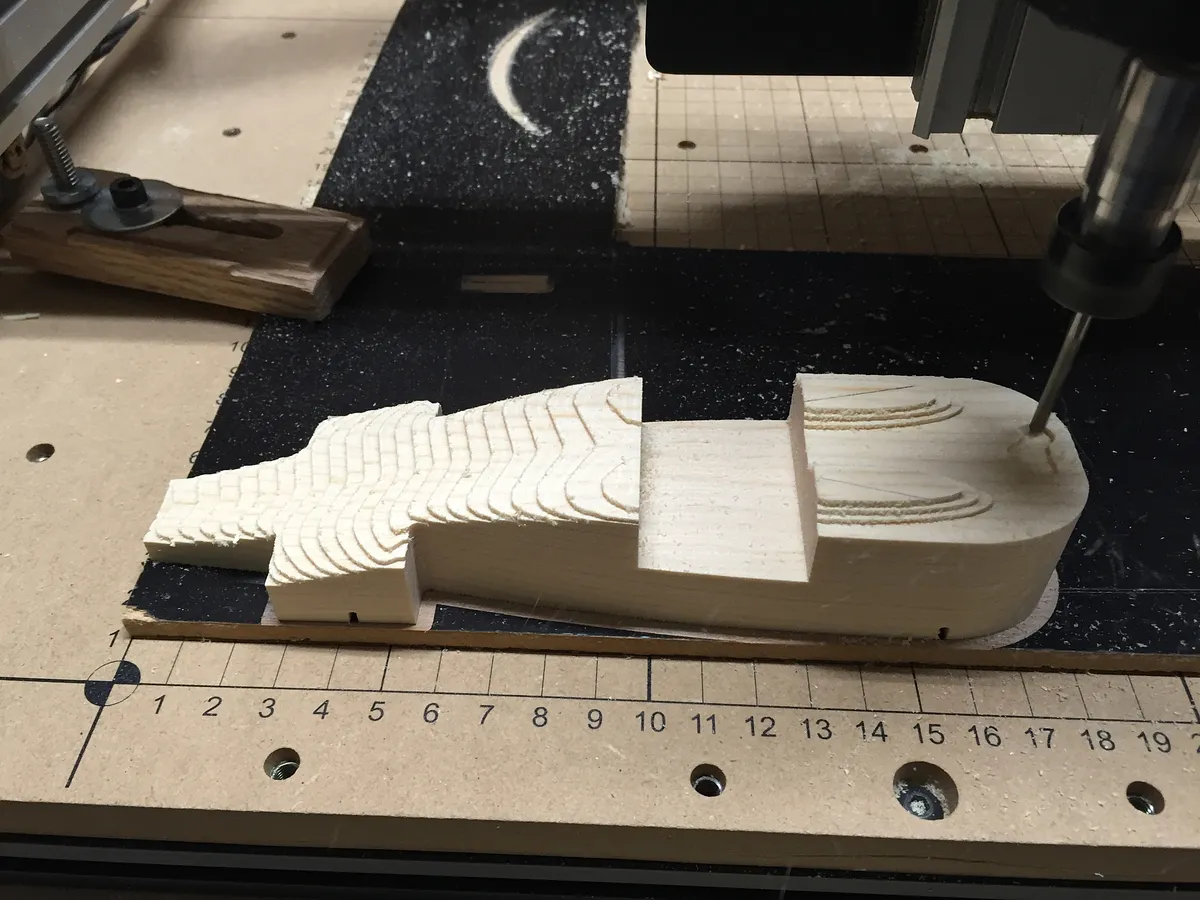
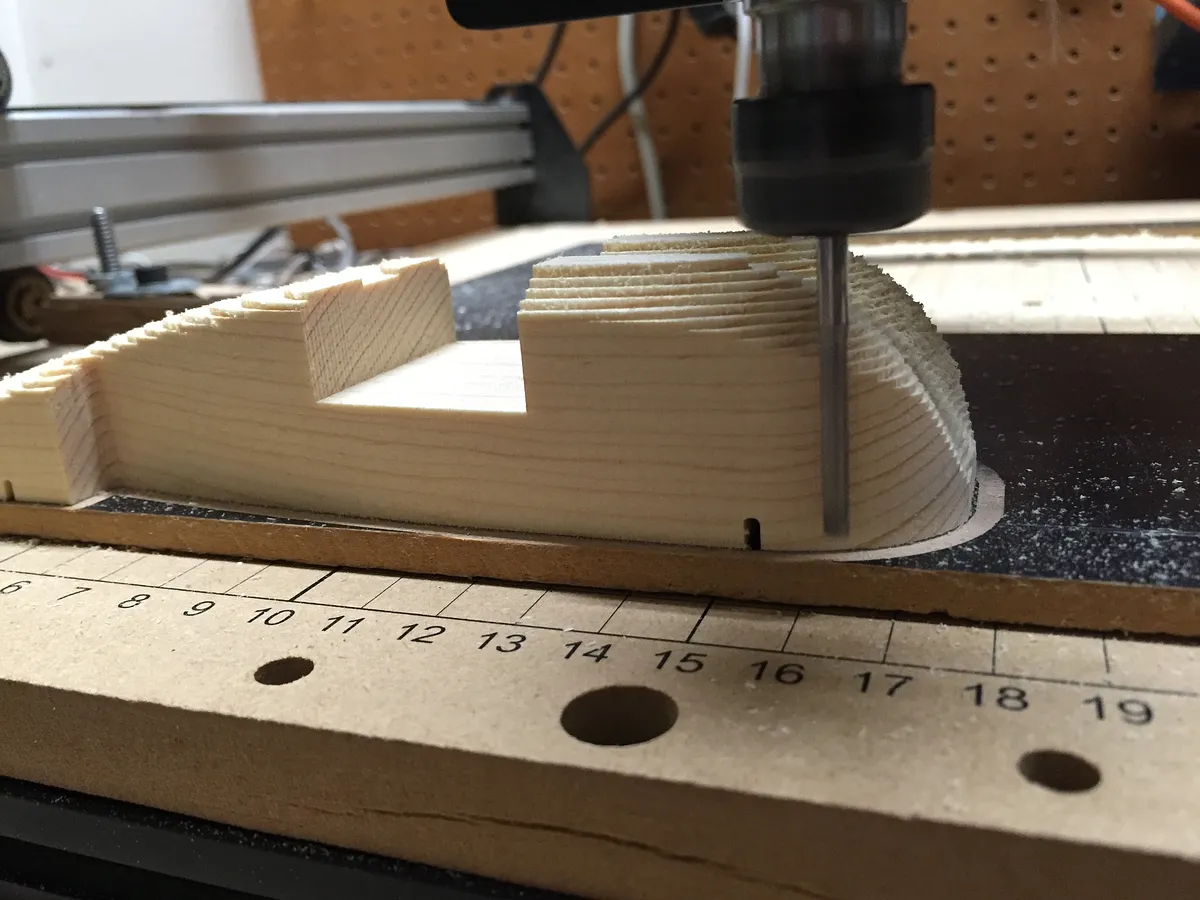
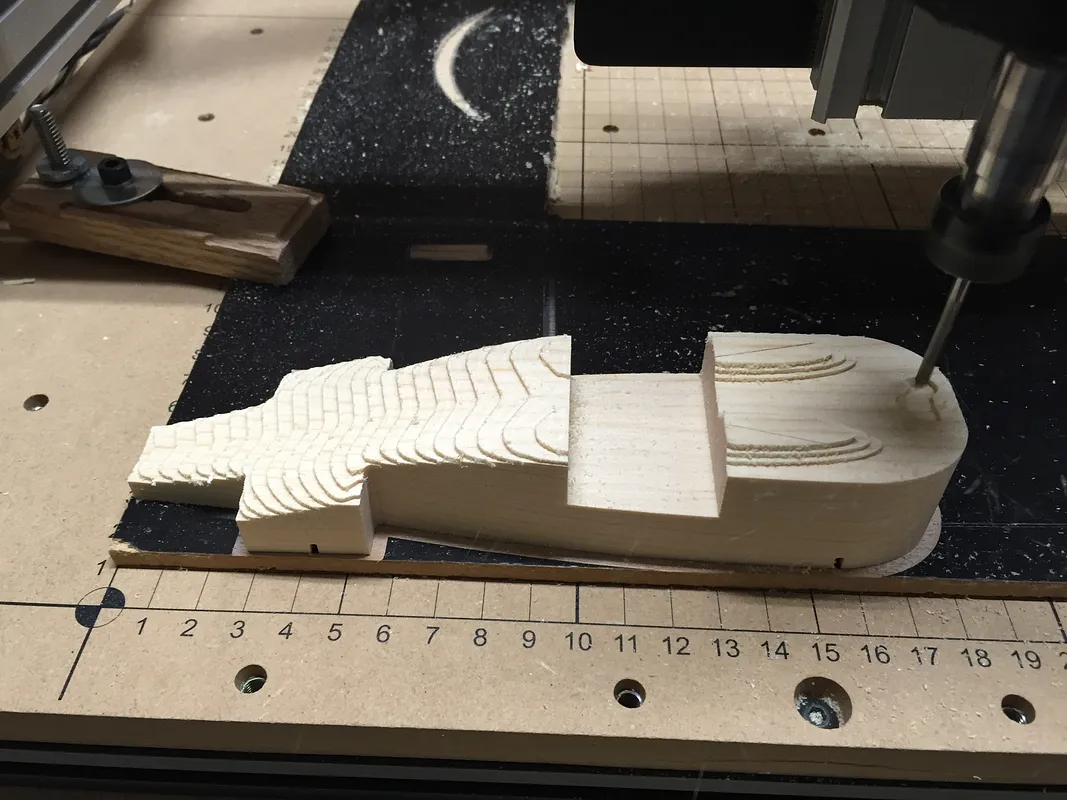
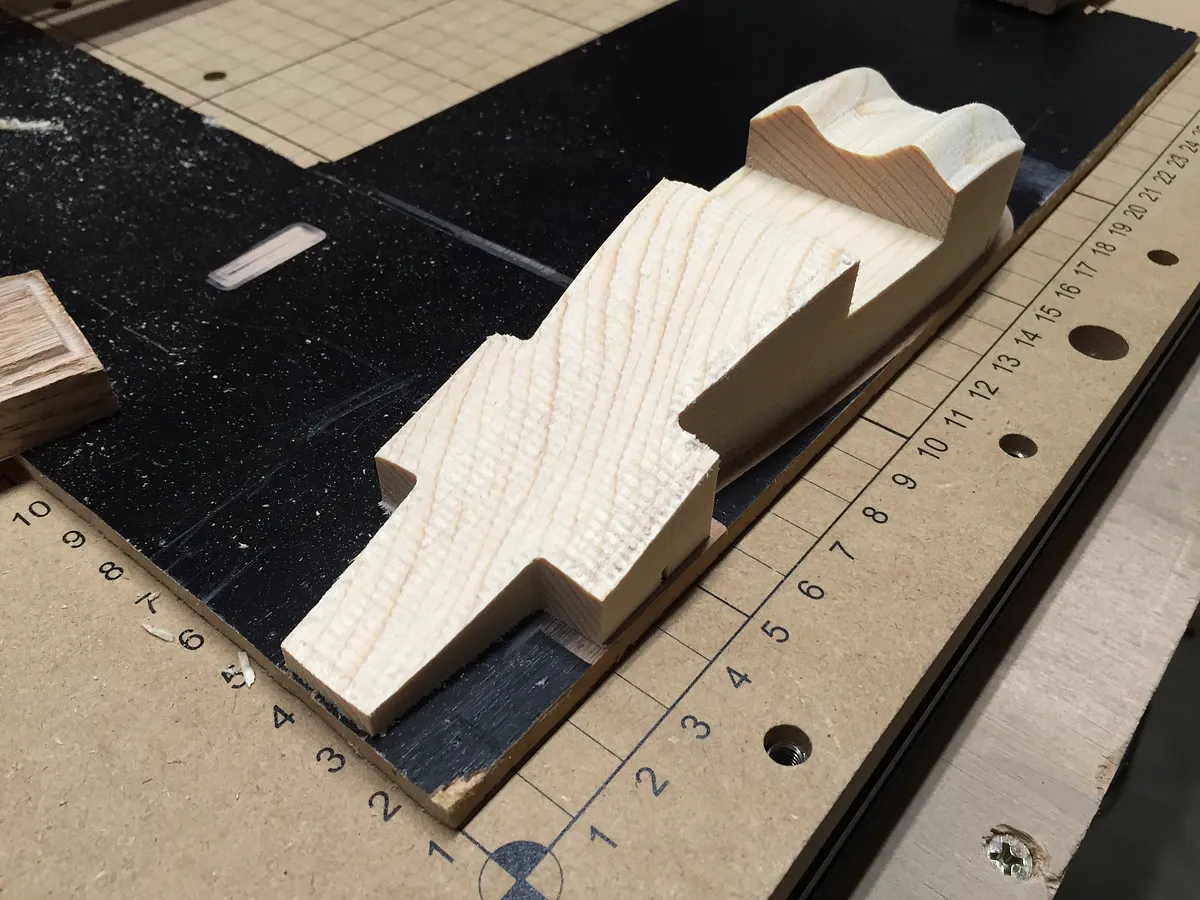
2nd Pass with Ball Nose
Once the first pass is complete I changed my bit to a 1/8" Ball Nose and ran the second project that will clean up the surface and round the corners so there's not a lot of sanding that will need to be done.
Estimated time: 16 minutes

Final Touches
Remove you awesome new car and put a little elbow grease to it by lightly sanding your car. I would lightly sand the car and spread a little filler on it to smooth it out even better. Once the filler has dried lightly run sandpaper across is in preparation to painting it.
More final pictures to come once my friend and his son put the finishing touches (sanding, painted and custom vinyl decals) on the car.
Estimated time: 15 minutes

Comments
File is not shared publicly.
Trevor · October 19, 2019
Can you please share publicly?
Trevor · October 19, 2019
looks like someone played in your sandbox and changed it
Alan SmithPro · April 29, 2025