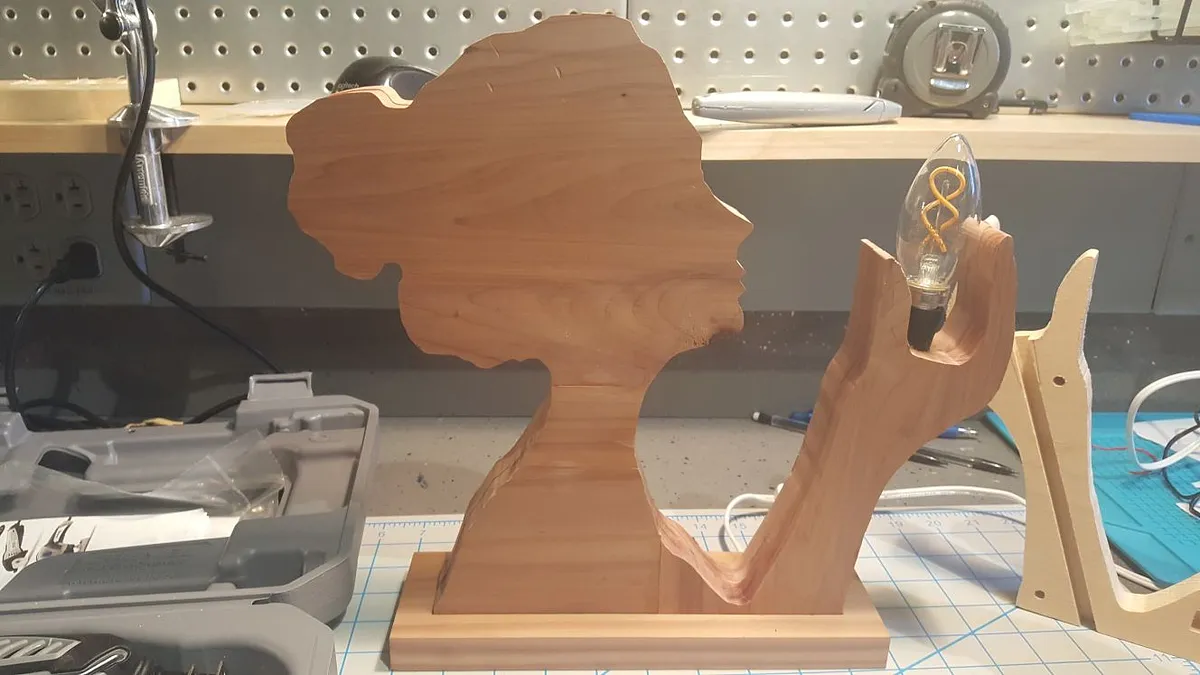
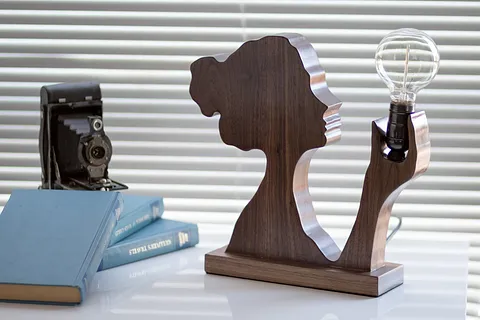
Woman Silhouette Lamp Carvey Version

Instructions
Get the raw material
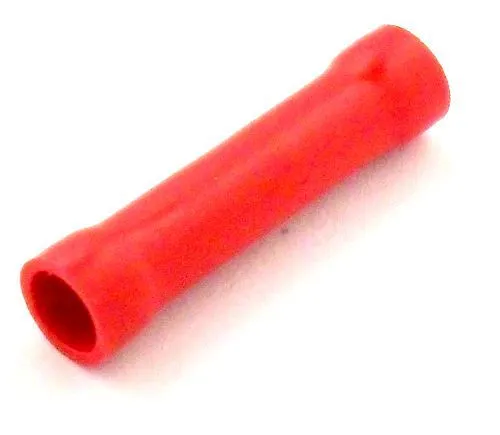
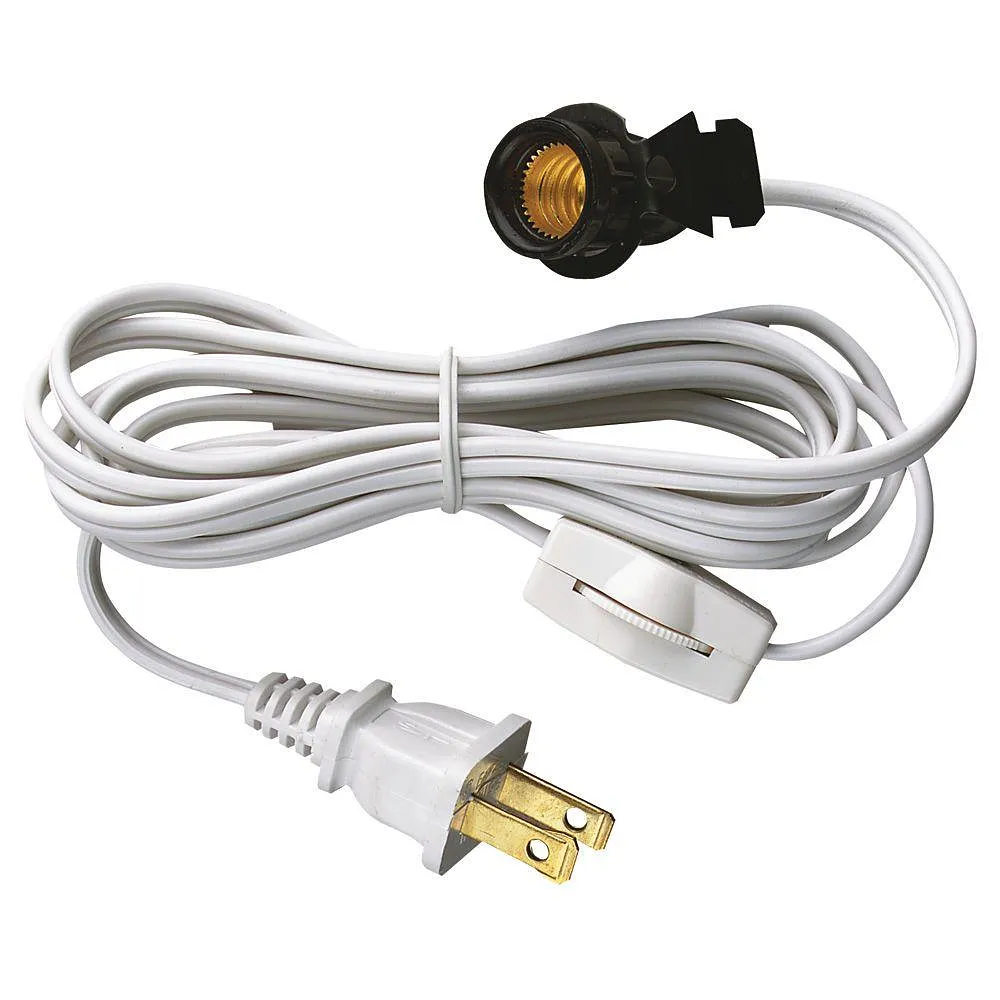
3/4 inch dowel - 1 8 X 11 X 3/4 - 7 pieces of your choice of wood. lamp stand wire type - 1 edison led lamp - 1 wood putty/clay(hardening type) - to hold lamp stand in place. A drill - to make holes for wire wire butt - to clamp the wires once it is cut.
Estimated time: 30 minutes
Start Carving
Start cutting down the pieces. This can be done over a period of time each pieces takes approx 30-45 mins with the base taking 2 hours.
Estimated time: 330 minutes
Start Gluing.
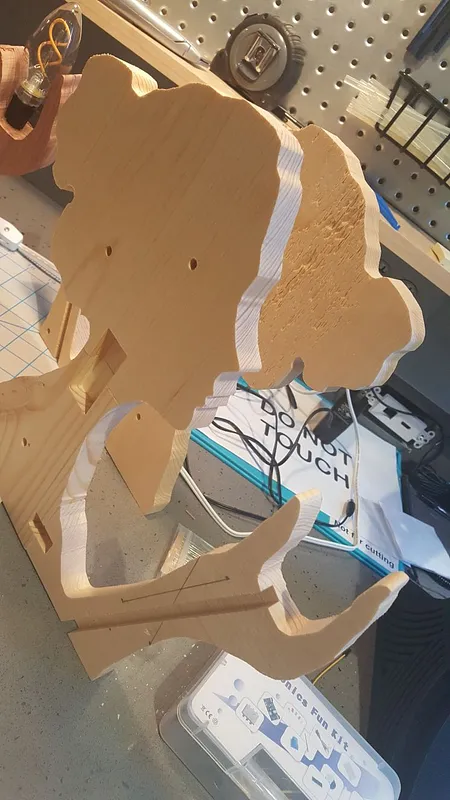
Glue each side of the lamp separately use the block pieces to help them position them properly. The block pieces might not fit perfectly due to sharp edges and might require some sanding. Clamp it down and let them rest for 12 hours.Once both side are ready move on to next step.
Estimated time: 45 minutes
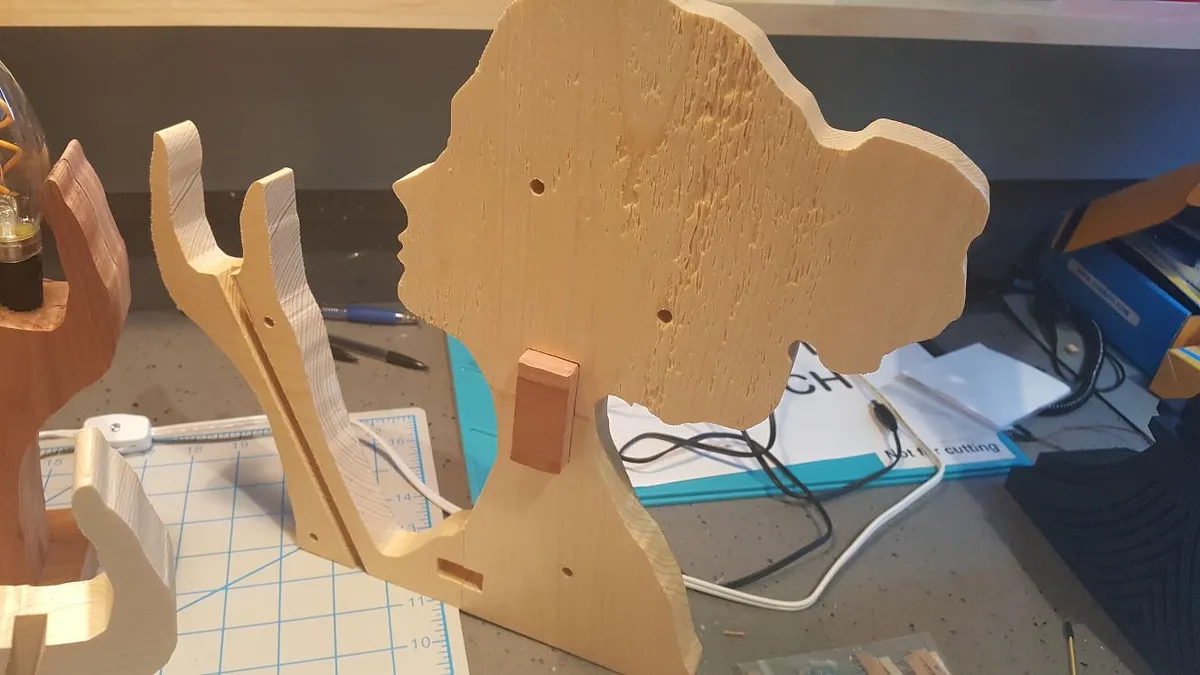
Drill a hole for the wire
Decide the side which is going to be the back and drill a hole near the arm for the wire to pass through. Make sure the hole is not big enough to show out side the base( I put everything roughly together and marked the point to which base covered hand). Then make a slanted drill for the wire.
Also drill a hole in the base for the wire to pass through. Start with a smaller drill and slowly go to bigger to avoid cracking or chipping.
Once done we need to remove the switching and snip the wire near the plug to let it pass through the hole . Once it does use a butt to connect the snipped wire's back. Do check the lamp still works after this step.
Putting it all together.
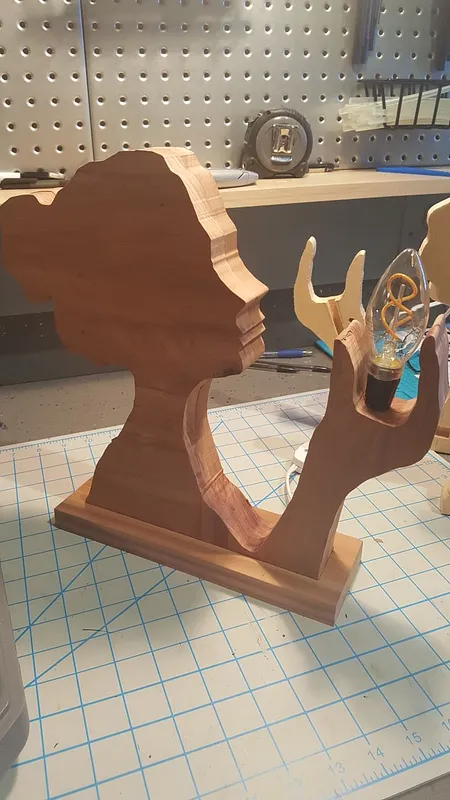
Once both side are glued and ready we can use the block pieces to roughly hold the whole thing in place we can start setting up the wire and make sure everything fits right. Once satisfied use the dowels and the block pieces . Glue both the pieces with wire in the center and also passing through the base.
Once both side are glues place the women in base and then use putty to firmly hold the lamp base in place. Do put on the bulb before putting clay to ensue the bulb fits when all is said and done.
Once the clay dries glue the base to women and let it try.
Estimated time: 60 minutes
Sand it down
Once everything has dried sand the edges to make it smooth and you can also polish it if you wish so. I did not want to polish mine so I skipped the polishing part.
Comments