Customizable Wedding Sign

Instructions
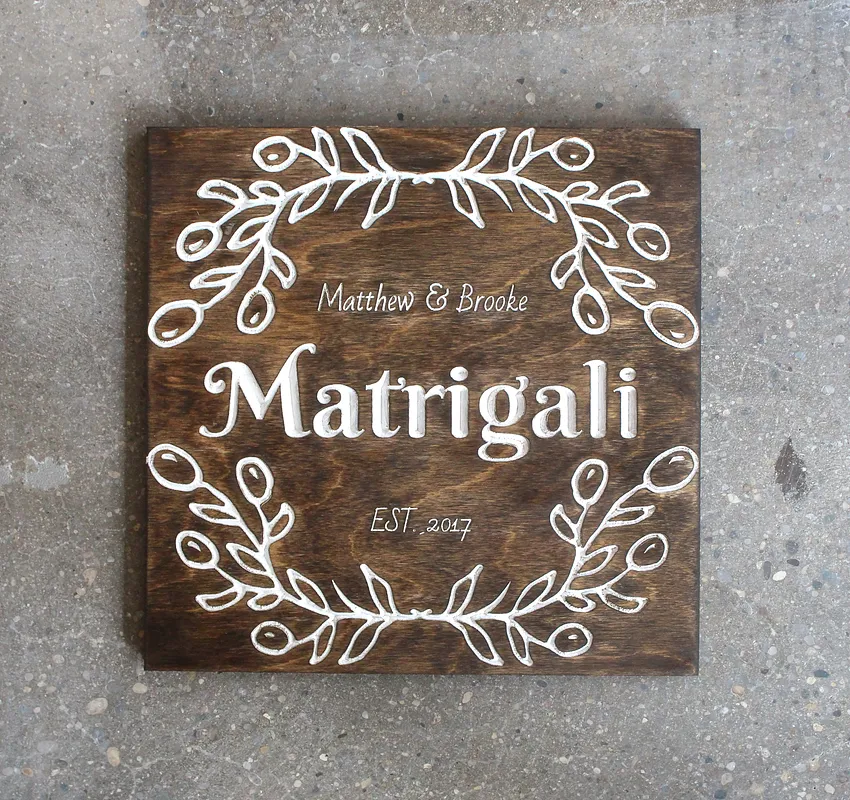
Customize the text
Open the project and click on the text to change it to whatever you would like.
You can use the align tools to make sure everything is centered.
Estimated time: 5 minutes
Carve
Once your design is done, you can carve the project.
I used a v-bit to get all of the details and eliminate the need to use two bits.
The second workpiece includes a square if you would like to carve out the design from a larger sheet.
Estimated time: 15 minutes
Sanding sealer
OPTIONAL: Stain the wood if you would like it to be a different color. The go one with the next steps.
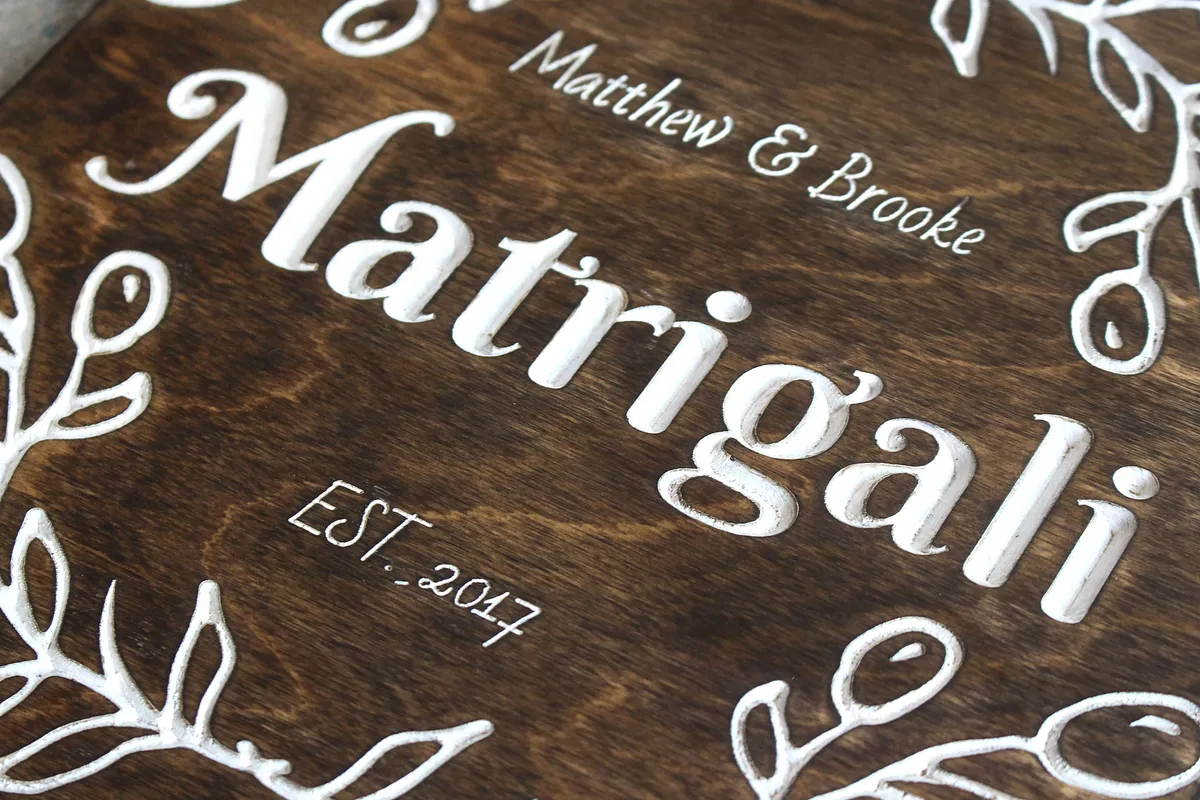
I wanted to paint in the letters, so before I did that, I used a "sanding sealer":https://www.lowes.com/pd/Minwax-Water-Based-32-fl-oz-Sanding-Sealer/999914203 to prevent the paint from bleeding into the wood.
Brush the sealer on, and let it dry for an hour. Make sure you get sealer in all the engraved parts.
Paint and sand
Once the sealer is dry, use paint (I used craft acrylic paint), to fill in the letters. Because the sanding sealer puts a protective layer over the wood, you can paint sloppy and get paint on the surface of the sign.
Once the paint is dry, take a sander or sandpaper to the surface of the sign and remove any excess paint.
Now you can add a clasp or carve a hole in the back to hang it up!
Estimated time: 5 minutes



Comments
How do you avoid sanding off the stain when sanding off the excess paint
Andy dubrawski · January 02, 2018
Hi, I found the best way is to use a few layers of stain and then also a few extra layers of the sealer. You will also need to lightly sand the paint off. If you do take some of the stain off, you can go back in and touch up the stain with a smaller brush and avoid the painted areas.
Sam Alaimo · January 02, 2018
Hi, so I have been using the sealer and have found that I'm getting a very gummy residue that sticks into the details. Its very hard to get out. Anybody else found this? Any recommendations? Thanks!
Jodi Batchelor · December 11, 2018
I have been applying the sealer to the whole board so maybe it's too much? I thought it would help get the stain consistent with the sanding.
Jodi Batchelor · December 11, 2018
I stain then apply a couple coats of shellac to the wood to prevent bleed over. I use acrylic paint and wipe with a wet paper towel to remove excess.
jason herrman · December 30, 2018
How does the copyright attribution work?
Eric M. Kipp · December 17, 2019
Hi did you have to do several coats of paint to get it to cover?
TIMOTHY ROBERTS · April 19, 2020
Replying to to - Jodi Batchelor To keep your stain from looking blotchy before you stain the wood use a pre-stain wood conditioner and you’ll get much better results. Can be found in any hardware store. I use MinWax brand but any should work.
David Nevins · November 19, 2020
You can also use a masking material. Just stain your wood and then add the sheet of masking prior to carving, After the carving, you can spray with shellac and then paint after the shellac dries. Then remove masking after paint dries.
Mark CopelandPro · June 26, 2023