12 Blade Mechanical Iris

Instructions
Separate the Components
I put all the pieces into one easel project, so the first thing is to remove the components and make them into their own project.
Estimated time: 2 minutes
Cut out the Pieces
Cutting the Birch plywood is pretty straight forward. I let the X-carve mark the drill hole locations to be drilled on my drill press later. The 12 shutter blade holes need to be counter-sunk so that a flat head screw can sit flush and not interfere with the movement of the iris blades. I used an 1/8" 2-flute straight bit.
Cutting the blades out of aluminum roof flashing, you can find this at lowes or any big box hardware store. I used spray adhesive on a piece of MDF and let it dry till tacky, then stuck the sheet of flashing on it. After cutting the shutter blades, you just peel it off the MDF backer. I used an 1/8" 2 flute upcut aluminum bit.
Estimated time: 120 minutes
3/8" Rod for Making the Shutter Blade Pins
I used a 3/8" Nylon rod for Amazon, cut into 12 - 1/2" pieces. Those little 1/2" pieces need to be counter-sunk and drilled. These pins need to be attached to the aluminum shutter blades with a flat head screw. It is very important that the screw head is flush with the shutter blade, if the screw head protrudes it will interfere with the operation of the iris.
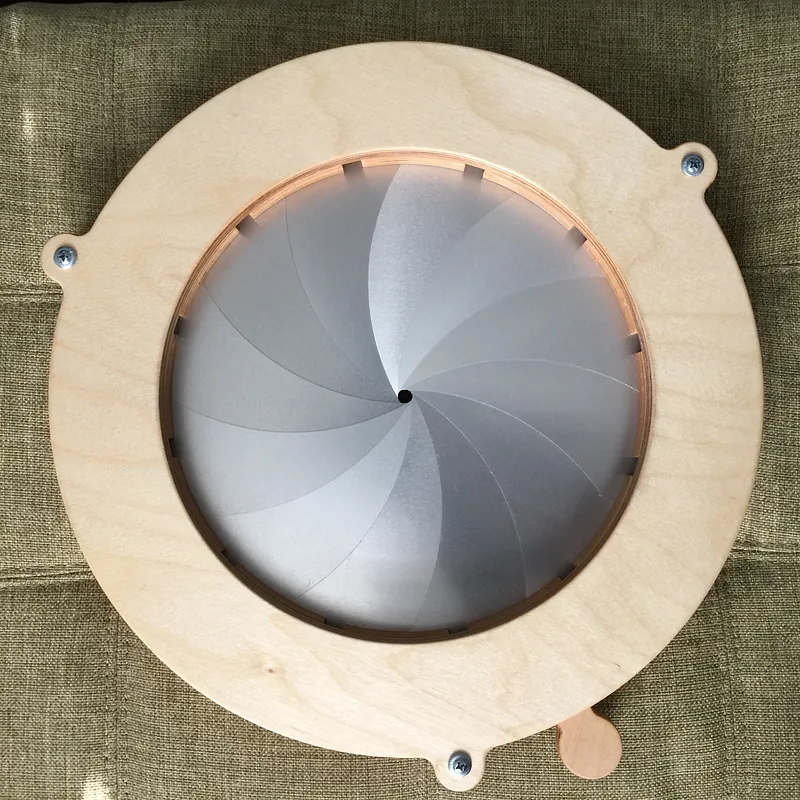
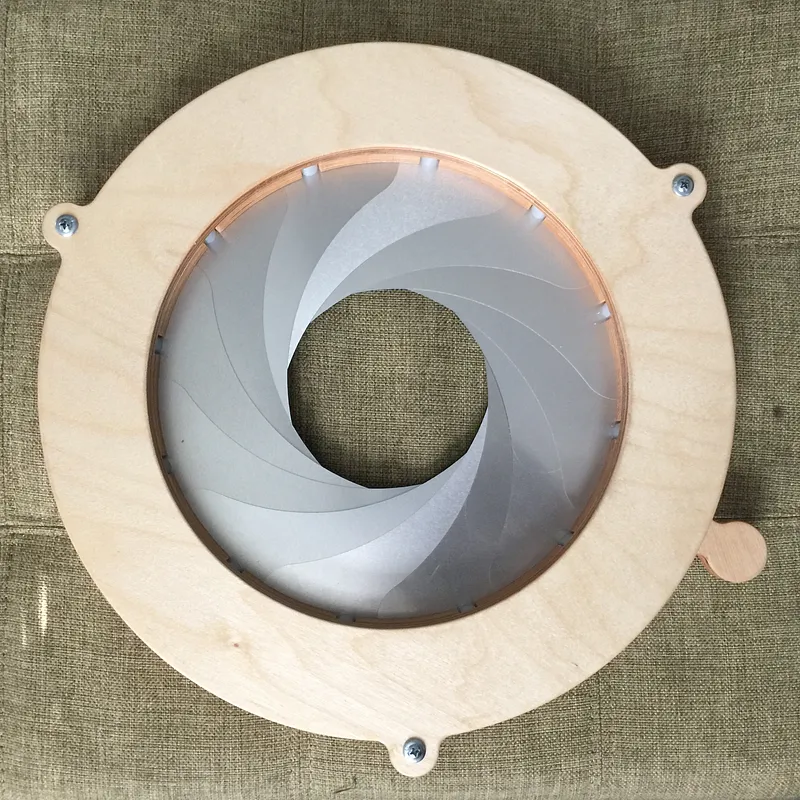
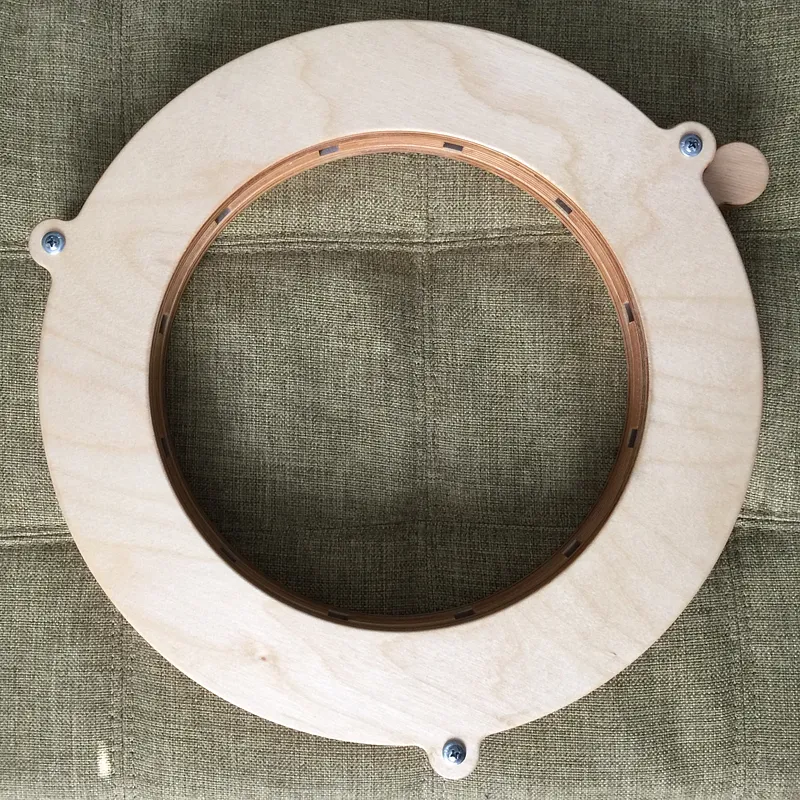
Assemble
Attach the left side of each shutter to the circular wood frame with the 12 counter-sunk holes. Then place the slotted wood frame over the shutter blades so that each pin lines up into a slot. Then place the last frame on top. You will need 3 - 3/8" spacers approximately 5/8" long with a screw to adjoin the front and rear frame.
Comments
Hi, love this design. Can you please make your easel project public?
Michael Una · May 16, 2017
The public box is checked, and I hit save. I dont know why its not working.
Nick · May 16, 2017
nice ....thank you ...more photos o videos about the process???
rob orange · May 31, 2017
That's awesome!
John McWhirterPro · June 22, 2017
looks cool. do you have a video or photos showing all the components before assembly? it's hard to understand which parts need to be countersunk and which piece goes where
David Whiddon · October 19, 2018
where is the blades one the file I see 3 curved little piueces are those the blades??
code red · May 24, 2019
Yes the file with the 3 curved pieces is the iris blades. You would need to make this file 4 times or copy and paste until you have 12.
Nick · May 25, 2019
So i cut out 12 blades 2 round things and the one with the slots can you please detail the assembly for me im not sure how to put them together thank you in advance for your time
code red · May 29, 2019
its clever but not rocket science....
Neil Scott · August 20, 2019
Don't you need holes like in this example youtube.com/watch?v=hFgHeSb7DFk
Jim Jackson · October 09, 2019