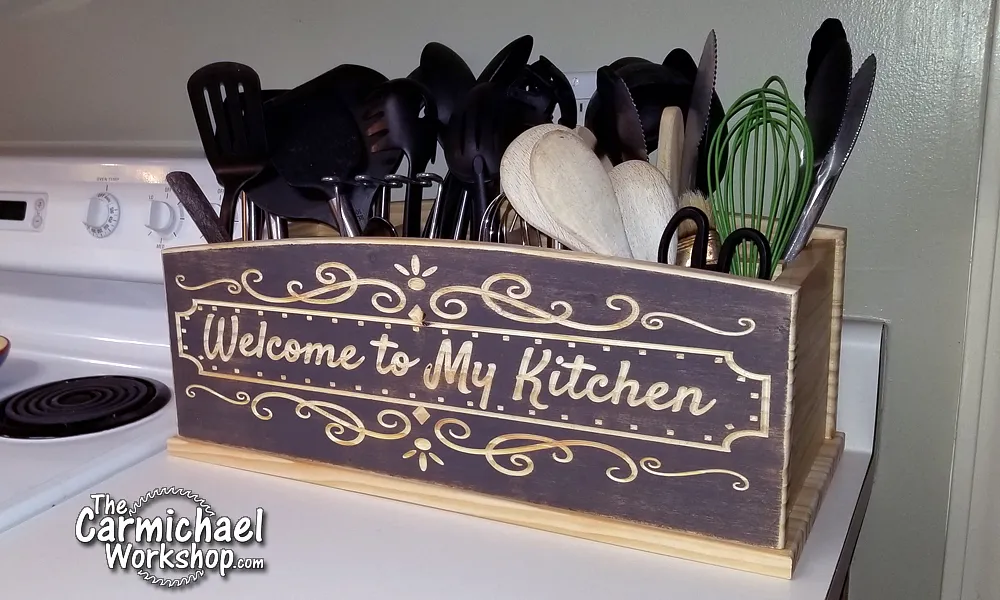
Kitchen Utensil Organizer

Instructions
Watch the Video!
Watch my video of this project to get an idea of the basic steps involved in making this project. Click the "Open In EASEL" to make a copy of this design and customize it to fit your needs.
Estimated time: 6 minutes
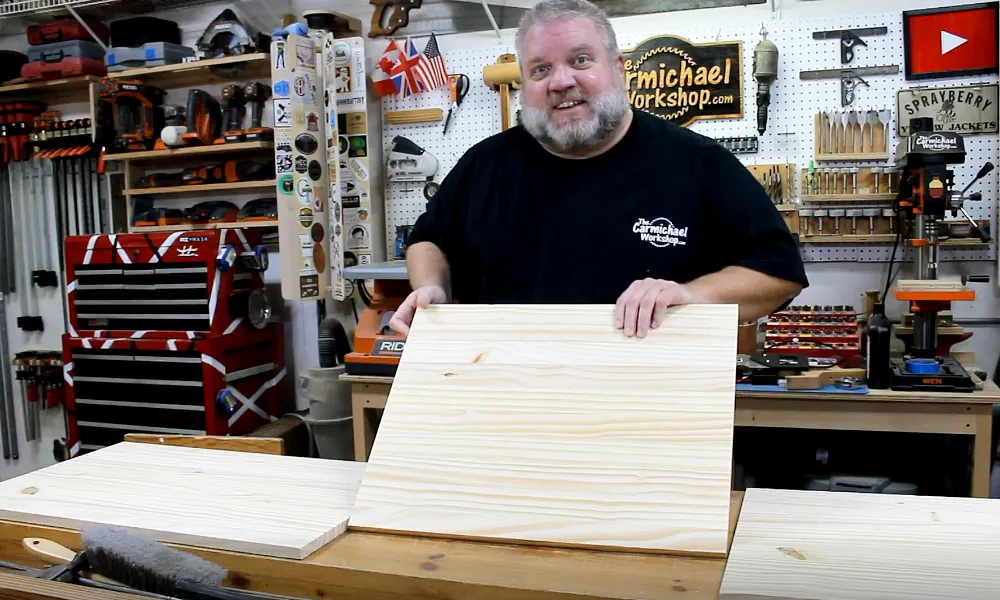
Buy Lumber
I made this project from a Laminated Pine Panel from Home Depot that is 17.25" wide, 72" long, and about .67" thick. I cut the board into two 22" sections and one 26.5 sections that match the workspaces in the EASEL file.
Estimated time: 60 minutes
Carve the Front and Back Pieces
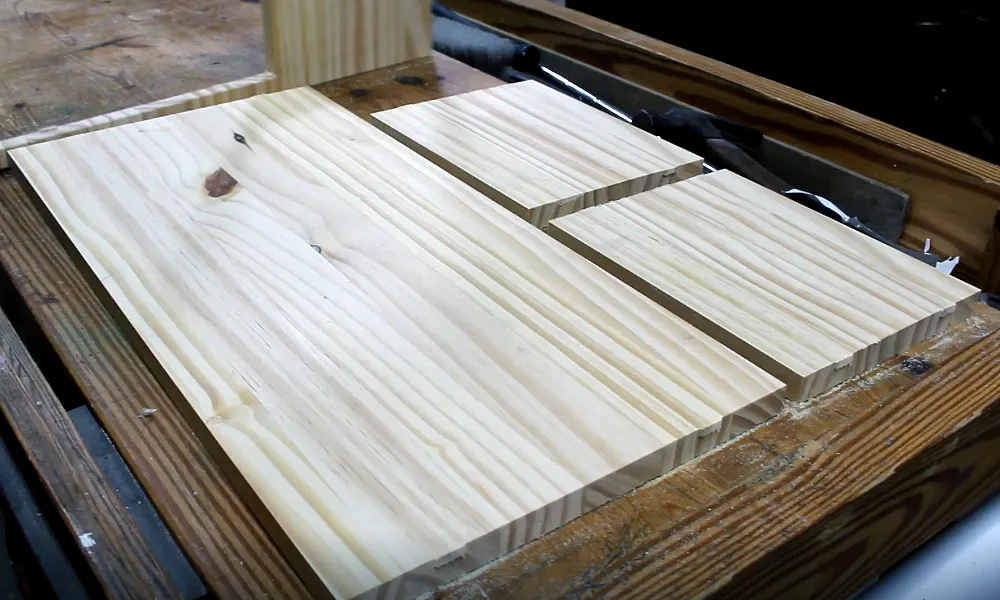
Mount a 17.25"x22" board on the X-Carve and carve the front and back pieces on the first workspace tab. Cut the tabs to release the parts and sand away the tabs.
Estimated time: 60 minutes
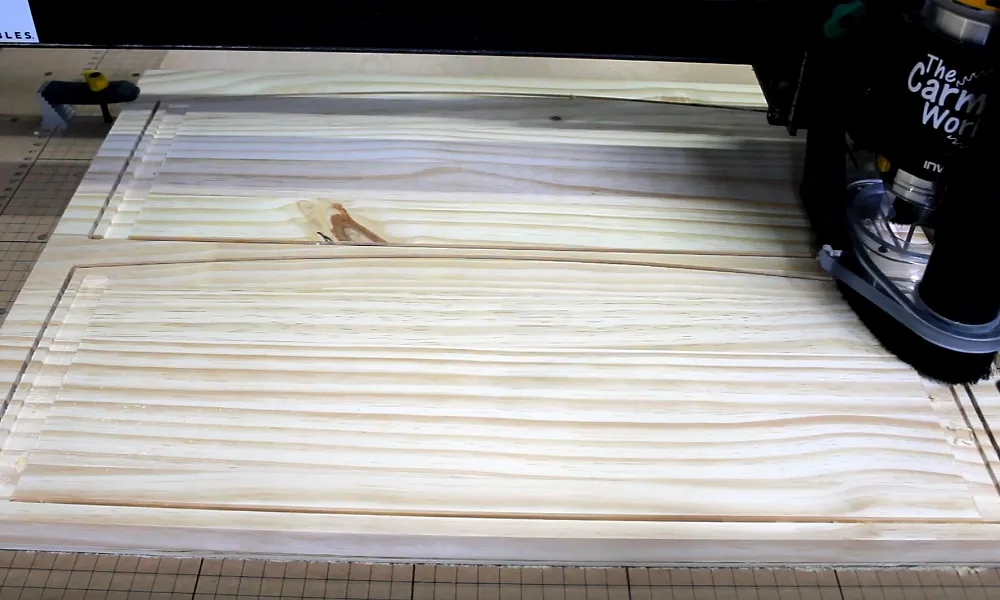
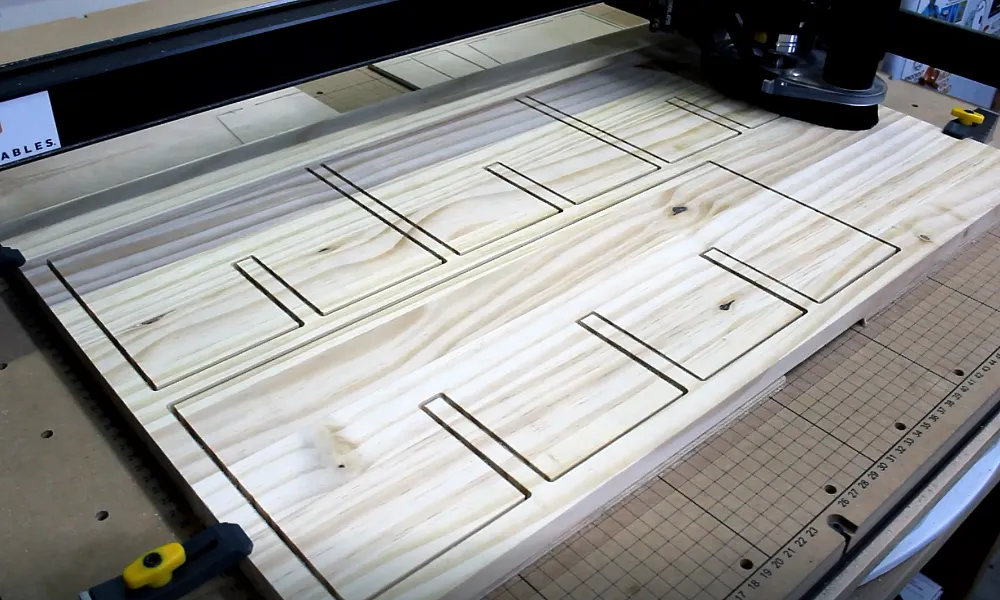
Carve the Base and Side Pieces
Mount a 17.25"x22" board on the X-Carve and carve the base and side pieces on the second workspace tab. Cut the tabs to release the parts and sand away the tabs.
Estimated time: 60 minutes
Carve the Divider Pieces
Mount a 17.25"x26.5" board on the X-Carve and carve the divider pieces on the third workspace tab. Cut the tabs to release the parts and sand away the tabs.
Estimated time: 60 minutes
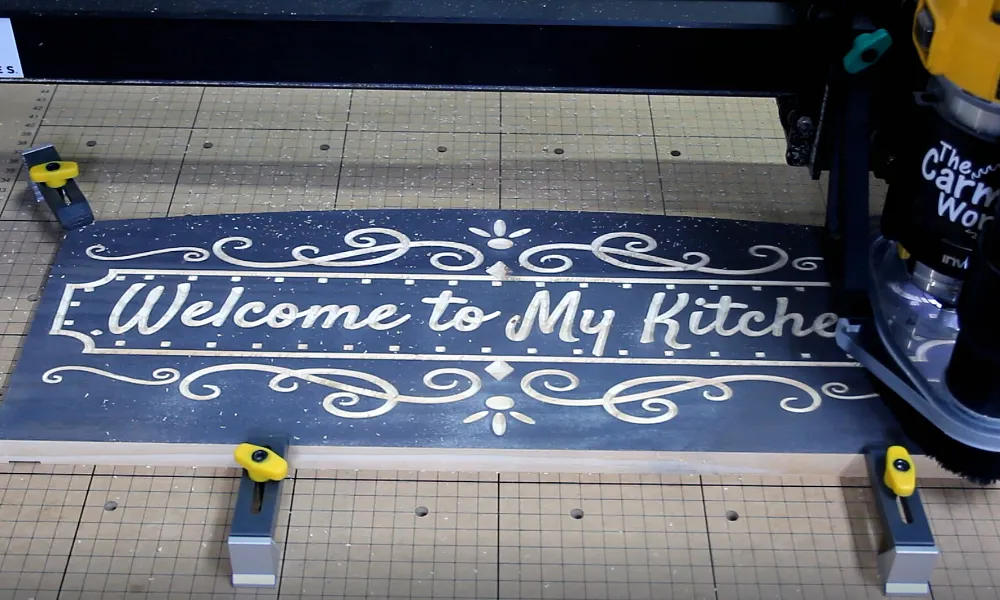
V-Carve the Front
I painted the front surface with gray spray paint to make the carving pop. This is a good time to get creative by changing up the graphics and text, or using a different color that matches your kitchen. Below are some fun suggestions. Mount the front board on the X-Carve and carve the design on the fourth workspace tab.
"Stay Out of My Kitchen!"
"My Kitchen, My Rules"
"What's for Dinner?"
"Smith's Bar & Grill"
"Kiss the Cook!"
Estimated time: 45 minutes
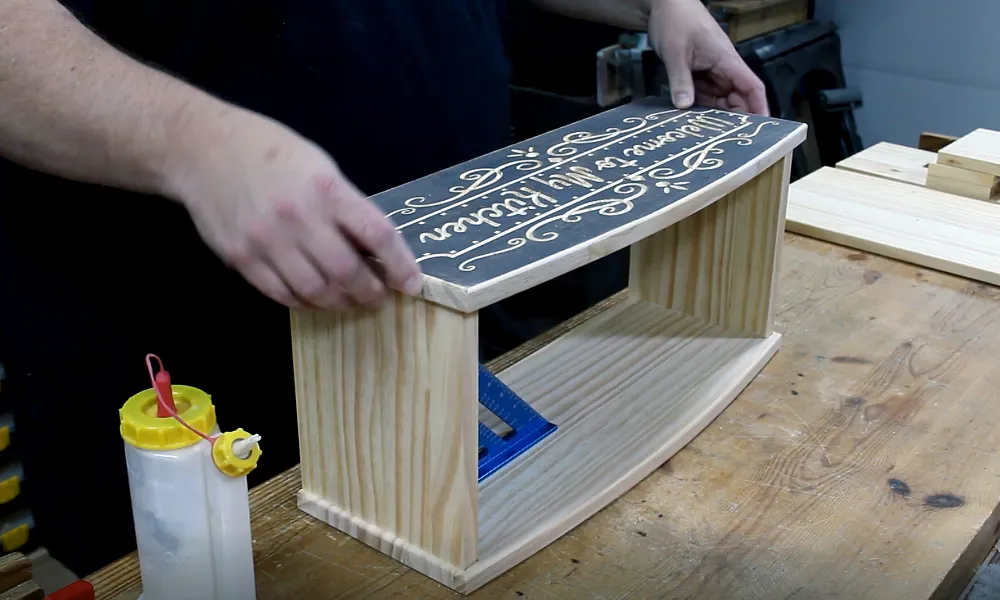
Assembly
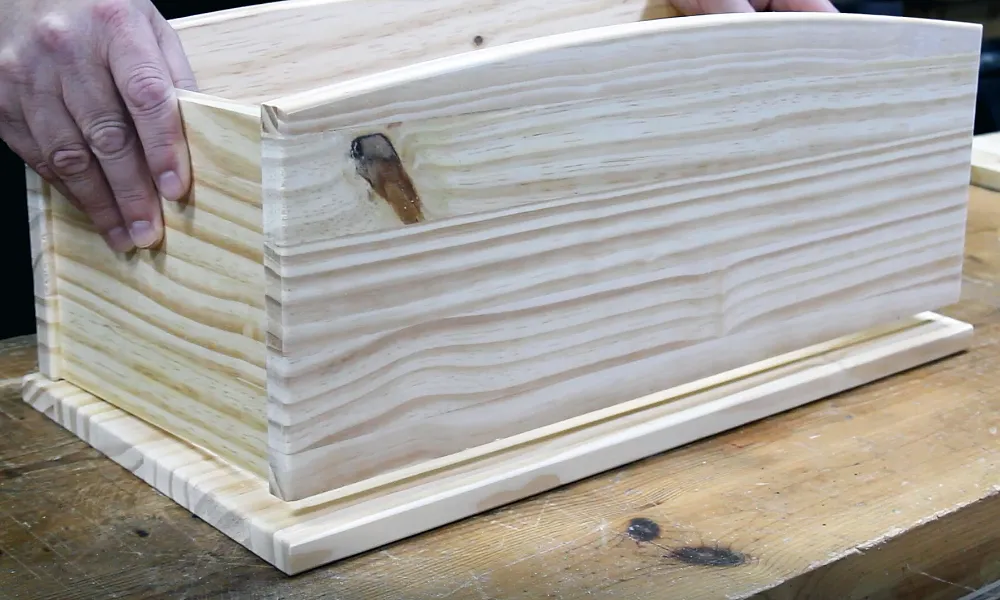
Sand all of the pieces smooth. I used a router with an 1/8" round-over bit to round over some of the edges. Glue the front, back, and side pieces together making sure to keep them square and sitting flat on the workbench. When dry, glue on the base keeping it centered. The base should extend out 1/4" on all sides to create a reveal. I did not glue the divider pieces together to allow some flexibility with changing the number and size of the compartments.
Estimated time: 60 minutes
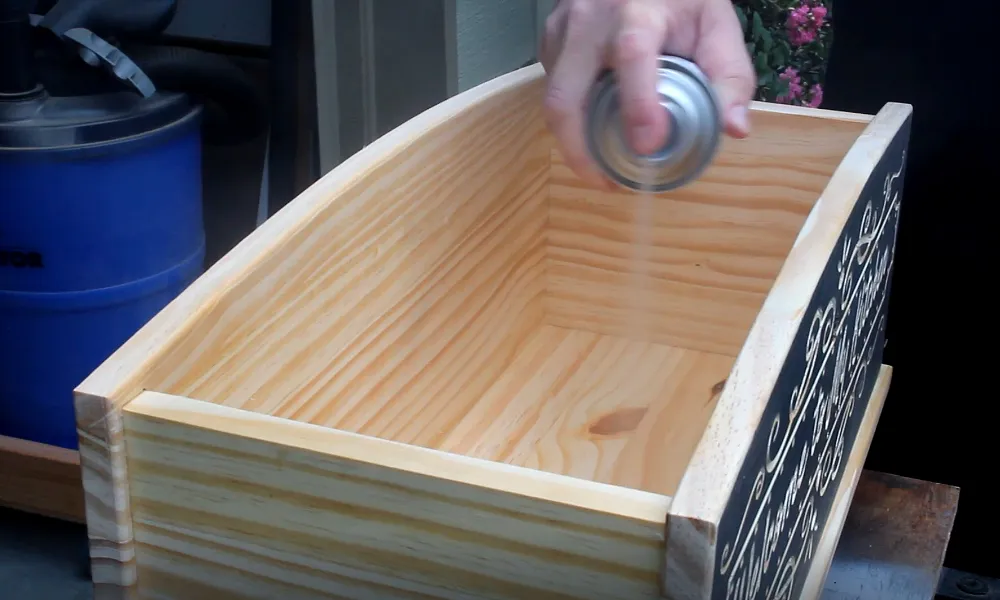
Apply a Finish
Apply your choice of finish or paint. This is another opportunity for some creativity. Since this project will be on a kitchen countertop, there is a possibility of it getting wet, so consider using a water resistant finish. I used Deft Clear Wood Finish Satin Spray Lacquer.
Estimated time: 30 minutes
Load It Up!
Once the finish is dry, drop the interlocking divider pieces into the box and load it up with kitchen utensils. Enjoy! Thank you for checking out my project!
Visit my website at "www.TheCarmichaelWorkshop.com":http://www.thecarmichaelworkshop.com Watch more project videos on "The Carmichael Workshop YouTube Channel.":http://www.youtube.com/c/SteveCarmichael?sub_confirmation=1

Comments