Birch Turkey

Instructions
Measure Your Material
Just make sure you measure your material here. Mine was about 3.3-3.5mm thick. I used Woodpeckers 12x12x.125" Baltic Birch Plywood. If your material is a little thicker or thinner, you could probably get away with just scaling all of the pieces up or down a bit.The only thing that really matters here is that the slots in each piece are as thick as whatever material you're using.
Before you go all out, cut a piece (like one of the small feathers) just to test the fit of the notch with the thickness of your material. You want it to be relatively tight since you're not gluing anything, but not so tight that it's difficult to assemble.
Estimated time: 1 minutes
Carve Up Some Turkey
I think each set of pieces takes about 10 minutes to carve with the suggested settings in Easel. I added a single tab to each piece. I usually use double-sided tape when possible, but for such small pieces, I recommend just rolling with the tabs I've added. It only takes a few seconds to cut away the tabs with a Dremmel. After all the pieces are loose I sanded away the remaining bit of the tabs and called it good.
I recommend using a downcut bit for this. It's not absolutely necessary, but with the thin plies of the material, it seems to help minimize tearout. It's soft, so you can get away with different bits and just sand the pieces a little. If you use a different kind of bit, it might be a good idea to lower your speed settings.
Estimated time: 10 minutes
Build Your Turkey
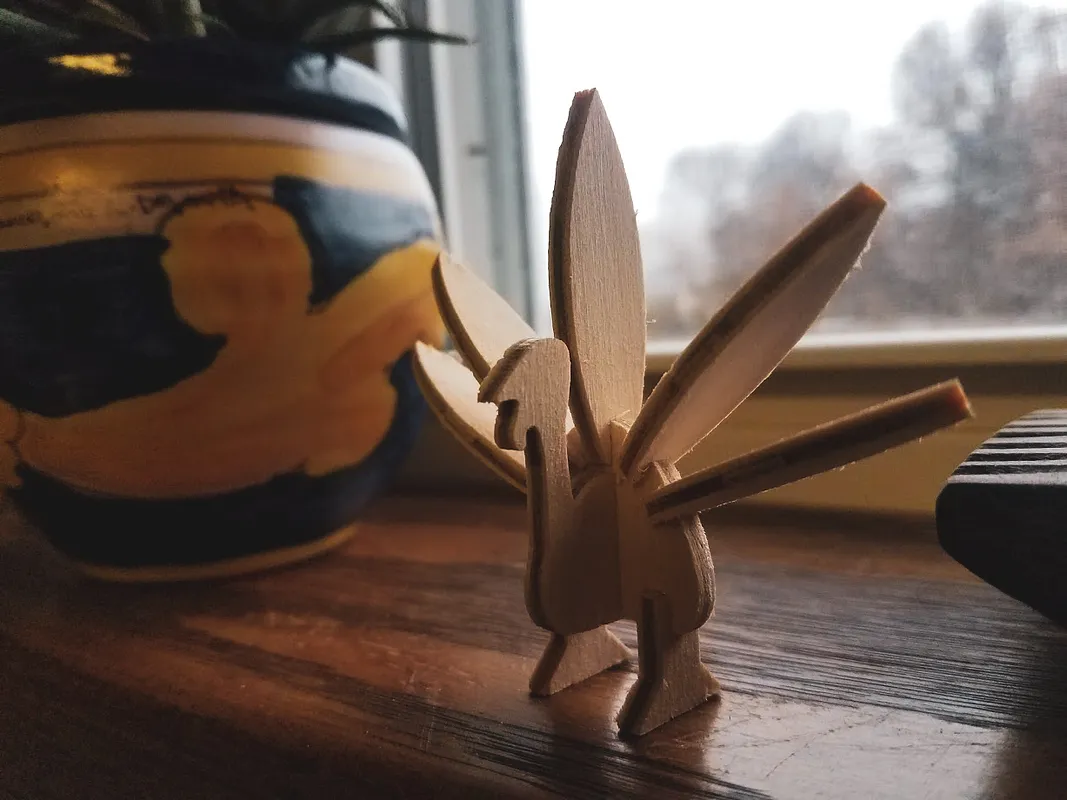
Building it is the fun part. Wrap the pieces in some kraft paper, or throw in a ziplock bag and let someone else put it together. It's pretty straightforward. There is one large feather for the center notch, two medium feathers for the two middle notches and two small feathers for the bottom notches. I'll leave it up to the builder to decide where the feet go.
You just need to be a little careful. These are pretty small and could break if you're not kinda careful while assembling. If you're running off a few for your family's kids, take a minute and make some spare pieces ;)
UPDATE: I found out that crayons make this project so much better. Before assembling, let them go to town decorating/coloring the components. It's not as effective as paint or anything, but it's an easy way to customize the turkeys without having to add any real time or effort to the project.
Estimated time: 3 minutes
Give Some Thanks
Like I said, I saw something like this on Thingiverse, but I didn't want to make them from plastic. This was an easy way to make a lot of them quickly without fiddling with the 3D printer. If you like these, please go thank the Thingiverse designer with a like and comment: https://bit.ly/2TxlZPU. It looks like that designer was inspired by this post: https://bit.ly/2DQZj8t
I've added an .svg of my drawing from Illustrator so you could also use with a laser. I tried this, but cleaning up the tabs with the Dremmel seemed a lot easier than cleaning away the soot my laser leaves on cut edges.
Estimated time: 1 minutes
Comments
Love this! any chance you can share this publicly?
Kyle Ensign · October 21, 2019
Hi Kyle, sorry... I thought it was public. Inventables makes sharing easel projects too confusing. try this link if the above one isn't working: easel.inventables.com/projects/zU3f1mNaPbjwNQ9SZz…
Fred Housel · October 22, 2019
Just remember to go slow with this. 1/32 downcut is a fragile bit. I've made these with and without tabs (using doublesided tape) I'll leave that up to you, but I prefer using doublesided tape.
Fred Housel · October 22, 2019
I'd suggest when doing these or any project where you're cutting all the way through really is using a sacrificial sheet of birch plywood as a sort of sled. You can reuse this piece as a buffer to avoid sticking tape to your wasteboard or risk cutting into your wasteboard. Makes this project easier.
Fred Housel · October 22, 2019