Make a toothbrush holder

Design a wooden cup in Easel with an opening sized for your toothbrushes.

See the toothbrush holders

Start from a blank workpiece

Stack three wooden rings on a solid base

Make a toothbrush cup from plywood rings glued onto a wooden base. Wood glue joins the layers; this version needs no screws or separate hardware. In Easel, start with ¾-inch plywood and draw four circles, each 2¾ inches across. Leave one circle solid for the base. Put a centered 2-inch circle inside each of the other three to form the rings. Set the outside edges to cut outside the shape and the openings to cut inside, all the way through the plywood.

Recorded in the Easel editor, playing at 3× real speed.

After cutting, remove the tabs and circular offcuts, then sand the mating faces. Glue the three rings together with their openings aligned, and glue that stack onto the solid disk. Clamp until the glue cures. At the example thickness, the cup is 3 inches tall with a 2¼-inch-deep interior and a ⅜-inch wall. Measure your actual plywood and brush handles before resizing; the recording lays out these four parts rather than reproducing either maker's file.

Finish the inside and outside before bathroom use. This solid-bottom version is a holder, not a watertight drinking cup: let brush handles dry and wipe out any collected water. MakerSpace Zurich's original includes a different base with a narrow drainage slot.

Separate brush recesses or one open cup?

An electric brush needs a recess shaped for its base; a manual brush can share a wider cup with a razor. Check the widest part of each handle and the clearance between brush heads. A family block spreads the handles along the counter, while stacked rings give a cup its height without hollowing a thick block.

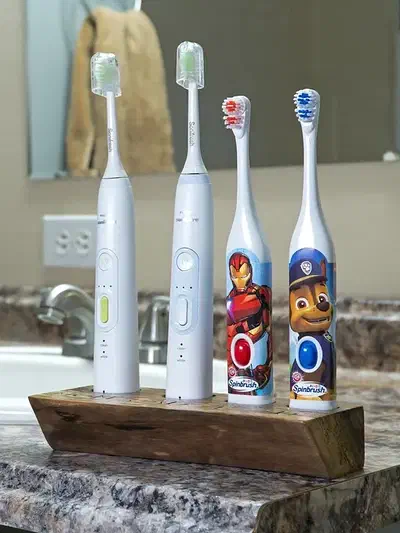
Four complete electric toothbrushes stand in a walnut holder on a bathroom counter, with the entire wooden base visible. Family Toothbrush Holderby Gunflint Designs: Mark Chryst

A walnut block with a place for each brush

Mark's walnut holder separates four electric toothbrushes. The shared Easel project has one workpiece with four shaped recesses and another with lettering. The recesses are pockets in the wood, not through-holes; the outside of the live-edge block is not supplied as a cutout. Fit the recesses to your own brush bases, then adjust the names separately. Mark links a video for the build and assembly details.

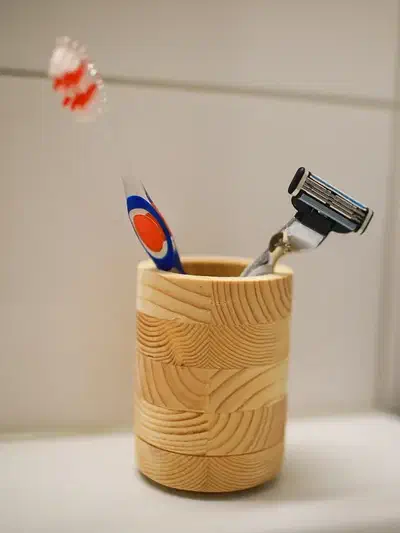
A complete layered wooden cup holds a toothbrush and razor against a tiled wall, with its opening and base unobscured. Toothbrush Standby MakerSpace Zurich

A glued wooden cup for a toothbrush and razor

MakerSpace Zurich builds height by gluing carved wooden layers together. The gallery lists birch plywood, while the description calls the photographed material soft wood. Its shared file includes ring outlines and a base with stepped recesses and a narrow slot. The maker's sequence is carving, sanding, wood-glue assembly, more sanding and a mineral-oil finish; brushes and the razor are separate.

See more toothbrush-holder search results →

From MakerSpace Zurich's instructions

Keep one element in reserve during assembly

The note appears in the project's “Prozess” instructions. Read the discussion signed out; log in to post a question to the designer.

An extra element can replace a broken one

MakerSpace Zurich says you do not need all five elements and can keep one in reserve in case an element breaks.

Project notes by MakerSpace Zurich: read the source.

From Toothbrush Stand by MakerSpace Zurich.

Ask a question

Give the brush heads room as well as the handles

Set the brushes beside your planned layout before fixing the recess spacing or cup opening. A handle can fit while its angled head still crowds the brush next to it.