Make a wooden spice rack

Set the shelf spacing and depth of a wooden spice rack for your jars in Easel.

See the spice racks

Start from a blank workpiece

Fit two shelves into wooden side panels

The two shelves in this countertop rack sit in shallow grooves cut across the wooden sides. Use birch plywood for all four pieces, with wood glue and clamps ready for the later glue-up; this rack has no towel fittings or wall hardware. Measure the plywood thickness and the jars first. In Easel, draw two 8½ × 4-inch shelf outlines and two 4 × 5-inch side outlines for the example’s ½-inch stock, with the outer edges cutting through the material.

Recorded in the Easel editor, playing at 3× real speed.

In each side, draw two 4-inch-long grooves across the full depth, ½ inch wide and ¼ inch deep. Put their lower edges ¼ inch and 4¼ inches above the bottom of the side. These grooves receive the shelf ends: each shelf enters each side by ¼ inch, giving a 9-inch outside width and a 3½-inch clear opening above the lower shelf. Match the groove width to your actual stock and test the joint on scrap before cutting the rack.

After removing tabs and sanding, dry-fit both shelves between the sides. Glue the groove faces and shelf ends, check the rack is square, and clamp until the glue cures. This open-backed version sits on a level counter; it has no jar-retaining rails and is not a wall-mounted or towel-rod design. The recording shows the flat parts and native cut preview, not a physical build or load test.

Check jar access, then choose the case or the wall strip

Allan’s 4-inch-deep case gives jars a shelf to sit on, but the 2-inch front rails mean you must lift each jar before pulling it out. Set the two shop-cut interior shelves only after trying your tallest jar and its lid inside the 16-inch case; the file does not set those shelf heights for you. Cristiana’s 530 mm shelf spreads one row across the wall, with scallops cut into a strip only about 38 mm deep. Check your jar bases against that pattern rather than treating its overall length as usable cupboard space. Leave room at the left end to replace the paper-towel roll and move the phone arm. For a counter with no suitable mounting surface, Allan’s case avoids the wall installation; for a crowded counter, Cristiana’s extra moving joints and wall fixings buy back worktop space.

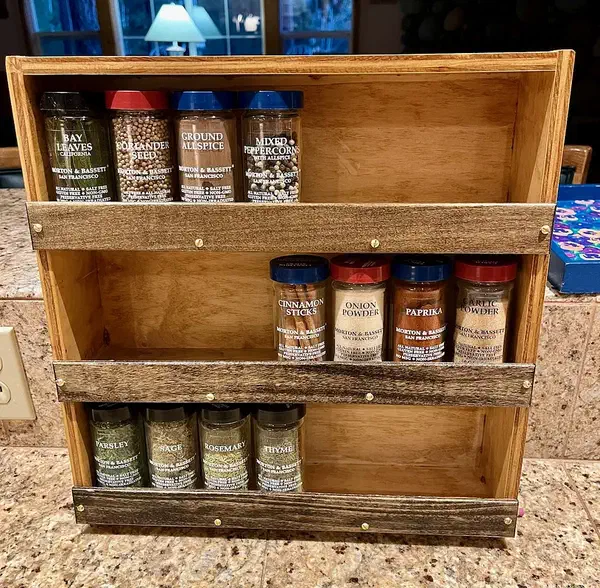
Allan Schwartz’s complete three-row wooden spice rack on a counter, with jars behind three dark front rails. Rustic Spice Rackby Allan Schwartz

A three-row wooden case

Allan’s 16 × 16 × 4-inch case uses nominal ½-inch plywood. The shared CNC layout supplies five finger-jointed parts: the back, two sides, top and bottom. His README keeps the interior shelves and front rails out of that layout: shop-cut the plywood shelves about 3½ inches deep to fit the roughly 15-inch interior, and cut three 2 × 16-inch rails from ½-inch hardwood or contrasting plywood. Glue and clamp the case square, attach shelves with 18-gauge brads through the back and sides, then screw on the rails with decorative brass screws. Glue, brads, screws and any wall fixings are separate supplies; the rack can also stand on a shelf or counter.

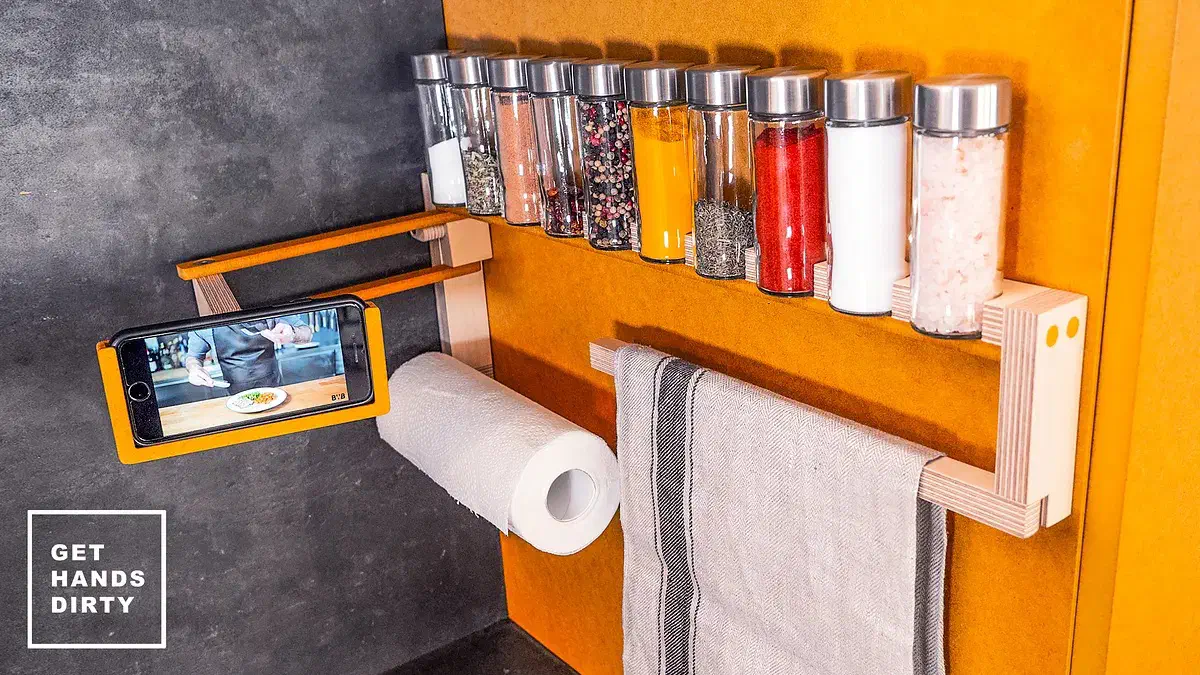
Cristiana Felgueiras’s finished wall-mounted spice shelf above a paper-towel roll, a hanging cloth and a phone support against a yellow and gray wall. Multifunctional Spice Rackby Cristiana Felgueiras

Spices above towels and a phone

Cristiana’s shared project has two cut layouts: 18 mm birch plywood for the scalloped jar shelf, end supports, flat towel bars and pivot blocks; 8 mm MDF for the long backing strip, phone cradle, two articulated arms and rounded connector plates. The 530 mm-long shelf is not a deep cupboard shelf. The cut parts make the wooden assembly, including its towel supports—not just a spice-shelf outline. Her build photos show the phone cradle layered around the handset and the moving joints connected with metal bolts and sleeve-style fittings. Those fittings, glue, finish and wall fasteners are separate; the instructions also require a drill for edge holes. Hardware sizes are not listed, so match the fittings to the actual holes before assembly.

See more spice-rack search results →

From Cristiana’s instructions

Some holes need a drill after carving

Read step 1 of Cristiana’s project and follow its build-video link for her assembly. The discussion is visible without login; sign in to ask a question.

The edge holes are a separate operation

“There are holes that cannot be made as they are on the edge of the material.”

Project notes by Cristiana Felgueiras: read the source.

From Multifunctional Spice Rack by Cristiana Felgueiras.

Ask a question

Lay out the jars before laying out the shelves

Separate the jars you use every day from the taller bottles. That tells you which row needs extra clearance and whether a small counter rack is enough, before you commit to a wall installation.