Make a plywood feeder for two removable bowls, using Jody’s birch-plywood build as the assembly reference. The bowls, wood glue and brad nails are separate supplies. First draw an 18 × 9-inch top in Easel for ¾-inch plywood. Add two 5½-inch circular openings, with their centers 4½ inches from the front edge and 4½ and 13½ inches from the left edge. Cut inside the circles and outside the top, through the stock.
Recorded in the Easel editor, playing at 2× real speed.
Creating an Easel account is free. No credit card required.
Next draw two 9 × 3-inch side panels and two 16½ × 3-inch front and back panels, all with outside cuts. The front and back fit between the sides to form an 18 × 9-inch frame. Glue the panel ends and tack them together, then attach the top to all four upper edges. With ¾-inch wood, the top stands 3¾ inches above the floor.
These example openings suit bowls whose bodies are at most 5¼ inches wide, with 6¼-inch rims and no more than 3 inches hanging below the rim. That leaves clearance around the body and below the bowl, while the wider rim rests on the top. Measure the real bowls and plywood, and try a scrap opening before adapting the parts. The recording draws all five wooden pieces from blank; it does not show a carve, assembly test, or either maker’s decorative details.
Removable dishes or wooden bowls?
A rimmed metal dish lifts out for washing; its body must pass through the opening without the rim slipping through. Jody’s layered wooden bowls are a different construction: the rings and bases must be glued into vessels as well as fitted into the stand. For either approach, decide how far the bowl hangs below the top before choosing the support height.
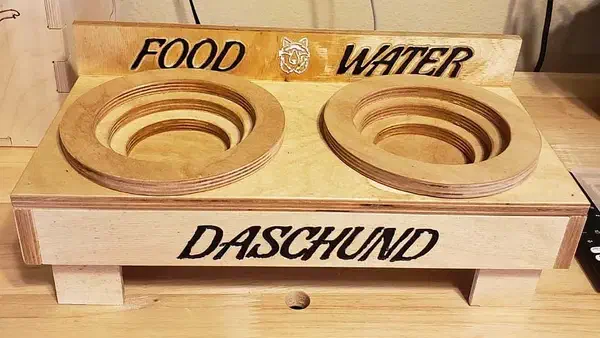
Jody’s birch-plywood feeder pairs a personalized front with separate wooden bowls built from stacked rings. Three shared workpieces contain the stand panels, lettering and decoration, and the bowl rings and bases. Add glue and brad nails for the stand and clamps for the bowls. Despite the WATER lettering, Jody says he uses both bowls for dry food and does not recommend them for water.
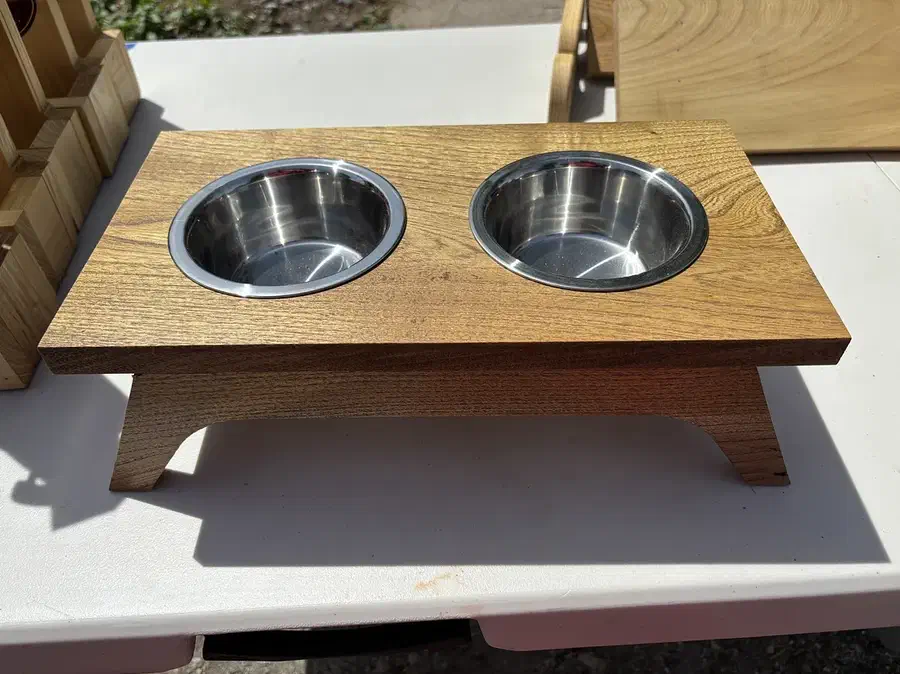
Henry’s gallery photograph shows two metal bowls in a low wooden stand; the project lists walnut. Its public design has six workpieces, including several sizes of two-opening tops, shaped supports, crosspieces and joint pockets. They are alternatives, not six pieces to assemble together. Select one matching layout and resize its bowl openings and mating joints together; supply the bowls and assembly adhesive separately. The gallery has no written assembly steps.
A bowl can be wide at the lip and narrow underneath. Size the hole for the part that passes through it, leaving enough rim resting on the wood to hold the bowl when it is full.
 Dog bowls for small onesby Jody