Make wooden letters you can move around

Spell a word on a giant game board, make large classroom letters or change a tabletop message one tile at a time. Explore real maker projects, then draw a letter tile in Easel.

Explore the letter projects

Start from a blank workpiece

Draw a square tile with a letter and a point value

Start with a new blank workpiece in the real Easel editor. Size a square to 3½ inches and give its outline an outside cut. Add an A with the text tool, resize it inside the square, then add a smaller 1 near the lower corner. Give both text shapes shallow pocket cuts. The native 3D preview shows the carved face and tile outline. This unsaved demonstration uses half-inch stock and 1/8-inch text pockets. It draws one tile, not a complete game set. Choose the letters and repeats for your game or message, and adjust the tile size and depth to your actual wood. The recording shows design actions, not a tested carve.

Recorded in the Easel editor, playing at 3× real speed.

Make a wall game, a tabletop message or classroom letters

The wall game uses magnets to hold loose letters. A tabletop display holds bought tiles in recessed rows; classroom tiles can be carved together in a plywood panel.

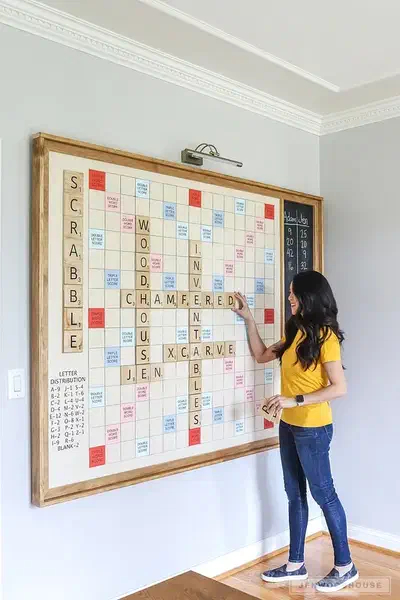
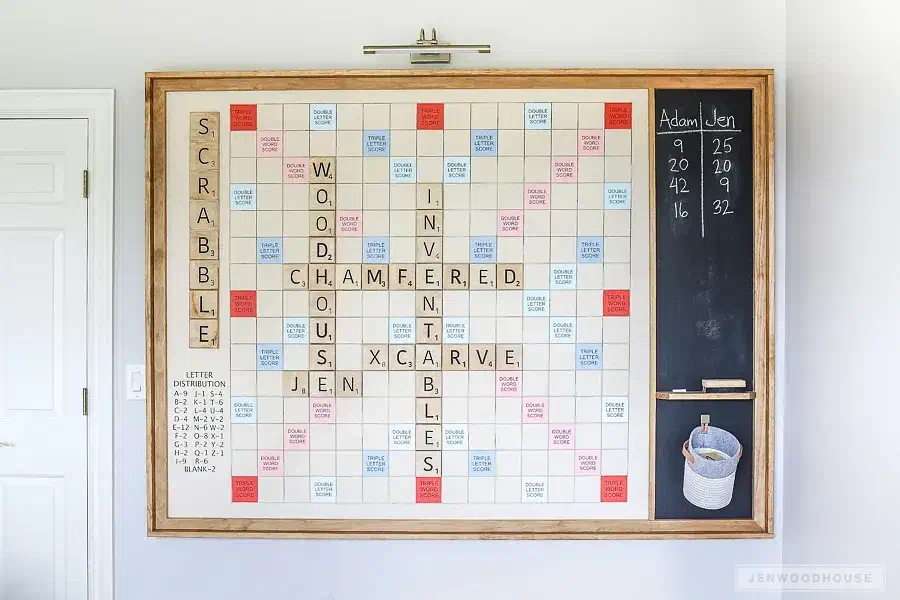
A large framed wall-mounted Scrabble game with wooden letter tiles, colored bonus squares and a black score panel Giant wall-game lettersby Jen Woodhouse

Giant wall-game letters

Turn a wall into a word game with large plywood letters. Woodhouse’s finished board has a frame, a score panel and magnetic tiles. Her four shared layouts supply the letter faces, not the wall-board construction. She engraves the faces in half-inch plywood, then separates the tiles with a saw. Follow her full build tutorial for the board, magnets and hanging hardware. V-carving requires Easel Pro.
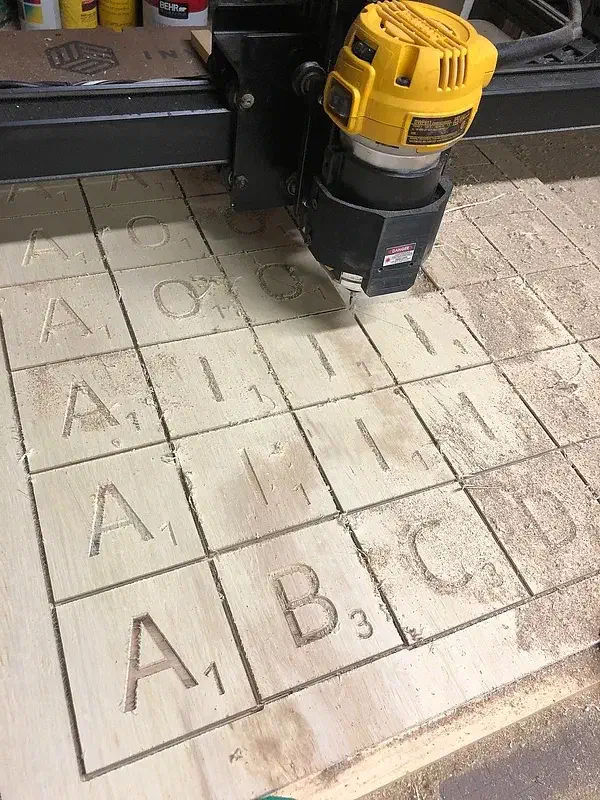
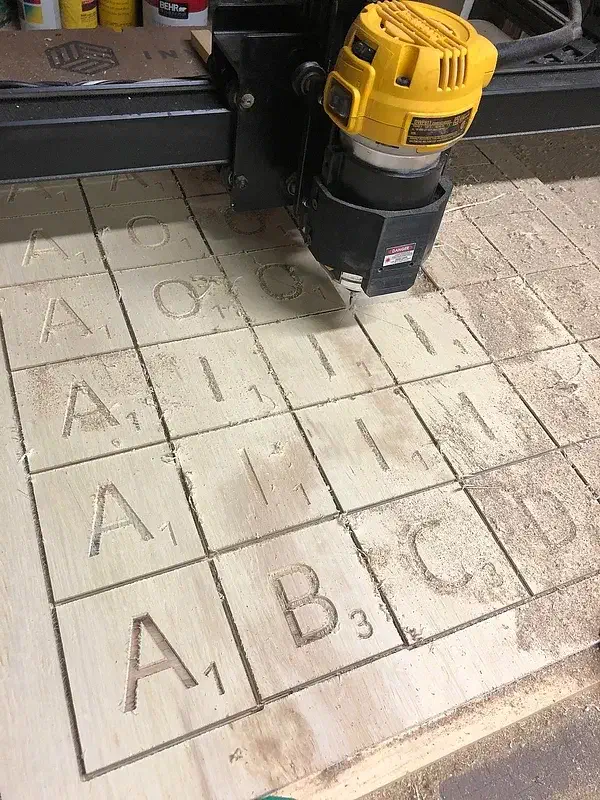
An X-Carve router carving large letter-and-point-value tiles in a plywood panel Large letters for a classroomby Trey Price

Large letters for a classroom

Price adapted Woodhouse’s design into 3½-inch plywood tiles for a teacher. The photo shows the letters being carved on his X-Carve, before the pieces are separated. Five shared workpieces include larger letter layouts and smaller selections. His note specifies quarter-inch plywood; set the material thickness to match your board rather than keeping the preview’s thicker stock setting.

See more letter-tile projects in Scrabble gallery search →

From maker notes and comments

Lean the display and keep playing tiles easy to lift

Read these project discussions without an account. Log in to post a question; replies are not guaranteed.

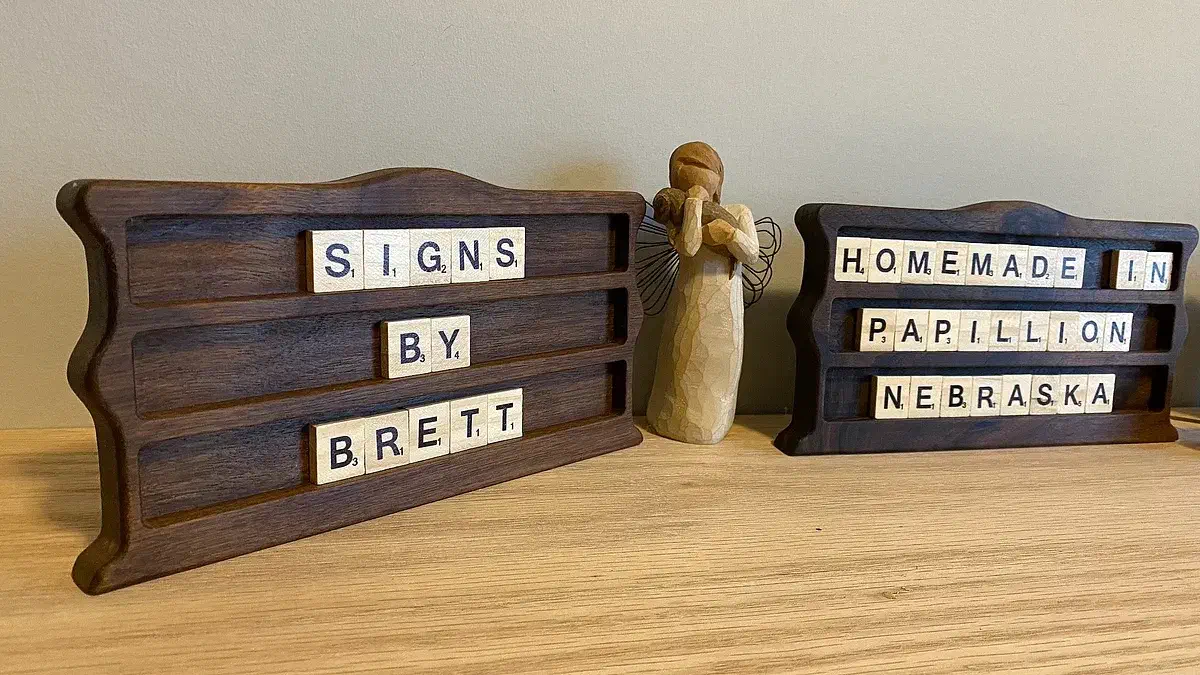
Give a tabletop display its backward lean

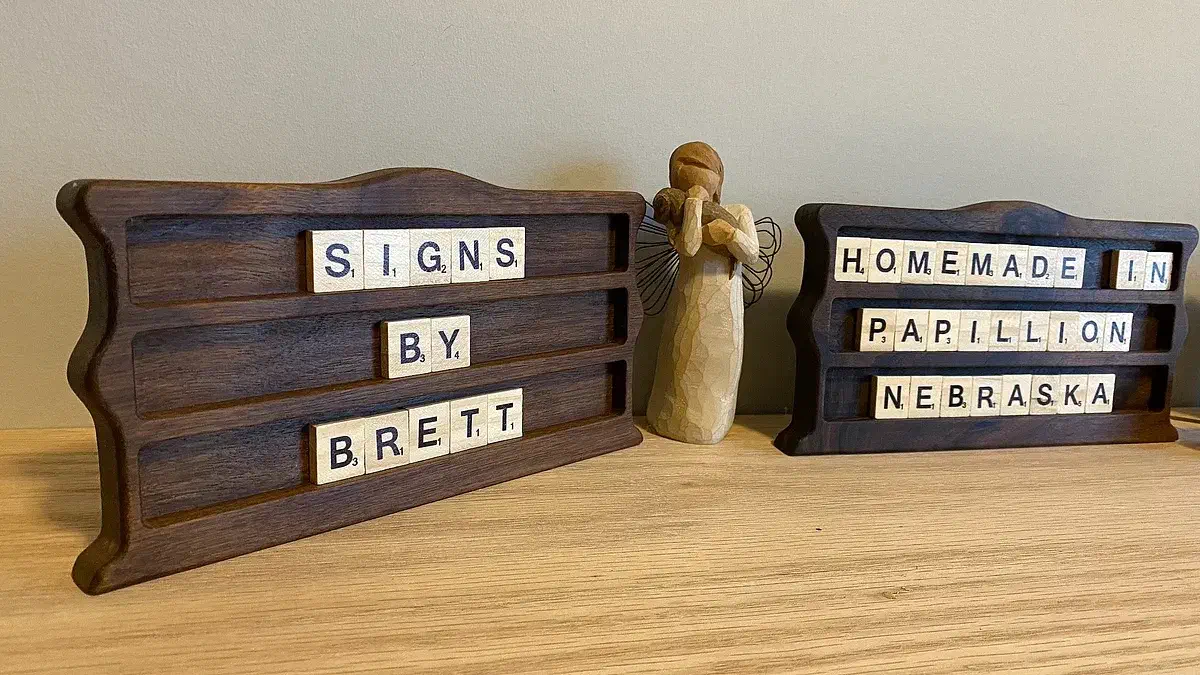
signsbybrett drills a 3/8-inch hole for a rear dowel, then sands the bottom of the display at an angle. The dowel and angled bottom let the panel lean back rather than stand straight up. His second gallery photo shows the support from behind, which helps explain a part you will not see in the front view.

Project notes by signsbybrett: read the source.

From Brett's Scrabble Holder by signsbybrett.

Ask a question

Keep enough of a playing tile above its pocket

For his tabletop board, Sean Anderson suggests about 1.5 mm of finished pocket depth for 4 mm-thick tiles. The tile should still project above the board so you can pick it up. His deeper bonus squares are intended for contrasting wood inserts, not as the final recess depth for every letter. Measure your own tiles before choosing a pocket depth.

Comment by Sean Anderson: read the source.

From Scrabble Board by Sean Anderson.

Ask a question

Lay out the letters your message needs

A classroom word and a full game need different letter repeats. Arrange the tile faces on your board, with a smaller point value near the corner if you are making game pieces.