Make a wooden headphone stand with a rounded support and a separate base, using Steve Carmichael’s walnut build as the assembly reference. Wood glue joins the parts; self-stick felt cushions the headband, with no metal hardware.
Recorded in the Easel editor, playing at 1× real speed.
Creating an Easel account is free. No credit card required.
First draw a 2-inch-wide upright and overlap a 2-inch circle at its top. Add a centered tenon, then Combine the three shapes into one outline: the shoulder-to-crown height is 8 inches and the tenon projects another ½ inch below it.
Next draw a 6 × 5-inch base and place a ¾-inch-square mortise at its center, ½ inch deep in the example’s ¾-inch stock. Use outside cuts for the upright and base, and a pocket for the mortise.
After carving, round the tenon corners to match the router-cut mortise, dry-fit the joint, glue and clamp it square, then add felt over the crown.
Measure your actual stock and headphones before adapting the dimensions: the socket must match the wood’s thickness and the earcups need clearance above the base. The recording shows the flat cutting layout and native preview, not a physical build or stability test.
Keep audio adapters nearby or paint a gaming emblem
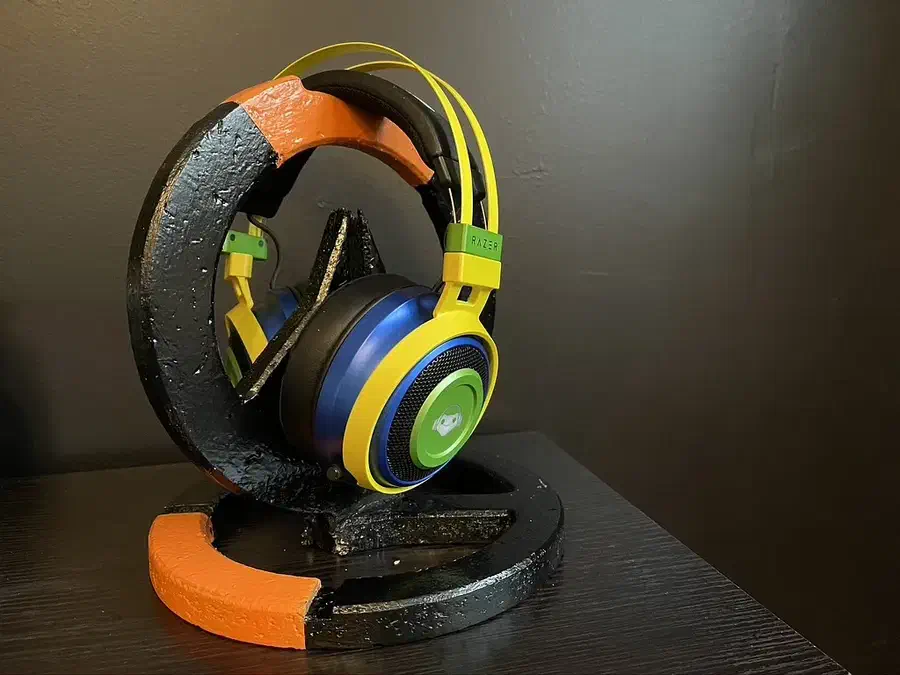
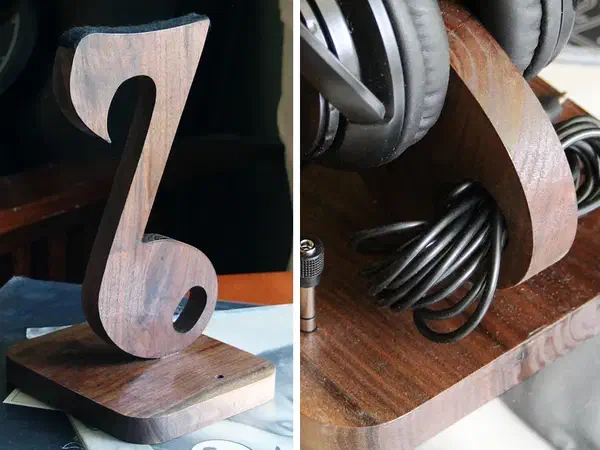
The walnut music-note stand includes places for a cable and plug adapters. The painted MDF holder trades that storage for an Overwatch emblem around the headband support.
A music-note upright holds the headphones while an opening keeps the coiled cord above the base. Steve Carmichael carves the stand from walnut and glues the upright’s tenon into the base. His instructions specify two shallow holes for ¼-inch plug adapters. The linked Easel workpieces supply the top and base; wood glue, felt and finish are separate supplies.
Kenny hammerlund’s MDF holder uses a black-and-orange Overwatch emblem as its upright and a matching circular base. The main Easel workpiece contains both parts; a second workpiece offers an alternate upright. The maker specifies ¾-inch material and a glued, clamped assembly. Paint, clear finish and glue are separate supplies.
Creating an Easel account is free. No credit card required.
From the makers’ instructions
Fit the mortise corners and plan the paint sequence
The project discussions are public to read. Log in to add a comment.
Round the tenon, not the mortise
Steve Carmichael explains that a round router bit leaves rounded corners inside the base’s mortise. In his sanding step, he sands the tenon’s corners for the best fit. His top-carving instructions also say to resize the mortise if the lumber thickness changes.
Kenny hammerlund says to glue and clamp the two pieces, warns about squeeze-out, and suggests assembling before painting. His finishing step lists spray paint and a lacquer clear coat.
Size the upright around the headphones you use, then keep the headband above a broad base. A cord opening and adapter pockets can keep the audio accessories with the stand.
 Walnut music-note standby Steve Carmichael