Make a chisel rack

Space a chisel rack in Easel around the handle necks, then place its support high enough to keep the longest blade above the base.

See the finished builds

Start from a blank workpiece

Design your own chisel rack

The animation below shows drawing a wooden tabletop chisel rack from scratch in Easel. A slotted rail rests on two side supports above a broad base, with a backboard behind the blades; separate wood screws connect the pieces. Assume four chisels with 14 mm necks, shoulders at least 22 mm wide, handles no wider than 32 mm and blades extending at most 150 mm below the rail. These are untested design references. In 12 mm wood, draw a 220 × 174 mm back, 244 × 150 mm base, 244 × 55 mm rail and two 55 × 168 mm sides. Four 16 × 40 mm slots open through the rail’s front edge on 45 mm centers: neck clearance is 2 mm, shoulder bearing is 3 mm each side, and handle-to-handle room is 13 mm. Place the sides outside the back: 12 + 220 + 12 = 244 mm. Set their rear edges 15 mm from the base’s rear edge; the rail covers their full depth. Rest the chisel neck centers 45 mm from the base rear, keeping the reference 32 mm handles 1.9 mm in front of the centered back. The back seats 6 mm into the base: 174 − 6 = 168 mm above the base top, flush with both side tops. The rail rests on the sides and back at 168–180 mm, so it clears the back instead of crossing it. Its top is 180 mm above the base top, leaving 180 − 150 = 30 mm beneath the reference blade tips; neighboring handles have 45 − 32 = 13 mm between them. Draw a 12.2 mm-wide, 6 mm-deep back groove 15 mm from the base rear, extending 2 mm beyond each end of the back. Its open ends let the square back seat without trapped rounded corners. Base screw-guide centers are 6 and 238 mm across the base, at depths 40 and 60 mm from its rear edge; these enter the side bottom edges. Draw side-face guides 6 mm from each side’s rear edge, 40 and 140 mm above its bottom, to enter the back edges. The rail’s guides lie 6 mm from its ends, 7.5 and 41.5 mm from its rear edge, above the side top edges. Add two more rail guides 30 and 214 mm from its left end and 6.1 mm from its rear edge; these enter the middle of the back’s 12 mm-thick top edge. Remove profile tabs, seat the back, clamp the sides and rail in those positions, and drill matching edge pilots through the guides. Use separate wood screws sized for these joints; enlarge face clearance holes as needed, countersink heads and keep screw tips inside the receiving wood. Check blade clearance, handle removal and stability on a mock-up before loading tools; the recording shows design geometry, not a physical assembly test.

Recorded in the Easel editor, playing at 4× real speed.

A wall rack with a stand or a fixed wooden rack

Size the openings to support the chisel handles, allow room between neighboring tools and keep the longest blade above the base.

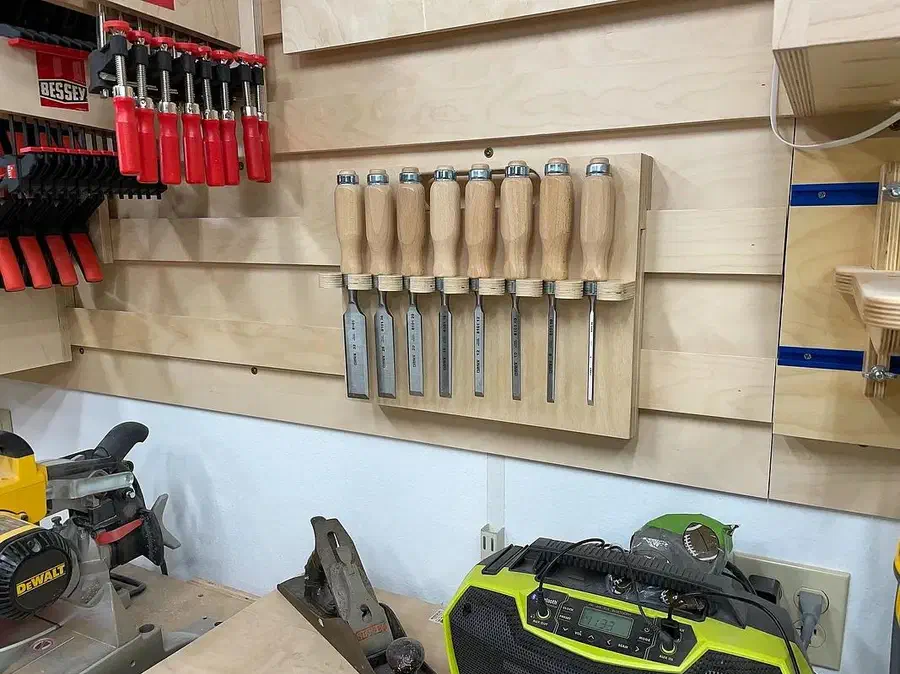
Steve Moseley’s plywood chisel rack mounted on a workshop wall holding a row of chisels Wall Mounted Chisel Rack With Built In Standby Steve Moseley

Wall Mounted Chisel Rack With Built In Stand

Steve sizes his Baltic birch plywood rack around eight Narex chisels, listing blade widths from 6 to 32 mm. The rack is 15 inches wide, with a 15 × 6.87-inch base for bench use; the holder uses 3/4-inch plywood and the remaining wooden parts use 1/2-inch plywood. Its eight native 0.92-inch round chisel seats are on 1.73-inch centers. His six tabs include two text-only title/tooling tabs, a chisel holder, a vertical back with two handle-opening laminations, an angled support with the base, and a reverse-side hinge operation on that same angled support. Glue the three handle-opening layers together; add miniature hinges and screws for the folding stand, four screws for the removable holder, and separate wall cleats with their screws. The magnets, epoxy to set them and matching screws in the back’s bottom edge are optional.

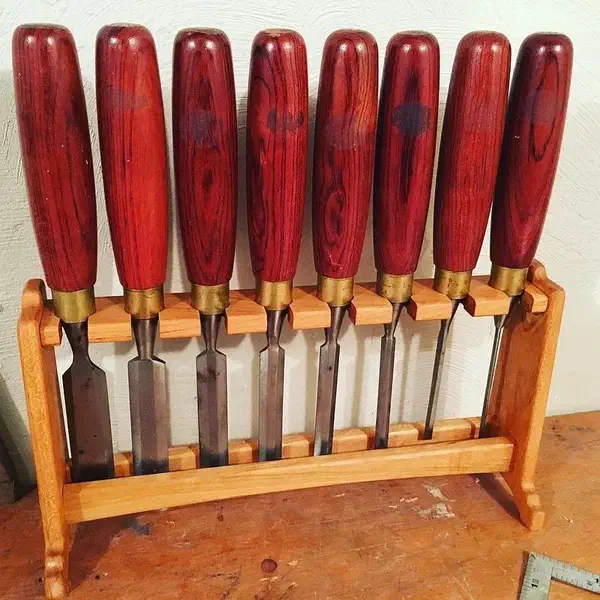
Nikolaus Brown’s freestanding wooden chisel rack holding red-handled chisels Greene & Greene Styled Chisel Rackby Nikolaus Brown

Greene & Greene Styled Chisel Rack

Nikolaus makes his Greene & Greene-style rack in walnut for his own chisel set, joining the wooden parts with separate Festool Dominos. His single native workpiece contains two shaped sides, two long rails and the chisel-support board, in approximately 11 mm stock. The support is 12 × 1 3/4 inches, with eight 3/4-inch through seats on 1 1/2-inch centers, 0.6-inch-wide entry slots and 0.9-inch shoulder recesses. The side profiles extend about 4 inches front to back and 7 inches high; the rails set the rack’s 12-inch span between the sides. Check your own chisel necks, shoulders and handle spacing against those openings before adapting his layout.

See more chisel search results →

Screw the holder on so it can be changed

Log in to post a question in the project discussion; replies are not guaranteed.

Screw the holder on so it can be changed

In his assembly step, Steve Moseley positions the holder using his longest chisel. He attaches it with screws and no glue so it can be removed, replaced or modified later.

Project notes by Steve Moseley: read the source.

From Wall Mounted Chisel Rack With Built In Stand by Steve Moseley.

Ask a question

Start creating with your CNC

Create your free Easel account and connect your machine in minutes.